Chocolate Peanut Butter Pie: Creamy and Crisp
- Time:25 minutes active + 10 minutes cook + 6 hours chilling = 6 hours 35 minutes total
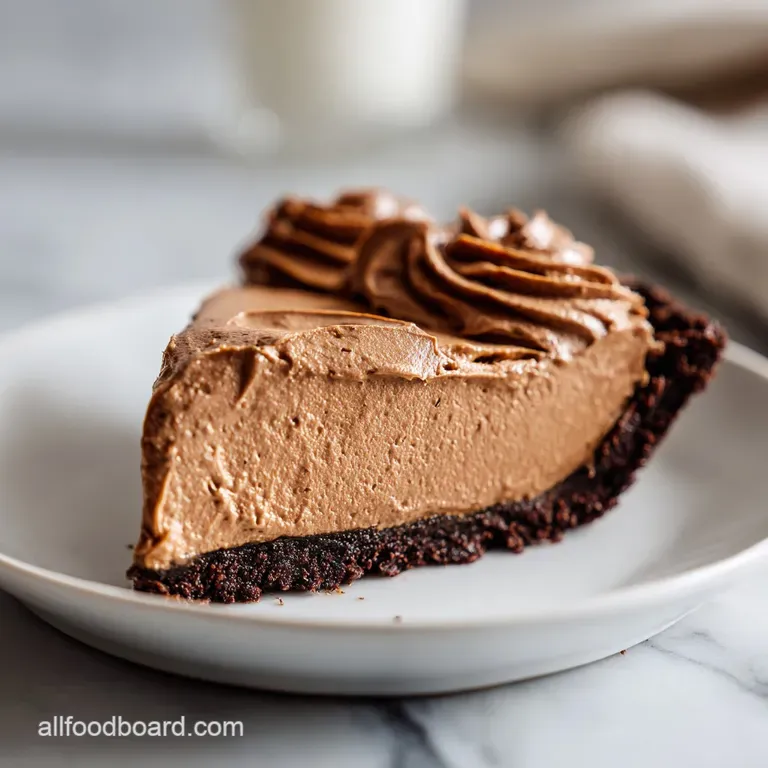
- Flavor/Texture Hook: Velvety peanut butter mousse over a shattering chocolate cookie base
- Perfect for: Make-ahead dinner parties or indulgent weekend family treats
- Creating a Masterpiece Chocolate Peanut Butter Pie
- Why This Cloud Like Mousse Works
- Essential Stats for Success
- Components for a Balanced Dessert
- Essential Tools for Fine Pastries
- The Craft of Assembling Layers
- Fixing Common Texture Pitfalls Easily
- Simple Ways to Enhance Flavor
- Proper Storage for Lasting Freshness
- Perfect Pairings for Sweet Treats
- Recipe FAQs
- 📝 Recipe Card
Creating a Masterpiece Chocolate Peanut Butter Pie
There is nothing more tragic than a dessert that promises a crunch but delivers a damp, flavorless sponge. I remember the first time I attempted a version of this dish; I was so excited to slice into those beautiful layers, only to find the cookie base had completely surrendered to the moisture of the filling.
It was a mushy mess that lacked that essential "shatter" when the fork hit the plate. That experience taught me that while this is a simple dessert, the details in the construction are what separate a rustic home bake from something that feels truly special.
We are aiming for a specific kind of magic here a contrast between a dark, slightly salty crust and a filling that feels like eating a cloud made of peanut butter. This Chocolate Peanut Butter Pie isn't just a sugar bomb; it's an exercise in balancing the rich oils of the nuts with the airy lift of freshly whipped cream.
We’re going to fix the soggy bottom syndrome once and for all with a mahogany colored ganache seal that acts as a waterproof shield for your crust.
By the time you pull this from the fridge, you'll have a dessert that looks like it belongs in a boutique bakery window. The textures range from the snap of the cookie base to the silky, melting mousse and the snap of the chocolate drizzle on top.
It’s the kind of dish that makes people quiet down after the first bite because they’re too busy enjoying the way it dissolves on the tongue. Let’s get your kitchen flour dusted and ready, because this is the only version of this recipe you'll ever need.
Why This Cloud Like Mousse Works
The architecture of this pie relies on a few hidden tricks that keep the layers distinct and the texture stable without feeling heavy or rubbery.
- Fat to Air Ratio: Using both cream cheese and whipped cream creates a structure that is firm enough to slice but light enough to melt instantly.
- Moisture Barrier: Spreading a thin layer of ganache over the baked crust prevents the oils from the peanut butter from seeping into the cookie crumbs.
- Starch Stability: The powdered sugar contains a tiny amount of cornstarch, which helps stabilize the cream cheese base and keeps the filling from weeping.
- Temperature Control: Chilling the bowl before whipping the cream ensures the fat globules stay solid, leading to more volume and "lift" in the mousse.
Building a sturdy foundation is the first step to success, much like when you are crafting the base for a flaky cherry pie. When the crust is handled correctly, the rest of the pie can rest easy.
| Method | Prep Time | Texture Result | Best For |
|---|---|---|---|
| This Classic Baked Crust | 35 mins | Deeply toasted, crunchy, and dark | Dinner parties and clean slicing |
| No Bake Chill Method | 25 mins | Softer, buttery, and slightly crumbly | Quick family snacks or hot days |
| Frozen "Icebox" Style | 20 mins | Firm, almost like a candy bar base | Summer cookouts and kids' parties |
The baked method we use here is superior because the heat from the oven caramelizes the sugar in the sandwich cookies, creating a deeper flavor profile that balances the sweet filling. It also fuses the crumbs together more effectively than chilling alone ever could.
Essential Stats for Success
Before we grab the mixing bowls, let's look at the "physics" of our ingredients. This isn't just a list; it's a map of how the components interact to create that velvety finish.
| Ingredient | Science Role | Pro Secret |
|---|---|---|
| Heavy Cream | Provides aeration and volume | Always use cream with at least 36% fat content for stiff peaks |
| Cream Cheese | Acts as the structural anchor | Use brick style, never the tub or "spreadable" versions |
| Peanut Butter | Emulsifies the fats for flavor | Creamy commercial brands work better than "natural" oil separated types |
| Chocolate Cookies | Forms the rigid skeletal base | Pulse until they look like fine sand to avoid gaps in the crust |
This component analysis shows why we can't just throw things together. The temperature of the cream cheese, for example, is the difference between a lumpy filling and a silky one. It needs to be soft enough to "embrace" the sugar without creating tiny pockets of unmixed fat.
Components for a Balanced Dessert
To get the results we want, we need the right ratios. We aren't just making a snack; we are building a pastry shop quality treat.
- 24 standard chocolate sandwich cookies, finely pulsedWhy this? The cream filling in the cookies helps bind the crust together naturally.
- 5 tbsp unsalted butter, meltedWhy this? Acts as the "glue" that hardens when chilled, securing the crumb.
- 0.25 tsp fine sea saltWhy this? Essential for cutting through the richness of the chocolate and nut butter.
- 8 oz full fat brick cream cheese, softenedWhy this? Provides the tangy "heft" needed to support the light whipped cream.
- 1 cup creamy peanut butterWhy this? Stick to standard creamy brands like Jif or Skippy for the smoothest mouthfeel.
- 1 cup powdered sugar, siftedWhy this? Sifting ensures no lumps are left behind in your mousse.
- 1 tsp pure vanilla extractWhy this? Enhances the floral notes of the chocolate and the nuttiness of the PB.
- 1.33 cups heavy whipping cream, dividedWhy this? You'll use 1/3 cup for the ganache and 1 cup for the filling.
- 0.5 cup semi sweet chocolate chipsWhy this? Darker chips balance the sweetness better than milk chocolate would.
| Original Ingredient | Substitute | Why It Works |
|---|---|---|
| Chocolate Cookies | Graham Crackers | Provides a honey wheat flavor. Note: Lacks the deep cocoa contrast. |
| Semi Sweet Chips | Bittersweet (60%+) | Less sugar, more intense chocolate. Best for adult palettes. |
| Heavy Cream | Full fat Coconut Milk | Creates a dairy-free topping. Note: Will add a distinct tropical flavor. |
If you enjoy the way these flavors meld together, you might find yourself reaching for these Chewy Peanut Butter Cookies for your next baking session. The combination of salt and sweet is a classic for a reason.
Essential Tools for Fine Pastries
You don't need a professional kitchen, but a few specific tools will make the process much smoother and the results more "aesthetic."
- 9 inch deep dish pie plate: This recipe makes a generous amount of mousse; a standard shallow plate might overflow.
- Food processor: This is the fastest way to get those cookies into a fine, uniform sand like texture.
- Stand mixer or hand mixer: Essential for beating the cream cheese and whipping the cream to stiff peaks.
- Offset spatula: This tool is the secret to getting that smooth, professional looking top on your pie.
- Chilled metal bowl: If you have time, pop your mixing bowl in the freezer for 10 minutes before whipping the cream. It makes the process much faster.
Chef's Tip: When pressing the crust into the pan, use the bottom of a flat measuring cup. It applies even pressure and gives you those sharp, clean angles where the bottom meets the sides.
The Craft of Assembling Layers
- Preheat your oven to 350°F (175°C). Combine the finely pulsed cookie crumbs, 5 tbsp melted butter, and sea salt in a medium bowl until it looks like wet sand. Press this firmly into your 9 inch deep dish pie plate.
- Bake the crust for 10 minutes until the aroma of toasted chocolate fills the room. Remove it and let it cool completely; putting filling on a warm crust is a recipe for disaster.
- Heat 1/3 cup of heavy whipping cream in the microwave or on the stove until just simmering. Pour it over the 0.5 cup chocolate chips and let it sit for 2 minutes. Whisk until it becomes a glossy, mahogany liquid.
- Spread a thin layer of this ganache over the bottom of your cooled crust. Note: This is your moisture barrier; don't skip it! Keep the remaining ganache for the topping.
- In a large bowl, beat the 8 oz softened cream cheese and 1 cup peanut butter until no streaks of white remain and it looks like silk.
- Add the 1 cup sifted powdered sugar and 1 tsp vanilla extract. Mix on low at first so you don't get a sugar cloud in your face, then increase to medium until fully combined.
- In a separate chilled bowl, whip the remaining 1 cup of cold heavy cream. Watch it closely; you want stiff peaks that stand up straight when the whisk is lifted.
- Gently fold the whipped cream into the peanut butter base in three separate additions. Use a rubber spatula and a "down across-up" motion until the mixture is light and uniform.
- Pour the filling into the crust and smooth it with your offset spatula. Drizzle or swirl the leftover ganache over the top in any pattern you like.
- Refrigerate the pie for at least 6 hours. This allows the fats to solidify and the flavors to marry, making it easy to slice.
Fixing Common Texture Pitfalls Easily
Even the most seasoned bakers run into trouble sometimes. The key is knowing what went wrong so you can pivot.
The Filling Is Grainy or Lumpy
This almost always happens because the cream cheese was too cold when you started. If the fat is cold, it won't emulsify with the peanut butter or the sugar. To fix it next time, make sure your cream cheese is truly room temperature you should be able to press a finger into it with zero resistance.
The Crust Is Crumbling Apart
If your crust won't hold its shape, the crumbs might have been too coarse, or they weren't pressed firmly enough. Those cookie pieces need to be a fine powder to create a solid wall. Also, make sure you don't skimp on the butter, as it's the only thing holding the "sand" together once it cools.
The Mousse Is Too Soft
If your pie is more like a pudding, the whipped cream likely wasn't whipped to stiff peaks, or it was deflated during the folding process. Be very gentle when combining the two mixtures.
If you're in a rush, you can pop the pie in the freezer for 30 minutes before serving to firm it up, but the fridge is best for a creamy set.
| Problem | Root Cause | Solution |
|---|---|---|
| Filling is runny | Cream was under whipped | Beat until peaks hold their shape firmly |
| Crust is soggy | Ganache barrier was missed | Always seal the crust with chocolate first |
| Topping is too hard | Ganache was over chilled | Let the pie sit out for 5 mins before slicing |
Common Mistakes Checklist
- ✓ Ensure cream cheese is at room temperature for at least 2 hours before mixing.
- ✓ Never add filling to a crust that is still even slightly warm.
- ✓ Sift your powdered sugar to avoid "white dots" in the dark filling.
- ✓ Use the "fold" technique for the whipped cream never use the electric mixer for this step.
- ✓ Give the pie the full 6 hours in the fridge; 2 hours is not enough for the structure to set.
Simple Ways to Enhance Flavor
If you're making this for a special occasion, you can easily double the recipe or scale it back. Just remember that when scaling down, you might need a smaller 6 inch pan. If scaling up, I recommend making two separate pies rather than one massive one to ensure the center sets properly.
For those who want to experiment with the flavor profile, try adding a tablespoon of espresso powder to the ganache. It doesn't make it taste like coffee; it just makes the chocolate taste "more like chocolate." You can also swap the sandwich cookies for peanut butter filled cookies if you want to go full tilt on the nuttiness.
| Servings | Ingredient Adjustments | Pan Size | Chill Time |
|---|---|---|---|
| 5 people | Halve all ingredients | 6 inch springform | 4 hours |
| 10 people | Standard recipe | 9 inch deep dish | 6 hours |
| 20 people | Double all ingredients | Two 9 inch pans | 8 hours |
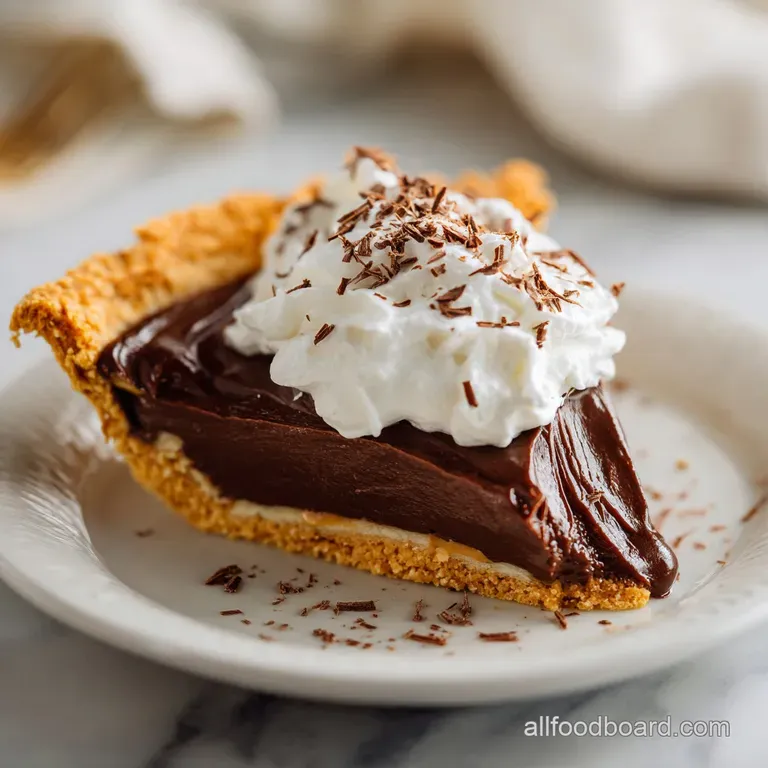
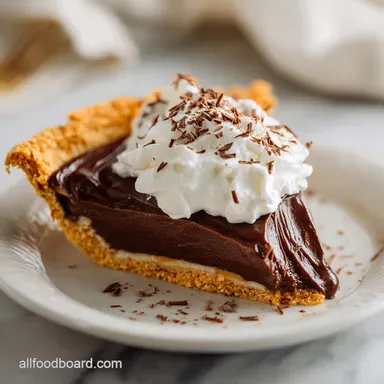
Don't be afraid to get creative with the toppings. Crushed roasted peanuts, a sprinkle of flaky sea salt, or even some shaved dark chocolate can take this from a "home cook" vibe to "professional pastry chef" status.
Proper Storage for Lasting Freshness
This pie is a dream for meal preppers because it actually tastes better on day two. The flavors have more time to mingle, and the crust remains protected by that ganache layer we worked so hard on.
Fridge Storage: Keep the pie covered with plastic wrap or in an airtight container for up to 5 days. The whipped cream will eventually start to lose some of its volume, but the flavor will remain excellent.
Freezer Instructions: This pie freezes beautifully! Wrap it tightly in two layers of plastic wrap and one layer of foil. It will stay fresh for up to 3 months. You can even eat it straight from the freezer for a texture that resembles a high end ice cream cake.
Zero Waste Tip: If you have leftover cookie crumbs, don't toss them. Store them in a jar and use them as a topping for yogurt or vanilla ice cream. Any leftover ganache can be reheated and drizzled over your morning coffee or a bowl of fruit.
Perfect Pairings for Sweet Treats
When it comes to serving, this pie is quite rich, so you want to pair it with things that offer a bit of acidity or bitterness to cleanse the palate. A strong cup of black coffee or a cold glass of milk are the classic choices, but you can get more adventurous.
A side of fresh raspberries or sliced strawberries provides a tart contrast that cuts through the heavy fats of the peanut butter. If you're serving this at a party, a dollop of unsweetened whipped cream on the side can help temper the sweetness for those who prefer a less sugary dessert.
One myth I often hear is that you can't use "natural" peanut butter for this recipe. While it's true that the oil separation can be tricky, you can use it if you stir it very thoroughly and perhaps add an extra tablespoon of powdered sugar to help with the emulsion.
However, for that nostalgic, perfectly smooth diner style pie, the standard creamy processed brands are truly the gold standard. Another myth is that you can substitute milk for the heavy cream this will never work, as milk doesn't have the fat content to hold air, and your pie will simply be a soup.
Stick to the heavy stuff for the best results!

Recipe FAQs
Why is my filling not firm after two hours in the fridge?
Two hours is simply not enough time for the mousse to structure properly. This pie requires at least 6 hours, or ideally overnight, in the refrigerator to allow the fats in the cream cheese and whipped cream to set firmly.
How to avoid white lumps in the peanut butter mixture?
Sift the powdered sugar before adding it to the cream cheese. This removes clumps that are otherwise impossible to smooth out once the heavy ingredients are combined.
Is it true I can speed up the process by putting the pie in the freezer?
No, this is a common misconception. Rapid freezing can cause the emulsion in your whipped cream to break, leading to a grainy or watery texture instead of a smooth mousse.
How to fold the whipped cream without deflating the mixture?
Use a rubber spatula to gently scoop from the bottom and fold over the top in three distinct additions. If you enjoyed learning this precise aeration technique, you can apply the same light handed folding method to our Peanut Butter Cup Brownie Bliss recipe to maintain a delicate crumb structure.
Why did the crust become soggy after adding the filling?
You likely added the filling before the crust was completely cool. Always ensure the crust reaches room temperature, and make sure you create that thin moisture barrier by spreading the melted ganache across the bottom before adding the peanut butter layer.
How to ensure the cream cheese blends perfectly with the peanut butter?
Allow your cream cheese to reach room temperature for at least 2 hours before you start mixing. Cold cream cheese will remain lumpy and refuse to incorporate smoothly with the peanut butter and sugar.
Can I use a mixer to combine the whipped cream into the peanut butter?
No, never use an electric mixer for the final folding stage. Mechanical mixing at this point will deflate all the air you worked to incorporate, resulting in a dense, flat pie rather than a light mousse.
Chocolate Peanut Butter Pie
Ingredients:
Instructions:
Nutrition Facts:
| Calories | 603 kcal |
|---|---|
| Protein | 9.2 g |
| Fat | 45.1 g |
| Carbs | 42.8 g |
| Fiber | 3.3 g |
| Sugar | 33.1 g |
| Sodium | 287 mg |
