Garlic Mushrooms with Butter and Herbs
- Time: Active 5 minutes, Passive 10 minutes, Total 15 minutes
- Flavor/Texture Hook: Meaty, browned edges with a velvety garlic butter finish
- Perfect for: Quick weeknight sides, holiday roasts, or topping a juicy steak
- Searing the Perfect Garlic Mushrooms with Butter and Herbs Every Time
- The Secret to Achieving Deep Umami Flavor in Ten Minutes
- Component Analysis and Ingredient Deep Dive
- Gathering Your Essential Ingredients for This Savory Side Dish
- Minimal Tools Required for Maximum Results in the Kitchen
- Mastering the Searing Process with These Simple Cooking Techniques
- Avoiding Sogginess and Rescuing Your Garlic Mushroom Dish
- Creative Ways to Customize Your Herb and Butter Mushrooms
- How to Scale This Recipe for Any Occasion
- Debunking Common Mushroom Myths
- How to Store and Repurpose Your Leftover Mushrooms Safely
- Best Ways to Pair and Plate Your Savory Mushroom Creation
- Recipe FAQs
- 📝 Recipe Card
Searing the Perfect Garlic Mushrooms with Butter and Herbs Every Time
I’ll never forget the Tuesday night I nearly gave up on mushrooms forever. I had a beautiful punnet of cremini, threw them into a lukewarm pan with a giant knob of butter, and watched in horror as they turned into a grey, spongy mess swimming in a pool of murky water. It was heartbreaking.
I realized then that I was treating them like onions, but mushrooms are tiny sponges that require a completely different set of rules. Discover an incredibly flavorful garlic mushroom recipe with butter and herbs that will become your new favorite side dish.
After dozens of soggy attempts, I finally stumbled upon the secret: patience and high heat. When you hear that first aggressive sizzle as the mushrooms hit the hot dry pan, you know you’re on the right track.
The aroma shifts from damp earth to something reminiscent of a roasting forest, and that’s before the butter even hits the metal. Now, this is the only way I make them for my family, and there are never any leftovers.
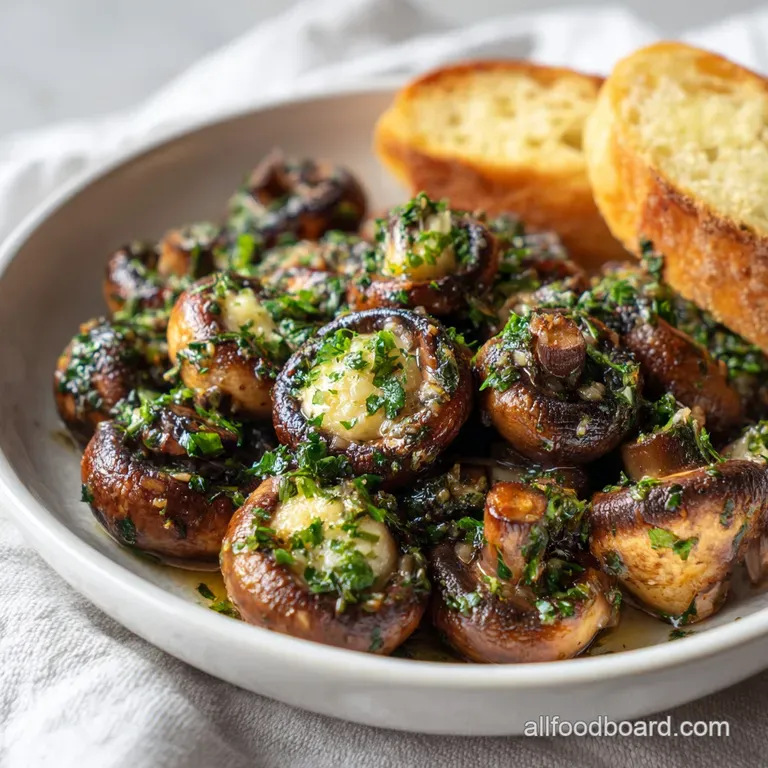
This specific garlic mushroom recipe with butter and herbs is all about the contrast between the browned, slightly crisp exterior and the tender, juicy middle. We're leaning into the simplicity of the ingredients, using grass fed butter to bring a richness that coats every crevice.
It’s a total transformation that takes less than 15 minutes but tastes like you’ve been hovering over the stove for an hour. Trust me, once you nail the sear, you'll never go back to the old way.
The Secret to Achieving Deep Umami Flavor in Ten Minutes
1. The Science of the "Dry Sear"
Evaporation Priority: Mushrooms are about 90% water, so cooking them without fat initially allows the moisture to evaporate quickly instead of creating a greasy steam. This clears the path for the Maillard reaction to brown the proteins and sugars, creating that meaty crust we crave.
2. Sequential Infusion
Flavor Layering: We add the garlic and herbs at the very end to prevent the delicate aromatics from burning under the high heat required for the mushrooms. This ensures the garlic remains sweet and fragrant rather than bitter and acrid.
3. Emulsified Herb Finish
Fat Management: Using a combination of olive oil and butter provides a higher smoke point for the initial sear while still delivering that velvety mouthfeel at the finish. The lemon juice acts as a bright surfactant, cutting through the fat and waking up the earthy tones of the thyme.
| Comparison | Fresh Cremini | Canned/Pre sliced |
|---|---|---|
| Texture | Firm, meaty, and holds its shape | Often soft, slippery, or rubbery |
| Flavor Impact | Deep, earthy, and soaks up the butter | Muted flavor; can have a metallic aftertaste |
| Cooking Result | Achieves a golden, shatter crisp edge | Struggles to brown due to excess preserved moisture |
The difference between using whole, fresh mushrooms and the pre packaged sliced variety is huge. Pre sliced ones lose moisture faster in the fridge, meaning they often turn slimy before you even open the pack. If you want that bistro style finish, buy them whole and halve them yourself just before the pan gets hot.
Component Analysis and Ingredient Deep Dive
| Ingredient | Science Role | Pro Secret |
|---|---|---|
| Cremini Mushrooms | Structural base | Don't wash them under the tap; use a damp paper towel to prevent waterlogging. |
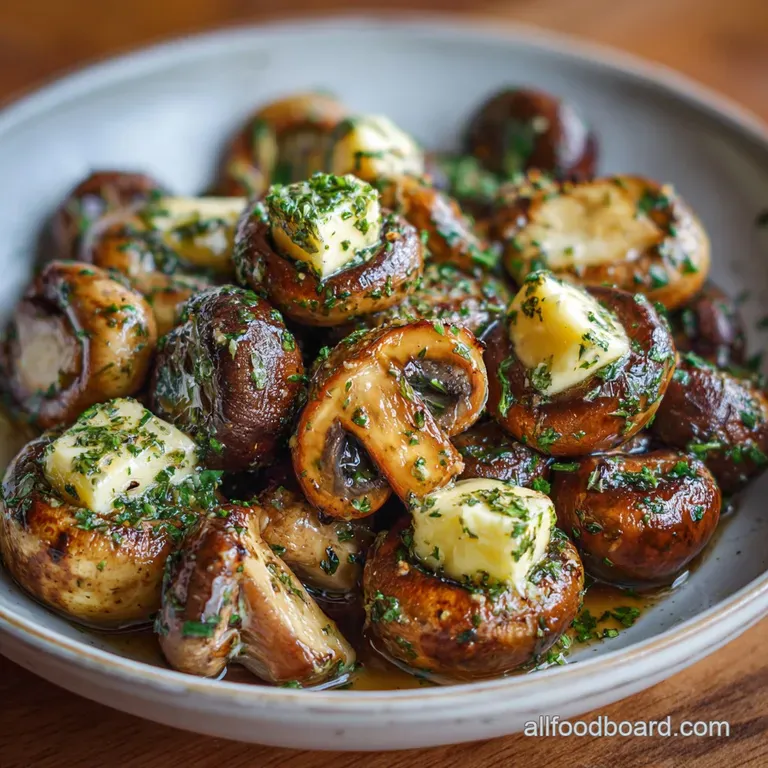
| Grass Fed Butter | Emulsifier & Flavor | Use cold butter at the end to create a glossy, thick sauce that clings to the veg. |
| Fresh Garlic | Aromatic punch | Hand mince rather than using a press to avoid "garlic juice" which burns instantly. |
| Lemon Juice | pH Balancer | The acid prevents the mushrooms from turning a dull grey, keeping them vibrant. |
When you're choosing your mushrooms at the store, look for caps that are tightly closed around the stem. If you see the dark gills underneath, the mushroom is older and will have a much more intense, almost funky flavor.
For this recipe with butter and herbs, the younger, tighter "baby bellas" work best because they stay bouncy and firm.
Gathering Your Essential Ingredients for This Savory Side Dish
For this recipe, we’re sticking to high-quality basics. I’ve found that using unsalted butter gives you total control over the seasoning, especially since mushrooms can be quite sensitive to salt.
- 16 oz (454g) Cremini or Baby Bella Mushrooms: Halved for the best surface area.
- 1 tbsp Extra Virgin Olive Oil: For the initial over high heat sear.
- 3 tbsp Unsalted Grass Fed Butter: Adds a richer, yellow hue and superior fat content.
- 5 cloves Fresh Garlic: Finely minced (measure with your heart, but 5 is my sweet spot).
- 1 tsp Kosher Salt: Diamond Crystal is my go to for its flaky texture.
- 1/2 tsp Freshly Cracked Black Pepper: Essential for a bit of back end heat.
- 1 tbsp Fresh Thyme: Finely chopped. Why this? Thyme has a woody citrus note that perfectly complements earthy fungi.
- 1 tbsp Fresh Italian Parsley: For a bright, cooling garnish.
- 1 tsp Fresh Lemon Juice: To cut through the richness.
Ingredient Substitutions
| Original Ingredient | Substitute | Why It Works |
|---|---|---|
| Cremini Mushrooms | White Button Mushrooms | Similar texture, though slightly less flavor depth. |
| Grass Fed Butter | Ghee (Clarified Butter) | Higher smoke point and nutty flavor. Note: Lacks the creamy milk solids. |
| Fresh Thyme | Dried Thyme (1/2 tsp) | More concentrated flavor. Note: Add earlier in the process to rehydrate. |
| Fresh Garlic | Garlic Confit | Much mellower, sweeter flavor profile. |
If you are looking for a way to use up extra garlic from this dish, you might enjoy trying my Proper Homemade Garlic recipe for some incredible garlic knots. It uses a similar infusion technique that really highlights the sweetness of the garlic.
Minimal Tools Required for Maximum Results in the Kitchen
You really don't need a kitchen full of gadgets for this. In fact, the less you move the mushrooms, the better they turn out. I prefer a heavy bottomed skillet because it holds heat like a champ even when you dump a pound of cold mushrooms into it.
- Large Cast Iron Skillet or Stainless Steel Pan: Avoid non stick if possible; you want the mushrooms to "grip" the pan slightly to form a crust.
- Wooden Spoon or Stiff Spatula: Best for scraping up the brown bits (the fond) from the bottom.
- Chef's Knife: For clean, even halves.
Chef's Tip: If you only have a small pan, cook the mushrooms in two batches. Overcrowding is the number one reason for "sad, boiled mushrooms." They need space to breathe so the steam can escape!
Mastering the Searing Process with These Simple Cooking Techniques
1. The over High heat Prep
Start by wiping your 454g of mushrooms with a damp cloth. Do not soak them. Halve them through the stem so each piece has a flat side. Heat your skillet over medium high heat until a drop of water flicked onto it dances and evaporates instantly.
2. The Golden Sear
Add the 1 tbsp of olive oil and swirl to coat. Carefully place the mushrooms in the pan, flat side down. Do not stir them for at least 3 minutes. Note: This allows the Maillard reaction to work its magic without interruption. Cook until the bottoms are deep chestnut brown and "snap" away from the pan easily.
3. The Butter & Garlic Infusion
Toss the mushrooms to brown the other sides for another 2 minutes. Reduce the heat to medium. Add the 3 tbsp of butter, 5 cloves of minced garlic, 1 tsp salt, and 1/2 tsp pepper. Cook for 2 minutes until the butter is foaming and the garlic smells sweet and toasted.
4. The Deglaze & Garnish
Stir in the 1 tbsp of fresh thyme. Add the 1 tsp of lemon juice, scraping the bottom of the pan to pick up all those caramelized bits. Cook for 1 more minute until the sauce has thickened slightly and glazed the mushrooms. Remove from heat and shower with 1 tbsp of fresh parsley before serving immediately.
Avoiding Sogginess and Rescuing Your Garlic Mushroom Dish
The biggest hurdle with this mushroom recipe with butter and herbs is moisture management. If your mushrooms start releasing liquid and the pan looks "soupy," don't panic. Crank the heat up to high and let that liquid boil off. It’s a rescue mission, but it works.
Why Your Mushrooms Are Soggy
When mushrooms sit in a pile, the steam from the bottom layer gets trapped by the top layer. This prevents the temperature of the mushroom surface from rising above 100°C (212°F), which is the temperature needed for browning.
| Problem | Root Cause | Solution |
|---|---|---|
| Rubberiness | Cooking too long on low heat | Use higher heat and shorter duration to keep the interior juicy. |
| Burnt Garlic | Adding garlic too early | Only add garlic once the mushrooms are fully browned and heat is lowered. |
| Grey Color | Salting at the start | Salt draws out moisture. Add salt only in the final 3 minutes of cooking. |
Common Mistakes Checklist
- ✓ Never wash mushrooms under a running tap; they act like sponges and will never crisp up.
- ✓ Wait for the oil to shimmer before adding the first mushroom.
- ✓ Resisting the urge to shake the pan constantly is key to a good crust.
- ✓ Use a pan large enough that the mushrooms sit in a single layer.
- ✓ Add the lemon juice at the very end to keep the herbs looking bright green.
Creative Ways to Customize Your Herb and Butter Mushrooms
Once you've mastered the basic technique with butter and herbs, you can start playing with the flavor profile. It's a very forgiving base.
1. Creamy Butter Garlic Mushroom
For a more indulgent version, add 2 tablespoons of heavy cream or a dollop of crème fraîche in the final minute of cooking. This creates a velvety sauce that is incredible over toast. If you love this vibe, you'll definitely want to check out my Cream Cheese Pasta recipe which uses a similar garlic herb base for a fast weeknight dinner.
2. Butter Garlic Mushroom Indian Recipe
To give this an Indian inspired twist, swap the thyme for 1/2 tsp of turmeric and a pinch of garam masala. Sauté some finely diced red onions with the mushrooms and finish with fresh cilantro instead of parsley. It becomes a fantastic "Mushroom Duo Pyaza" style side.
3. Vegan/Plant Based Swap
You can easily make this vegan by using a high-quality plant based butter (like Miyoko’s) or just sticking with a good olive oil. To get that "umami" hit that butter provides, add a teaspoon of nutritional yeast or a splash of soy sauce during the final glaze.
How to Scale This Recipe for Any Occasion
Downsizing (Serving 1-2): If you’re just cooking for yourself, use a smaller 8 inch skillet. You can still use the full amount of garlic (I won't tell!), but reduce the butter to 1.5 tbsp.
The cook time will be slightly shorter, roughly 7-8 minutes total, because there is less mass to heat up.
Upping the Batch (Serving 8+): When doubling the recipe to 32 oz (900g), you must use two separate pans or cook in two distinct batches. If you pile them all into one pan, you will end up with boiled mushrooms.
For the spices, only increase the salt and pepper by 1.5x initially, then taste and adjust. You don't want to over season as the liquid reduces.
| Servings | Mushroom Amount | Pan Size | Total Cook Time |
|---|---|---|---|
| 2 People | 225g (8 oz) | 20cm (8 inch) | 8 minutes |
| 4 People | 454g (16 oz) | 30cm (12 inch) | 10-12 minutes |
| 8 People | 900g (32 oz) | Two 30cm pans | 12 minutes |
Debunking Common Mushroom Myths
Myth: You can't wash mushrooms. Truth: You can quickly rinse them if they are very dirty, but you must dry them immediately and thoroughly. However, for this over high heat sear, a damp cloth is much safer to ensure a dry surface.
Myth: Mushrooms soak up all the oil, so you need to keep adding more. Truth: Mushrooms will initially absorb the fat, but as they cook and their cell structure collapses, they actually release much of that fat back into the pan.
Be patient and don't keep pouring in oil, or you'll end up with a greasy dish.
How to Store and Repurpose Your Leftover Mushrooms Safely
Storage: Keep any leftover garlic mushrooms in an airtight container in the fridge for up to 3 days. They actually taste even better the next day as the garlic and herbs permeate the flesh further.
Reheating: Avoid the microwave if you can; it makes them rubbery. Instead, toss them back into a hot dry skillet for 2 minutes to wake up the flavors and restore a bit of that texture.
Freezing: I don't recommend freezing these. The high water content in mushrooms means that once they thaw, the cell walls shatter, and they turn into a mushy, unappealing texture.
Zero Waste Tip: Don't throw away those mushroom stems! Even if you prefer just the caps for this dish, the stems are packed with flavor. Chop them finely and freeze them in a bag. Next time you make a bolognese or a soup, toss them in for an instant boost of umami. You can also use the leftover pan sauce bits to flavor a quick batch of Homemade Herby Croutons recipe for a salad.
Best Ways to Pair and Plate Your Savory Mushroom Creation
These mushrooms are the ultimate "utility players" of the kitchen. They fit in everywhere. I love serving them piled high on a piece of toasted sourdough that has been rubbed with a raw garlic clove. The juices from the butter soak into the bread, and it’s basically heaven.
If you’re looking for a full meal, they are the perfect companion to a medium rare ribeye or roasted chicken. For a vegetarian feast, stir them into a bowl of creamy polenta or use them as a topping for a quick risotto.
Because they have such a "meaty" texture, they can even hold their own as the main star of a grain bowl with some quinoa and roasted kale.
- If you want a crunchier texture, toss the mushrooms in a teaspoon of cornstarch before searing.
- If you want a deeper color, add a teaspoon of balsamic vinegar during the final minute.
- If you want a spicy kick, add a pinch of red pepper flakes when you add the garlic.
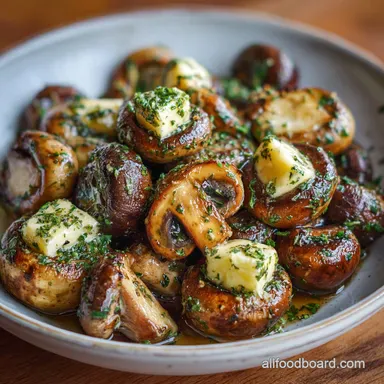
Right then, let's crack on! Get that pan screaming hot and give these mushrooms the respect they deserve. You'll know you've nailed it when the kitchen smells like a high end French bistro and the mushrooms have that beautiful, glistening mahogany finish.
Trust me on this the dry sear is a total game changer for your weeknight sides. Enjoy!

Recipe FAQs
Should I wash mushrooms before sautéing them?
No, wipe them clean instead. Mushrooms are like sponges; washing them under running water adds excess moisture, guaranteeing a soggy, steamed result instead of a good sear.
When should I add the garlic and herbs to prevent burning?
Add aromatics only after the mushrooms are deeply browned. After achieving the initial crust over high heat, reduce the temperature before adding minced garlic, as it burns quickly and turns bitter.
How do I achieve that deeply browned, meaty texture instead of rubbery ones?
Sear them first in a dry pan over high heat. This technique forces the water out quickly, allowing the natural sugars to caramelize (Maillard reaction), which builds deep umami flavor.
Is salting the mushrooms at the beginning mandatory?
No, salt them in the final minutes of cooking. Salting too early draws out moisture before the searing process is complete, leading to a less browned and potentially rubbery texture.
How do I prevent the butter from burning when I add it to the hot pan?
Add butter after reducing the heat from searing temperature. Use olive oil for the initial high heat sear, then reduce heat to medium before swirling in the butter to infuse the herbs, preventing scorching.
Can I substitute fresh thyme with dried herbs?
Yes, but adjust the quantity significantly. Use about one-third the amount of dried herbs compared to fresh, and add them slightly earlier than the fresh herbs to allow them time to rehydrate and release flavor.
How do I make this recipe into a rich, sauce coated side dish?
Finish by swirling in a small amount of cold butter and lemon juice. Reducing the heat just as you add the cold butter helps emulsify the fat with the pan liquids, creating a glossy sauce that clings perfectly to the mushrooms.
Butter Garlic Mushroom Recipe
Ingredients:
Instructions:
Nutrition Facts:
| Calories | 135 calories |
|---|---|
| Protein | 3.2 g |
| Fat | 12.2 g |
| Carbs | 5.1 g |
| Fiber | 1.2 g |
| Sugar | 1.4 g |
| Sodium | 488 mg |
