The Ultimate Copycat Restaurantstyle Garlic Parmesan Breadsticks
- Cracking the Code: The Culinary Espionage Behind Perfect Breadsticks
- The Key Components: From Flour to the Golden Butter Wash
- Mastering the Proof and Bake: A Step-by-Step Guide
- Achieving That Signature Golden Finish
- Elevating Your Breadsticks: Serving, Storing, and Flavor Upgrades
- Recipe FAQs
- 📝 Recipe Card
Cracking the Code: The Culinary Espionage Behind Perfect Breadsticks
There is pure joy in recreating a restaurant staple at home. I call it culinary espionage figuring out exactly why a dish hits the spot and then cracking the technique. For me, that obsession centered around those famous, perpetually warm, golden breadsticks.
They are the definition of easy comfort food, and frankly, making these at home ensures you can have unlimited refills. These Copycat Recipes are the result of several failed attempts, finally culminating in a breadstick that is just as soft, wonderfully garlicky, and impossible to stop eating as the original.
You’ll notice the incredible, yeasty aroma filling your kitchen almost immediately when you begin the mixing process, which is half the fun.
Defining the Perfect 'Pub Lunch' Texture and Flavor Profile
We aren't aiming for a crunchy stick designed for soup; we’re after a soft, cloud like interior texture that yields easily to the bite. This tender crumb requires a higher hydration level than many standard breads, meaning the dough is slightly wetter and stickier than you might be used to.
The signature flavor profile, which defines the best Restaurant Recipes Famous across the country, is a symphony of butter, salt, and intense, unapologetic garlic a flavor combination that truly separates these from any plain dinner roll.
How Our Dough Differs from Standard Homemade Dinner Rolls
A classic dinner roll usually contains a bit more fat (often milk or egg yolk) and sometimes more sugar, making it slightly richer and sweeter. Our breadstick dough, however, relies heavily on water and oil for moisture, aiming for elasticity and a clean, neutral base.
This difference is critical because we want the majority of the flavor to come from the heavy handed application of the buttery topping, not from the dough itself. The lack of excessive richness means the breadstick stays light, preventing that heavy, dense feeling you get from over enriched doughs.
Unlocking the Ultimate Copycat Recipes Challenge
The true challenge in creating great Copycat Restaurant Recipes lies in balancing texture and external flavour, particularly the salt-to-butter ratio. I learned early on that the intense flavor of beloved dishes often comes from generous seasoning right before serving.
For these breadsticks, achieving that immediate burst of savory, salty, garlicky goodness requires a precise methodology. If you’re building your own copycat recipes cookbook this methodology applying flavor externally, immediately after baking is the key to unlocking the true potential of Foodie Recipes .
The Key Components: From Flour to the Golden Butter Wash
Achieving the perfect breadstick isn't just about mixing ingredients; it’s about understanding what each component contributes. The dough itself is simple, but the magic happens when we consider the texture, the yeast activity, and the robust seasoning blend.
When your dough is proofing, run your finger across the surface you want it to feel satiny smooth, elastic, and cool.
Sourcing the Right Yeast for Maximum Fluffiness and Rise
For speedy and reliable results, I always recommend Instant Dry Yeast for projects like this, though Active Dry works just fine too (you’ll just need an extra 5 minutes for proofing).
Remember, yeast needs warmth and sugar to activate, so ensuring your water is Goldilocks approved between 105°F and 115°F is non-negotiable. If the water is too hot, you kill the yeast; if it’s too cool, your dough will simply sit there, inert and sad.
That satisfying foamy head after ten minutes is your guarantee of a successful rise.
The Ratio of Garlic Powder to Fresh Cloves (Our Deep Dive)
This is one of my favorite Copykat Recipes secrets: you must use both fresh minced garlic and dried garlic powder in the butter topping. Fresh garlic offers a sharp, immediate, pungent flavour, but it tends to lose intensity quickly.
Garlic powder, on the other hand, provides a deep, pervasive, and slightly caramelized base note that clings to the butter beautifully. Our ratio (4 fresh cloves to ½ teaspoon of powder) ensures a vibrant punch initially, followed by a lingering, deeply savoury finish that reminds you exactly of the best copycat recipes olive garden serves.
Essential Tools for Achieving Consistent Shape and Size
While bread baking often feels rustic, professional consistency relies on precision. You don’t need a stand mixer, but it certainly simplifies the kneading process. More importantly, investing in a kitchen scale is highly recommended for portioning.
Once your dough is ready to shape, divide the mass into exactly 12 equal pieces by weight. This guarantees that every breadstick bakes at the same rate, preventing some from turning golden too fast while others remain pale.
A good pastry brush is also crucial for the final step; you need a tool that can efficiently coat the surface without dragging the hot dough.
Related Recipes Worth Trying
- Creamy Tuscan Chicken Instant Pot Dinner Recipes Collection — This Instant Pot Creamy Tuscan Chicken is the easiest dump and go recipe in our Instant Pot Dinner Recipes Collection Get tender chicken and velvety sauce...
- Easy Christmas Crockpot Recipes Glazed Ham with Zesty Orange Ginger — Ditch the oven stress this year This foolproof Christmas Crockpot Recipes ham guarantees impossibly tender meat and a sticky zesty orangeginger crust The...
- Sunshine Jerk Chicken The Best Summer Crockpot Recipes — Say goodbye to hot kitchens This healthy Summer Crockpot Chicken recipe delivers tender smoky jerk flavour with zero fuss Its an easy summer dinner slow...
Mastering the Proof and Bake: A step-by-step Guide
The preparation of these breadsticks is really divided into three acts: mixing, waiting (proofing), and baking. Don't rush the process, especially the proofing that is where the structure and flavor truly develop.
When you punch down the dough after the first rise, you'll hear a satisfying whoosh as the gas releases; it should feel slightly spongy yet firm.
The 'Single Rise' Technique for Speedy and Predictable Results
Although we use two separate rest periods, I refer to this as a controlled "single rise" methodology because we focus all our energy on the first bulk fermentation. That initial 45 60 minute rest, where the dough doubles in size, is vital for developing gluten and those delicious yeasty flavors.
The second, much shorter rest (15– 20 minutes) after shaping isn't meant to make the dough double again. Instead, it allows the gluten strands, which were stressed during rolling, to relax. This relaxation ensures your breadsticks bake up light and fluffy, rather than tough and tight.
Shaping Strategy: Achieving Restaurant Grade Uniformity
After dividing the dough, it helps to lightly roll each piece into a neat ball first, letting them rest for 5 minutes. This makes the final rolling much easier.
To achieve that signature, slightly plump breadstick look, use the palms of your hands to gently roll the dough pieces back and forth on a lightly floured surface, applying even pressure. You are aiming for an 8 inch length and about a ½-inch thickness.
Remember, they will puff up quite a bit in the oven, so don’t start too thick! This simple technique ensures that beautiful, seamless restaurant grade uniformity.
The Critical Two-Step Butter Application Process
The biggest mistake people make when attempting Diy Food versions of buttery breadsticks is pre-buttering the dough. If you apply the garlic butter before baking, the delicate fresh garlic will burn, and the butter will simply slide off and pool on the parchment paper.
We use a critical two-step process. First, we bake the breadsticks naked. Second, the moment they exit the 375°F (190°C) oven, we immediately brush them with our warm, fragrant garlic herb mixture.
The residual heat instantly absorbs the fat and “cooks” the raw garlic just enough, locking in that fantastic, potent flavor.
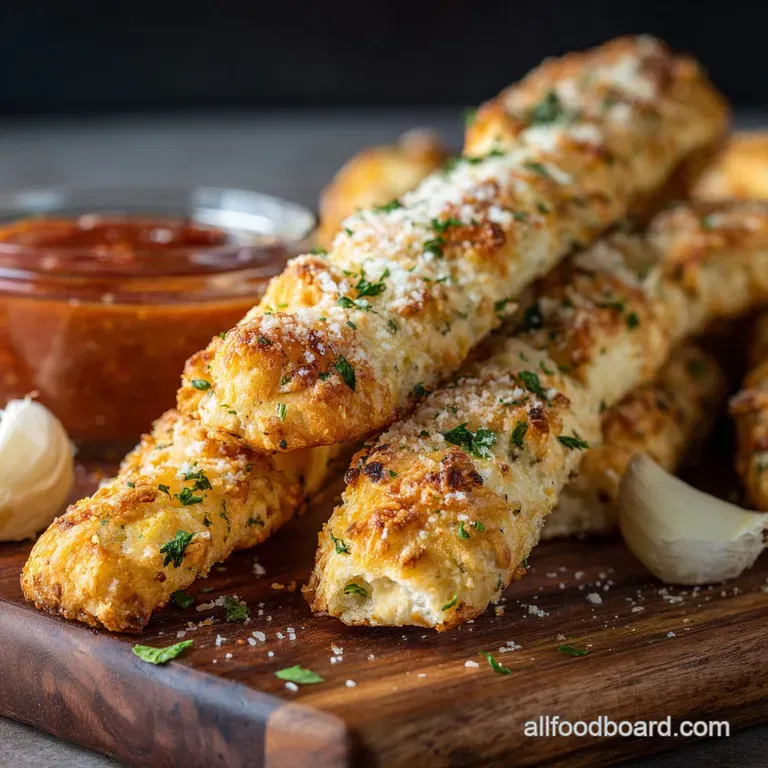
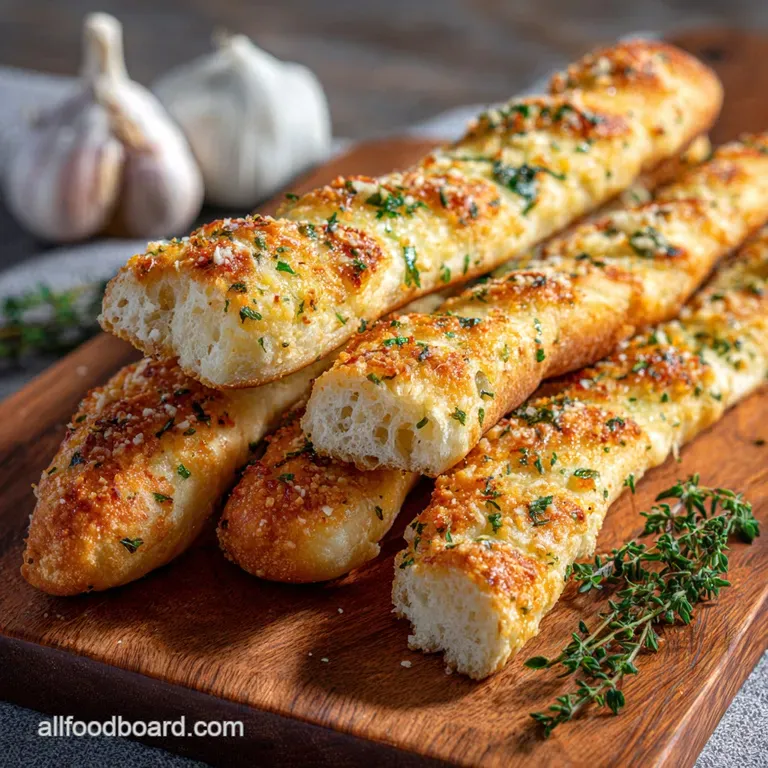
Achieving That Signature Golden Finish
You want your finished product to be truly golden, a deep amber color that hints at deliciousness, not pale white. If they look too light, keep them in the oven for another minute or two, watching carefully. This deep colour is caramelized crust and flavour, and it’s non-negotiable for superior breadsticks.
Elevating Your Breadsticks: Serving, Storing, and Flavor Upgrades
These breadsticks are incredible as they are, but if you’re a serious Foodie Recipes enthusiast, there are endless ways to elevate them. We're talking beyond the initial buttery garlic glory and into long term storage and advanced dipping strategies.
Freezing and Reheating for Later Carb Emergencies
One of the great joys of making a large batch of Copycat Recipes is the promise of future easy meals. These breadsticks freeze beautifully before the butter and cheese application. Once cooled, seal the plain baked breadsticks in an airtight bag.
To reheat, thaw them slightly and pop them into a 350°F (175°C) oven for about 5– 7 minutes until warm. Then, proceed directly to the butter and parmesan step. This method restores them to piping hot, soft centered perfection, vastly superior to any microwave reheat.
Dipping Sauce Pairing Guide: Beyond Standard Marinara
While marinara is the classic pairing, don’t limit yourself! Think about what contrasts the salty, oily nature of the breadstick.
- Creamy Alfredo: A rich, velvety counterpoint that doubles down on the Italian American comfort theme.
- Whipped Herb Feta: The tanginess of the feta cuts through the richness of the butter beautifully.
- Simple Pesto: The bright, slightly peppery basil and pine nuts add depth and freshness.
Troubleshooting: Why Didn't My Dough Rise?
If you’ve followed all the steps for these Diy Food breadsticks and your dough is refusing to budge, the culprit is almost always one of three things:
- Water Temperature: Your water was too hot, which killed the yeast (most common error).
- Old Yeast: Yeast has a shelf life. If it didn't foam up after 10 minutes, toss it and start with a fresh packet.
- Cold Environment: Yeast loves warmth. If your kitchen is chilly, try placing the bowl inside a turned off oven with just the oven light on; that little bit of warmth works wonders.
The Healthier Angle: Adjusting Sodium in Copycat Recipes
When tackling copycat recipes cookbook staples, salt is a massive flavour booster, often used liberally in restaurant kitchens. If you are watching your sodium intake, here's where you can adjust without sacrificing flavour.
Reduce the salt in the initial dough mixture (I learned I could drop it by half a teaspoon without structural issues). Crucially, ensure the salt you do use remains in the butter topping.
Since the topping is applied externally, your taste buds get that immediate salty sensation, masking the lower sodium content of the bread itself.

Recipe FAQs
My dough didn't double in size! Is my yeast knackered?
If your yeast didn't foam up like a good pint of beer in the initial mix, it was likely dead or the water was too hot or cold; you’ll need to start again with fresh yeast and water between 105 115°F.
Otherwise, the dough may just need a warmer spot try placing it in a slightly warmed, switched off oven, or be patient, as cold kitchens slow things down dramatically.
How can I prepare these glorious Copycat Recipes ahead of time for a party?
You have a couple of options: you can complete the first proof, shape the breadsticks, and then cover and refrigerate them overnight for a slow, cold second proof, baking them straight from the fridge the next day.
Alternatively, bake them completely, let them cool, and store them at room temperature for up to two days; they reheat beautifully for 5 minutes in a 350°F (175°C) oven.
What is the secret to getting that strong, pungent restaurant style garlic flavour?
The trick is using a combination of fresh minced garlic and garlic powder, and critically, applying the butter after baking. Heating the butter only gently for one minute prevents the fresh garlic from cooking down and losing its pungent bite, ensuring maximum flavour bomb status when brushed onto the hot bread.
My breadsticks came out a bit dense, not soft and airy; what went wrong with the texture?
This usually indicates insufficient kneading or skipping the crucial second rest (proof) after shaping. Ensure you kneaded the dough for the full 6 8 minutes to properly develop the gluten, and never skip the final 15 20 minute rest before the oven, as this guarantees a light and tender crumb.
Can I make these dairy-free, and what’s the best thing to dip them in besides marinara?
Absolutely, for a dairy-free version, simply substitute the butter in the topping with high-quality plant based butter (like a good vegan block) or light olive oil, and skip the Parmesan or use a dairy-free Parmesan alternative.
Beyond marinara, they are heavenly dunked in a proper soup, like a thick minestrone, or even a simple ranch dressing for the American touch.
