The Best Pot Roast: Tender and Rich
- Time: Active 20 minutes, Passive 180 minutes, Total 200 minutes
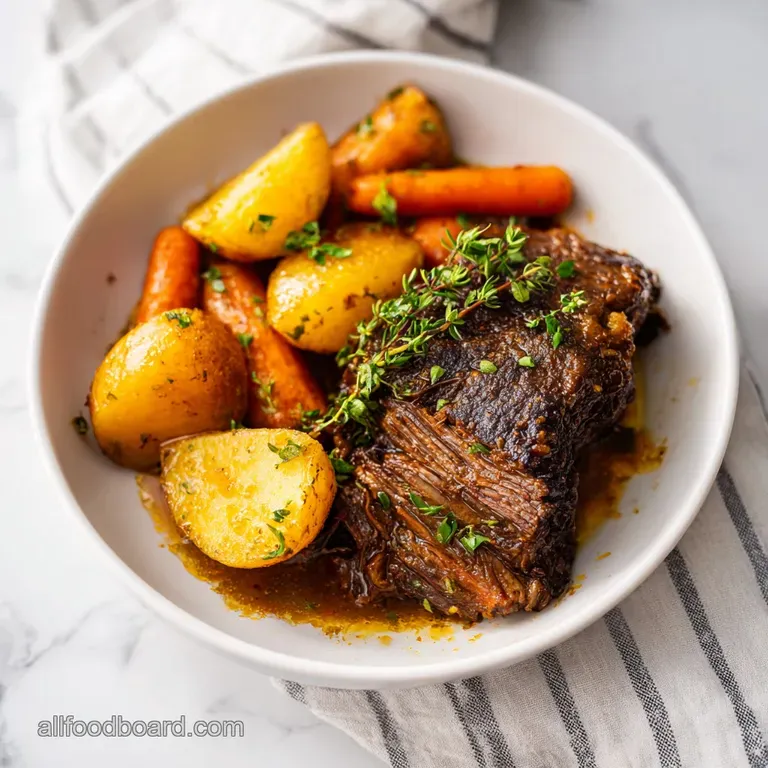
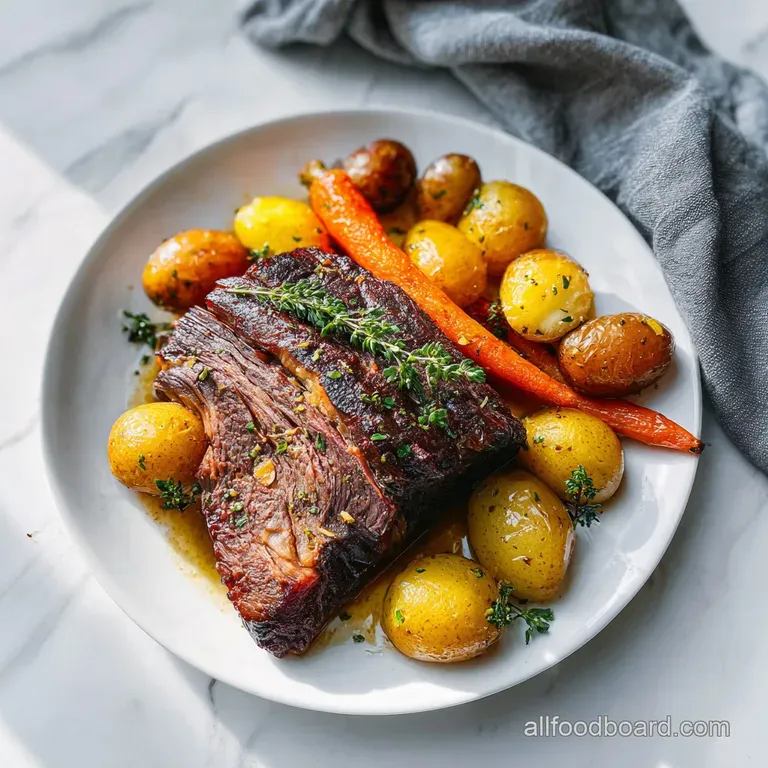
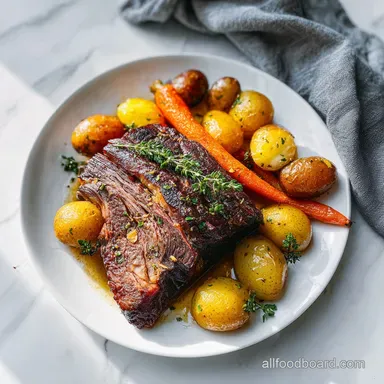
- Flavor/Texture Hook: Succulent, fall apart beef with a mahogany crusted exterior and velvety, concentrated pan sauce.
- Perfect for: Cozy Sunday family dinners or stress free meal prepping for a busy week.
- Achieve Deep Flavor with the best pot roast
- Why This Method Succeeds
- Understanding the Core Recipe Specifications
- Selecting Every Component for a Savory Result
- Choosing the Right Tools for Braising Beef
- Executing the Braise for Tender Beef Results
- Correcting Mistakes and Solving Common Pot Braising Issues
- Exploring Flavorful Variations and Simple Ingredient Swaps
- Practical Guidelines for Freezing and Reheating Beef
- Debunking Old School Kitchen Myths
- Enhancing Visual Appeal with Smart Presentation Tips
- Very High in Sodium
- Recipe FAQs
- 📝 Recipe Card
Achieve Deep Flavor with the best pot roast
The sound of a heavy Dutch oven lid clunking into place is the official start of Sunday in my house. There is something almost magical about the way the kitchen smells once that beef hits the oven the sharp scent of fresh rosemary mingling with the deep, savory hum of red wine and seared meat.
You know that specific aroma? It’s the kind that makes you want to pull up a chair right by the stove and wait, even though you know it’s going to be a few hours.
We’ve all had those pot roasts that end up gray, stringy, or swimming in a watery broth that tastes like nothing. I used to think I just wasn’t buying the right meat, but it turns out the secret isn't just the cut it's the patience. This recipe isn't about rushing.
It’s about that initial sizzle when the beef hits the hot oil and that slow, gentle bubble in a 300°F oven that turns tough fibers into something that melts like butter.
I’m sharing the exact method I use every time my family craves real comfort food. We’re going to talk about why that mahogany crust is non negotiable and why we add the vegetables much later than most people think.
Trust me, once you see that dark, glossy sauce and pull apart the first piece of beef with just a fork, you’ll never go back to the "dump and go" crockpot versions. This is how we build layers of flavor that actually stick to your ribs.
Why This Method Succeeds
Success in braising isn't about luck; it's about managing how heat interacts with the connective tissue in the meat. When we cook "the best pot roast," we are essentially performing a slow motion transformation of collagen into gelatin.
- Collagen Conversion: Tough connective tissue in the chuck roast only breaks down into silky gelatin when held at a low temperature for several hours, providing that signature mouthfeel.
- The Maillard Effect: Searing the beef until it forms a dark crust creates hundreds of new flavor compounds that simply cannot be replicated by boiling or steaming.
- Strategic Deglazing: Using red wine to lift the "fond" (the brown bits) from the bottom of the pot incorporates deep, caramelized sugars directly into the braising liquid.
- Delayed Vegetable Entry: Adding potatoes and carrots during the final hour ensures they absorb the beef's flavor without turning into a mushy puree.
- Aromatic Infusion: The high fat content in the chuck roast acts as a carrier for the fat soluble compounds in the rosemary and thyme, seasoning the meat from the inside out.
While some prefer a Classic Sunday roast beef for a more traditional oven-roasted texture, this braising method is what gives you that specific fall apart consistency that defines a true pot roast.
| Method | Cook Time | Texture | Best For |
|---|---|---|---|
| Dutch Oven | 3 hours | Ultimate tenderness, rich sauce | Maximum flavor development |
| Slow Cooker | 8 hours | Very soft, milder flavor | Hands off convenience |
| Pressure Cooker | 1 hour | Soft, but less depth in sauce | Last minute weeknight meals |
Choosing the right method depends entirely on your schedule. If you have the afternoon at home, the Dutch oven provides a level of caramelization and sauce reduction that the other methods struggle to match.
The heavy cast iron circulates heat more evenly than a thin slow cooker crock, ensuring every inch of that 3.5 lbs beef chuck roast reaches the same level of tenderness.
Understanding the Core Recipe Specifications
Precision matters when you're looking for that specific melt in-your mouth result. While I love to eyeball things in the kitchen, sticking to these checkpoints ensures your roast doesn't end up dry or undercooked.
Braising is a balance of time and temperature, and even a 25 degree difference in your oven can change how the collagen breaks down.
| Component | Specification | Why It Matters |
|---|---|---|
| Beef Weight | 3.5 lbs | Ensures the liquid to meat ratio is balanced for proper braising. |
| Oven Temp | 300°F (150°C) | The "sweet spot" for melting collagen without tightening muscle fibers. |
| Internal Temp | 200°F to 205°F | The temperature at which the beef becomes officially "fork tender." |
| Liquid Level | Halfway up meat | Allows for both braising (in liquid) and steaming (above liquid). |
If you follow these specs, you're giving the meat the best environment possible to succeed. I've tried bumping the heat to 350°F to save time, and honestly, the meat just gets tough. It's like trying to rush a good conversation it just doesn't work.
Keep it low, keep it slow, and let the Dutch oven do the heavy lifting while you enjoy your afternoon.
Selecting Every Component for a Savory Result
When you’re at the butcher counter, don't just grab the first package labeled "roast." You want to look for specific visual cues. For "the best pot roast," we are looking for a chuck roast with heavy marbling those little white flecks of fat running through the red meat.
That fat is your insurance policy; it’s what keeps the meat juicy during the three hour stay in the oven.
| Ingredient | Science Role | Pro Secret |
|---|---|---|
| Beef Chuck Roast | Provides collagen and fat | Look for the "serratus ventralis" muscle (the marbled part) for best results. |
| Tomato Paste | Adds umami and acidity | Brown it in the fat for 2 minutes to remove the raw, metallic tin taste. |
| Dry Red Wine | Solvent for flavor | The acidity cuts through the heavy fat, brightening the entire dish. |
| Yellow Onion | Sulfur based sweetness | Leave the root end intact on the halves to prevent them from disintegrating. |
For the liquid, I always reach for a low sodium beef bone broth. Why? Because as the sauce reduces over 180 minutes, the salt concentrates. If you start with a high sodium broth, the final gravy might be unpalatable.
Using bone broth adds an extra layer of gelatin that gives the sauce a silky, lip smacking quality.
- 3.5 lbs beef chuck roast
- Heavily marbled. Why this? The high fat and collagen content are essential for tenderness. (Substitute: Bottom round, but it's leaner and slightly drier).
- 2 tbsp kosher salt
- Use coarse salt for better crust formation. (Substitute: 1 tbsp table salt).
- 1 tbsp black pepper
- Coarsely ground is best. (Substitute: White pepper for less visual speckling).
- 3 tbsp neutral oil
- Grapeseed or avocado oil. Why this? High smoke point prevents burning during the hard sear. (Substitute: Canola oil).
- 1 large yellow onion
- Halved. (Substitute: 2 large shallots).
- 3 stalks celery
- Cut into chunks. (Substitute: 1 small fennel bulb for a hint of anise).
- 1 head of garlic
- Halved crosswise. (Substitute: 4 cloves minced, but add later so they don't burn).
- 2 tbsp tomato paste
- Concentrated flavor. (Substitute: 1/2 cup tomato puree, reduced longer).
- 2 cups dry red wine
- Cabernet Sauvignon or Merlot. Why this? Adds tannins and depth that water or broth can't match. (Substitute: Extra beef broth plus 1 tbsp balsamic vinegar).
- 2 cups beef bone broth
- Low sodium. (Substitute: Chicken stock in a pinch).
- Fresh Herbs
- 3 sprigs thyme, 2 sprigs rosemary, 2 bay leaves. (Substitute: 1 tsp each dried herbs).
- 1 lb Yukon Gold potatoes
- Halved. Why this? They hold their shape better than Russets in a braise. (Substitute: Red bliss potatoes).
- 1 lb large carrots
- Cut into segments. (Substitute: Parsnips for a sweeter, earthy twist).
Choosing the Right Tools for Braising Beef
You don't need a kitchen full of gadgets, but a few specific items make this recipe significantly easier and more consistent. The most important is undoubtedly your cooking vessel. I swear by a 6 quart enameled cast iron Dutch oven.
The thick walls hold heat steadily, which is exactly what the meat needs to relax those tough fibers over several hours.
If you don't have a Dutch oven, a heavy stainless steel pot with a very tight fitting lid can work, but you may need to check the liquid level more often. A loose lid allows steam to escape, which can lead to a dry roast or a scorched bottom.
If your lid feels a bit wobbly, you can place a piece of parchment paper or aluminum foil over the pot before putting the lid on to create a tighter seal.
You'll also want a good pair of long handled tongs. Searing 3.5 lbs of beef involves moving a heavy, slippery piece of meat in hot oil you want a secure grip. A fine mesh strainer is the final "chef's touch" tool.
Using it to strain the braising liquid at the end transforms a rustic stew into a refined meal with a smooth, professional looking sauce.
Executing the Braise for Tender Beef Results
Phase 1: The Hard Sear
Preheat your oven to 300°F (150°C). Pat the 3.5 lbs beef chuck roast completely dry with paper towels. Note: Surface moisture creates steam, which prevents the meat from browning properly. Season the roast aggressively on all sides with 2 tbsp kosher salt and 1 tbsp black pepper.
Don't be shy; this is a thick cut of meat, and it needs a lot of seasoning to penetrate the center.
Phase 2: Building the Fond
Heat 3 tbsp oil in your Dutch oven over medium high heat until it wisps with smoke. Sear the roast for 5 to 7 minutes per side. Wait until a dark, mahogany crust forms before flipping. If the meat is sticking, it’s not ready to turn.
Once browned on all sides, remove the meat and set it aside on a plate.
Phase 3: The Aromatics
Lower the heat to medium. Add the onion halves, celery chunks, and the halved head of garlic (cut side down) to the pot. Cook for about 4 minutes until the onions are browned on the edges. Stir in 2 tbsp tomato paste and cook for 1 to 2 minutes.
You want the paste to turn a shade darker, which signals the natural sugars are caramelizing.
Phase 4: Deglazing the Pot
Pour in 2 cups of dry red wine. Use a wooden spoon to scrape all those dark brown bits from the bottom of the pot. Note: This is called the "fond," and it contains all the concentrated beef flavor. Let the wine simmer for 3 minutes to cook off the raw alcohol scent.
Phase 5: Starting the Long Braise
Add 2 cups beef bone broth, thyme, rosemary, and bay leaves. Return the beef to the pot along with any juices that collected on the plate. The liquid should come about halfway up the side of the meat. Cover the pot and transfer it to the oven. Cook for 2 hours without opening the lid.
Phase 6: Adding the Hearty Vegetables
Carefully remove the pot from the oven. Arrange 1 lb halved Yukon Gold potatoes and 1 lb carrot segments around the beef, pushing them down into the liquid. Cover and return to the oven for an additional 1 hour.
Phase 7: The Final Check
Check the meat by piercing it with a fork. It should slide in and out with zero resistance. The beef should be fork tender and the vegetables soft. If it’s still a bit tough, give it another 20 minutes; some roasts just have more stubborn connective tissue than others.
Phase 8: Finishing the Sauce
Remove the meat and vegetables to a warm platter. Strain the braising liquid through a fine mesh sieve into a bowl. If you want a thicker sauce, you can puree a few of the cooked onion pieces or a potato back into the liquid.
Alternatively, simmer the strained liquid on the stovetop for 10 minutes to reduce it further. Serve the sauce poured generously over the sliced or pulled beef.
Correcting Mistakes and Solving Common Pot Braising Issues
Even the most seasoned cooks run into trouble sometimes. The biggest issue people face is "tough meat," which is almost always a result of undercooking, not overcooking. Because chuck roast is so full of collagen, it actually gets tougher before it gets tender.
If you pull it out at the 2 hour mark, it might feel like a rubber tire. Give it that third hour, and the transformation happens.
To Fix Tough Meat
If your timer goes off and the meat still feels resistant, don't panic. Put the lid back on and return it to the 300°F oven for another 30 minutes. As long as there is liquid in the pot, the meat will eventually yield.
Check the internal temperature; you're looking for roughly 202°F. At this point, the collagen has fully melted into gelatin.
To Fix a Thin Sauce
Sometimes the liquid doesn't reduce as much as you'd like, leaving you with a broth rather than a gravy. If your sauce feels too thin, you can whisk together 1 tbsp of cornstarch with 1 tbsp of cold water (a slurry) and stir it into the boiling liquid on the stovetop. It will thicken almost instantly. For a more flavor forward fix, try adding a splash of my Classic Au Jus to bolster the richness.
| Problem | Root Cause | Solution |
|---|---|---|
| Meat is Stringy/Dry | Boiled at too high a temp | Keep oven at 300°F; ensure liquid only simmers, never hard boils. |
| Vegetables are Mush | Added too early in process | Only add potatoes and carrots for the final 60 minutes of cooking. |
| Sauce is Bitter | Burnt tomato paste or garlic | Sauté aromatics on medium heat; if they turn black, start over. |
Common Mistakes Checklist:
- ✓ Never skip the "pat dry" step before searing; wet meat won't brown.
- ✓ Don't overcrowd the pot when searing; if the roast is huge, sear the ends separately.
- ✓ Avoid using "cooking wine"; if you wouldn't drink a glass of it, don't cook with it.
- ✓ Keep the lid tightly sealed; if steam escapes, the meat will dry out before it gets tender.
- ✓ Let the meat rest for 10 minutes before slicing to allow the juices to redistribute.
Exploring Flavorful Variations and Simple Ingredient Swaps
While the red wine and herb version is the gold standard for "the best pot roast," you can easily pivot based on what's in your pantry or your personal taste. Braising is a very forgiving technique once you understand the basic ratios of meat to liquid.
For a French Inspired Twist
Swap the beef broth for a high-quality veal stock and add 8 oz of pearl onions and sautéed mushrooms during the last hour. This leans into the flavor profile of a Beef Bourguignon. You can also replace the rosemary with extra thyme and a teaspoon of Herbes de Provence for a more floral, southern French vibe.
For an Alcohol Free Richness
If you prefer not to use wine, don't just use plain water. Replace the 2 cups of red wine with 1.5 cups of extra beef broth mixed with 1/4 cup of balsamic vinegar and 1 tbsp of Worcestershire sauce.
The vinegar provides the necessary acidity to break down the fat, while the Worcestershire adds the deep umami base that the wine usually provides.
Decision Shortcut:
- If you want a thicker, heartier meal, add 1/2 cup of pearl barley during the last hour of cooking.
- If you want a brighter, zingy flavor, stir in 1 tbsp of prepared horseradish and a squeeze of lemon juice right before serving.
- If you want a "pantry friendly" version, use a 12 oz bottle of stout beer instead of the wine; the maltiness pairs beautifully with beef.
Scaling this recipe is straightforward. If you're cooking for a crowd and use a 7 lb roast, you'll need to increase the searing time and extend the initial braise to 3 hours before adding the vegetables.
For the liquids and spices, you only need to increase them by about 50%, as too much liquid can actually dilute the flavor in a larger pot.
Practical Guidelines for Freezing and Reheating Beef
Pot roast is one of those rare dishes that truly tastes better on day two. As the meat sits in the liquid, the flavors continue to permeate the muscle fibers. I often make this on a Saturday specifically so we can have the "best version" on Sunday evening.
- Fridge
- Keep in an airtight container with the braising liquid for up to 4 days. The liquid will turn into a jelly like consistency this is normal! It’s just the gelatin.
- Freezer
- Shred the meat and store it in freezer bags with a generous amount of sauce for up to 3 months. To use, thaw in the fridge overnight before reheating.
- Zero Waste Tip
- Don't toss the leftover liquid! It’s essentially a concentrated beef stock. Use it as a base for a French Onion soup or freeze it in ice cube trays to drop into pan sauces for steak later in the week.
The Best Way to Reheat: Avoid the microwave if you can. It tends to make the beef rubbery. Instead, place the meat and sauce in a small saucepan or baking dish, cover with foil, and heat at 325°F until warmed through.
Adding a tiny splash of water or broth helps loosen the sauce and prevents the meat from drying out during the second round of heating.
Debunking Old School Kitchen Myths
There are a lot of "rules" passed down through generations that don't actually hold up to kitchen logic. Let's clear up a few so you can cook with more confidence.
Myth: Searing meat "seals in the juices." This is perhaps the most common misconception in cooking. Searing actually causes some moisture loss on the surface. We sear strictly for the flavor and color provided by the Maillard reaction.
The juiciness of "the best pot roast" comes from the rendered fat and melted collagen, not from "sealing" the meat.
Myth: You must use the most expensive wine. While you shouldn't use "cooking wine" (which is mostly salt and low quality grapes), you definitely don't need a $50 bottle. A decent $10 to $15 Cabernet or Merlot is perfect.
The nuances of an expensive vintage will be lost during the three hour simmer, so save the fancy stuff for the wine glass.
Myth: The meat is done when it reaches 145°F. While 145°F is a safe temperature for a steak, a chuck roast at that temperature will be tough and inedible.
For braising cuts, we are aiming for much higher temperatures around 200°F because that is the threshold where the magic transformation of connective tissue happens.
Enhancing Visual Appeal with Smart Presentation Tips
Let's be honest: pot roast can look a little... brown. While it tastes like a hug in a bowl, it often needs a little help to look as good as it tastes. Presentation is all about contrast in texture and color.
Instead of just shredding the meat into a pile, I like to slice it into thick, 1 inch slabs against the grain. This shows off the beautiful internal marbling and holds the shape better on the plate. Arrange the carrots and potatoes around the perimeter of a large, warmed platter rather than mixing them all together.
This keeps the vegetables from getting crushed and makes the dish look much more intentional.
The final touch is always something fresh. A heavy handful of chopped flat leaf parsley or a sprinkle of fresh thyme leaves adds a pop of vibrant green that cuts through the visual weight of the dark sauce.
If you really want to impress, serve it alongside some crusty sourdough bread to soak up every drop of that mahogany gravy. It’s rustic, family friendly, and feels like a celebration of everyday life.

Very High in Sodium
1180 mg of sodium per serving (51% of daily value)
The American Heart Association recommends limiting sodium intake to less than 2,300 mg per day, with an ideal limit of less than 1,500 mg per day for most adults.
Tips to Reduce Sodium
-
Switch to Low-Sodium Broth-30%
Replace the 2 cups of regular beef bone broth with low-sodium beef bone broth. This is the biggest sodium contributor after the added salt.
-
Halve the Kosher Salt-25%
Reduce the 2 tablespoons of kosher salt by half, using only 1 tablespoon. You can always add more salt at the table if needed.
-
Opt for No-Salt Added Tomato Paste-15%
Use no-salt added tomato paste. Regular tomato paste can contain a surprising amount of sodium.
-
Embrace Fresh Herbs & Spices
Boost flavor with fresh thyme, rosemary, and black pepper. Utilize garlic and onion as natural flavor enhancers.
-
Consider Lower Sodium Wine-5%
If available, use a lower sodium red wine or a wine that specifies its sodium content. Not all wines are created equal in terms of sodium.
Recipe FAQs
What's the secret to a good pot roast?
The secret is the dark, mahogany crust developed during the initial sear. By drying the meat thoroughly before cooking at 300°F, you create a deep layer of flavor that serves as the foundation for your entire sauce.
What is the best liquid for pot roast?
A combination of dry red wine and beef bone broth is ideal. The wine provides the necessary acidity to balance the richness of the chuck, while the bone broth adds a deep, concentrated savory profile that results in a velvety gravy.
What cooking method is best for pot roast?
Braising in a 6-quart Dutch oven at 300°F is the superior method. If you enjoyed mastering the searing technique here to develop flavor, you will appreciate how the steady, low heat of this Dutch oven process gently breaks down connective tissue over three hours.
Which meat is the most tender for pot roast?
Beef chuck roast is the best choice due to its high level of marbling. The internal fat melts throughout the long 180-minute cook time, ensuring the beef remains succulent and fork tender rather than stringy.
How to ensure the vegetables stay firm?
Add the potatoes and carrots to the pot only after the first two hours of cooking. Adding them later prevents the vegetables from turning to mush during the full three hour duration required to break down the beef.
Is it true I should sear the beef while it is wet?
No, this is a common misconception. You must pat the beef completely dry with paper towels to ensure the moisture evaporates quickly, allowing the surface to brown properly instead of steaming in the pan.
How to achieve a thicker gravy?
Puree a portion of the cooked aromatic vegetables back into the strained liquid. This thickens the sauce naturally without needing to add extra ingredients, creating a rich texture that coats your roast perfectly.
The Best Pot Roast
Ingredients:
Instructions:
Nutrition Facts:
| Calories | 918 kcal |
|---|---|
| Protein | 76.8 g |
| Fat | 47.2 g |
| Carbs | 25.4 g |
| Fiber | 4.8 g |
| Sugar | 6.2 g |
| Sodium | 1180 mg |
