The Frosty Feast Ultimate Sweet Salty Snowman Snack Mix
- Crafting the Ultimate Winter Whimsy: Why This Snowman Snack Mix Dominates
- Beyond Boring: Elevating Your Festive Finger Foods
- The Essential Components for Your Snowman Snack Mix Assembly
- Step-by-Step Blueprint for Building Your Edible Winter Scene
- Pro Tips and Variations to Customize Your Snowman Snack Mix
- Recipe FAQs
- 📝 Recipe Card
Crafting the Ultimate Winter Whimsy: Why This Snowman Snack Mix Dominates
The transition from autumn’s warm spices to the crisp, glittering aesthetic of deep winter calls for a corresponding shift in our snacking repertoire. While hearty stews and rich baked goods have their time, the season also demands something light, fun, and utterly whimsical.
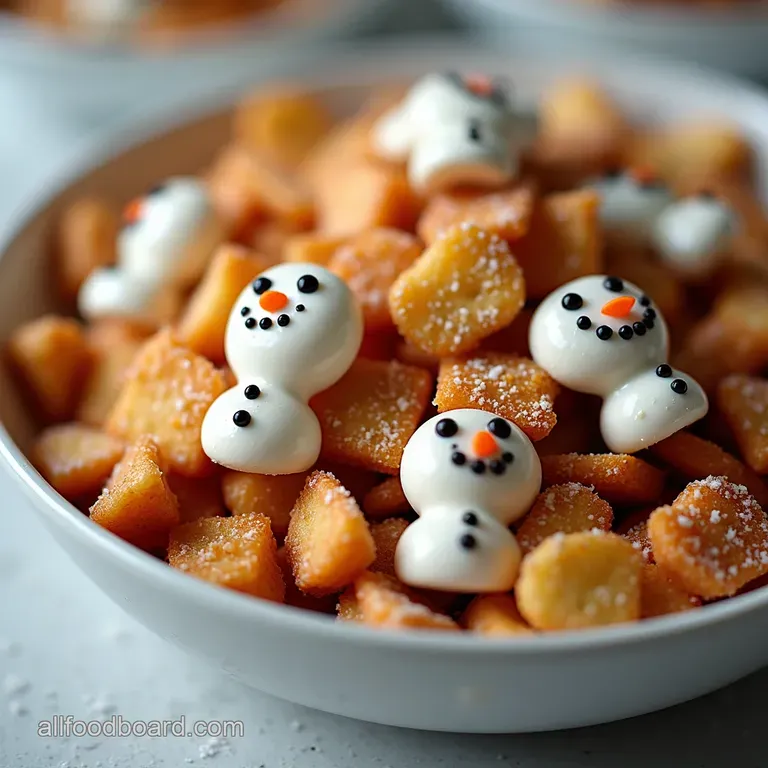
Enter the Snowman Snack Mix , a creation designed not just to satisfy the palate, but to delight the eye. This isn't just another collection of dried fruit and nuts; it’s a carefully constructed, edible landscape.
We are focusing on achieving that perfect, frosty crunch, coated in sweet, velvety white chocolate that mimics fresh powder. It’s versatile, instantly charming, and proves that some of the best Holiday Treats involve zero fussy baking.
Beyond Boring: Elevating Your Festive Finger Foods
Many traditional trail mixes can feel heavy or overly reliant on one dominant flavour. Our approach to creating this festive finger food elevates the concept entirely. We’ve moved past simple candy inclusions into a textural symphony, ensuring every handful offers something new a salty pop from a pretzel, the satisfying density of a nut, or the smooth melt of chocolate accents.
This focus on complexity makes the Snowman Trail Mix a star at any gathering, from casual family movie nights to more formal Christmas Snacks For Students .
The Magic Formula: Balancing Sweet, Salty, and Crunch
The core principle driving this recipe, which we'll call "The Frosty Feast," is balance. For every element contributing sweetness from the vanilla infused white coating, there must be a counterpoint of saltiness, primarily provided by the pretzels and nuts. The crucial third pillar is crunch.
By selecting a mix of airy cereal, sturdy pretzels, and firm nuts, we guarantee a textural experience that keeps you reaching back into the bowl. This deliberate combination moves the dish far beyond a standard sweet treat into the realm of compelling, complex snacking.
Perfect for Holiday Parties and Cozy Movie Nights
The visual appeal is undeniably high; the white coating, once dusted with powdered sugar, looks precisely like a fresh snowfall. This theme makes it an ideal centerpiece for holiday tables. On top of that,, because it’s a mix-and-toss recipe, it’s incredibly efficient.
You can whip up a large batch in under an hour prep time being just 20 minutes meaning you spend less time laboring in the kitchen and more time enjoying the festivities.
It’s the ideal grab and-go solution for seasonal potlucks or serving up during marathon viewing sessions of winter classics, solidifying its place as a go-to Easy Snack Mix For Kids (and adults!).
A Grown-Up Twist on Classic Puppy Chow Textures
If you enjoy the concept of classic "Puppy Chow" (or muddy buddies), you'll appreciate the transformation here. Instead of relying solely on peanut butter and heavy cocoa powder, we are using high-quality white chocolate chips combined with butter and vanilla for the base coating.
This lighter, sweeter canvas allows the other elements like the dark chocolate "coal" buttons and bright orange "carrot" pieces to truly shine. This refined flavour profile ensures that even sophisticated palates will crave more of this Melted Snowman Snack Mix .
Related Recipes Worth Trying
- Cheesy Shepherds Pie Remix Cottage Cheese Dinner Ideas — Looking for easy cottage cheese supper ideas This Shepherds Pie swap uses whipped cottage cheese for a proteinpacked creamy topping thats golden perfection...
- Box Cake Mix Enhancements Bakery Cake Magic — Discover the best Box Cake Mix Enhancements to transform any mix into a moist bakerystyle cake Simple swaps for a superior bake
- Box Mix Cake Enhancements Make Cake Mix Taste Like Homemade — Unlock the secrets to super moist box cake recipe results Discover the best box mix cake enhancements that turn a simple mix into a gourmet dessert
The Essential Components for Your Snowman Snack Mix Assembly
To successfully build this edible winter scene, we need four distinct categories of ingredients. The foundation must be robust enough to handle the coating without crumbling, the coating needs to adhere perfectly, and the final accents must provide the necessary visual character.
We are aiming for a total yield of approximately 8 cups, suitable for serving 10 to 12 guests.
Sourcing Premium Elements for Peak Flavor Performance
When dealing with a recipe that relies heavily on a coating, the quality of the base ingredients matters significantly. Since the prep time is so short ( 20 minutes), you want the ingredients you do use to perform at their best.
The Crunchy Base Layers: Nuts, Pretzels, and Cereal Selections
Start with 4 cups of mini pretzels twists or sticks work equally well, providing varied surface area for the coating. Complement this with 4 cups of a sturdy cereal like Chex or Crispix; their pockets and squares capture the melted white chocolate beautifully.
To add depth and healthy fats, incorporate 1 ½ cups of roughly chopped salted mixed nuts (almonds and cashews are excellent choices here). This trio forms the textural backbone of the entire mix.
Coating Concoction: Rich Dark Chocolate and White Drizzle Ratios
The "snow" itself requires 12 ounces of white chocolate chips opt for a high-quality melting wafer or confectionery coating for the smoothest melt. To enhance the richness and help prevent cracking once set, blend this with 4 tablespoons of unsalted butter.
A full teaspoon of pure vanilla extract is essential to perfume the coating beautifully.
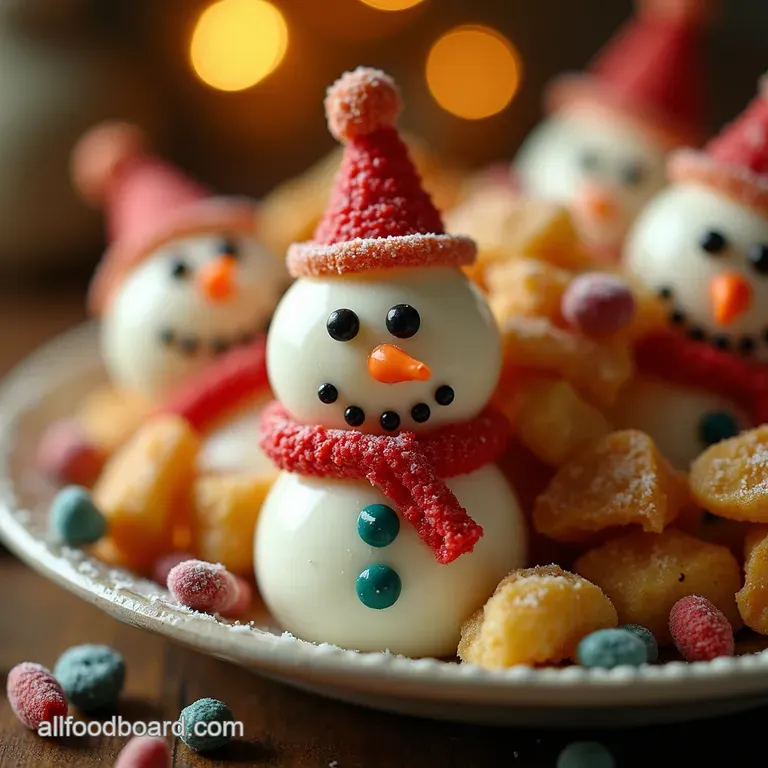
Snowflake Sparkle: Sweet Accents and Thematic Candies
These are the elements that truly make this a Snowman Snack Mix rather than just a white coated cereal mix. You’ll need 2 cups of mini marshmallows, added after the baking process to maintain their fluffy integrity.
For the signature snowman features, allocate ½ cup of dark chocolate chips (representing coal buttons) and ¼ cup of orange candy melts or small orange sprinkles to serve as the carrot noses.
Finally, a generous ½ cup of sifted powdered sugar provides the final, beautiful dusting of fresh powder upon cooling.
Essential Kitchenware: Tools for Perfect Mixing
While the assembly is straightforward, the right tools are vital. You will need two large mixing bowls (one for the dry ingredients and one for the final toss), a large rimmed baking sheet lined with parchment paper for setting, a microwave safe bowl (or small saucepan) for melting, and a reliable rubber spatula for gentle folding this is key to preventing breakage.
step-by-step Blueprint for Building Your Edible Winter Scene
The process is broken down into stages: preparation, coating, setting, and final decoration. Following this blueprint ensures that every component is treated correctly, resulting in a perfectly set, wonderfully crunchy Snowman Chex Mix .
Achieving the Perfect Coating Consistency
The success of this entire endeavor hinges on achieving a silky, homogenous coating that adheres evenly without being gloopy.
Phase One: Toasting and Preparing the Dry Foundations
Begin by preheating your oven to a low 300° F ( 150° C). Line your baking sheet with parchment paper. In your very large bowl, gently combine the pretzels, cereal, and nuts. Set this aside.
The low heat of the oven will help briefly toast the dry ingredients slightly, encouraging the coating to adhere better and crisp up nicely during the 12 15 minute bake time.
Melting Mastery: Ensuring Silky Smooth Chocolate Coverage
Melt your 12 ounces of white chocolate chips and 4 tablespoons of butter together. If using a microwave, employ short 30-second bursts, stirring vigorously between each interval until the mixture is entirely smooth and glossy. Stir in the teaspoon of vanilla extract.
Immediately pour this melted mixture evenly over your dry ingredients. Using your rubber spatula, employ a gentle folding motion think scooping from the bottom and turning over the top until every piece is lightly coated. Avoid overmixing, which can cause unnecessary crumbling.
The Powdering Process: Dusting for the Fresh Snow Effect
Spread the coated mix in a single layer on your prepared baking sheet. Bake for 12 to 15 minutes, making sure to stir everything halfway through to ensure even setting. Once removed from the oven, immediately transfer the mix back to the large bowl.
Allow it to cool for about 10 minutes until it’s just warm to the touch. Now, add the mini marshmallows and the dark chocolate chips. Toss gently again; this residual warmth will help them stick slightly without melting them into oblivion.
Spread the entire mix onto a fresh sheet of parchment paper to cool completely. Once fully cooled, sprinkle heavily with the pre-sifted powdered sugar for that ultimate fresh snow effect.
Final Assembly and Cooling for Maximum Snap
The final step before storage is ensuring everything has cooled completely on the flat surface; this process locks in the crunch. Just before serving, gently fold in your orange candy melts or sprinkles. This final integration should be light, ensuring those bright 'noses' remain distinct.
Pro Tips and Variations to Customize Your Snowman Snack Mix
This recipe is wonderfully adaptable, allowing you to tailor it perfectly to your audience, whether you are creating January Food Crafts For Kids or serving sophisticated holiday appetisers.
Troubleshooting: Preventing Clumping and Soggy Bits
The most common pitfall is clumping. To prevent this, ensure you are not overloading the mix with coating. If it feels too heavy during the folding stage, you’ve used too much chocolate. Also, never store the mix while it is still warm, as the condensation trapped underneath will result in a soggy texture.
Storing it spread out on parchment until completely cool is non-negotiable for maintaining that desired snap.
Banana and Peanut Butter Infusions for Extra Richness
For a heartier, richer version perfect for a cold evening, you can adapt this into a more decadent treat. Substitute the 4 tablespoons of butter in the coating with 2 tablespoons of creamy peanut butter.
On top of that,, for a flavour twist reminiscent of Elvis, add 1 cup of dehydrated banana chips to the initial dry mix.
Storage Secrets: Keeping the Crunch Alive for Weeks
The key to longevity is dryness and air exclusion. Store the finished Snowman Snack Mix in an airtight container at room temperature. If you’ve used the powdered sugar dusting, ensure the container is very dry before sealing.
Stored correctly, this mix will maintain its peak texture for up to two weeks, making it excellent for prepping ahead of busy holiday schedules.
Themed Variations: From Polar Express to Gingerbread
To shift the theme, simply swap out the base components. For a 'Gingerbread Snowman Snack Mix,' omit the pretzels entirely and substitute them with 3 cups of crumbled gingersnap cookies, adding ½ teaspoon of ground ginger into the melted white chocolate.
Alternatively, for a "Polar Express" inspired version, use dark chocolate chips instead of white for the primary coating, adding small silver or gold dragees as decorative accents instead of the orange noses.

Recipe FAQs
Can I make the Snowman Snack Mix ahead of time, or does it go soggy?
Generally, this mix holds up brilliantly, especially because the pretzels and cereal are baked to set the white chocolate coating. You can certainly make it a day or two in advance; just ensure it is completely cool before storing it in an airtight tin.
My white chocolate coating looks grainy after baking what went wrong?
That's usually due to overheating the chocolate, which can cause it to "seize" or become grainy, especially if you've added too much liquid or cooked it too long. To prevent this next time, melt the chocolate and butter slowly on low heat or in short bursts in the microwave, stirring frequently.
What are the best substitutions if I can’t find mini marshmallows for my Snowman Snack Mix?
If you're looking to maintain that soft, pillowy texture, you can swap the marshmallows for small, soft vanilla yogurt covered raisins or even small pieces of chewy white fudge. Remember to add these after the main baking stage so they don't melt into a sticky puddle.
Is this recipe suitable for keeping at room temperature, or does it need to be refrigerated?
No need to fret about fridge space; this mix is perfectly stable at room temperature, much like a packet of biscuits. Keep it sealed tightly in a container away from direct heat or sunshine, and it should stay fresh and crunchy for up to a week.
How do I make sure the colourful 'accents' (noses and coal) don't just fall off?
The key here is timing; you want the coating to be warm but not piping hot when you add the decorations. The residual warmth allows the coating to tack up just enough to hold the dark chocolate chips and orange candies in place without melting them completely.
Sweet Snowman Snack Mix

Ingredients:
Instructions:
Nutrition Facts:
| Calories | 518 kcal |
|---|---|
| Protein | 3.9 g |
| Fat | 18.6 g |
| Carbs | 61.6 g |
| Fiber | 1.9 g |
| Sodium | 322 mg |
