Extra Cheesy Baked Ziti: the Ultimate Brick Lane Bake (Meaty Creamy)
- The "Brick Lane" Bake: Why This Extra Cheesy Baked Ziti Is Essential Comfort Food
- The Science of Satisfaction: Why This Recipe Delivers Maximum Comfort
- Essential Components for the Ultimate Extra Cheesy Baked Ziti
- The Method: Layering Your Brick Lane Bake for Success
- Mastering the Bake: Chef's Tips and Troubleshooting Common Issues
- Planning Ahead: Storage, Freezing, and Reheating Baked Ziti
- Perfect Pairings: What to Serve Alongside Your Hearty Ziti
- Recipe FAQs
- 📝 Recipe Card
The "Brick Lane" Bake: Why This Extra Cheesy Baked Ziti Is Essential Comfort Food
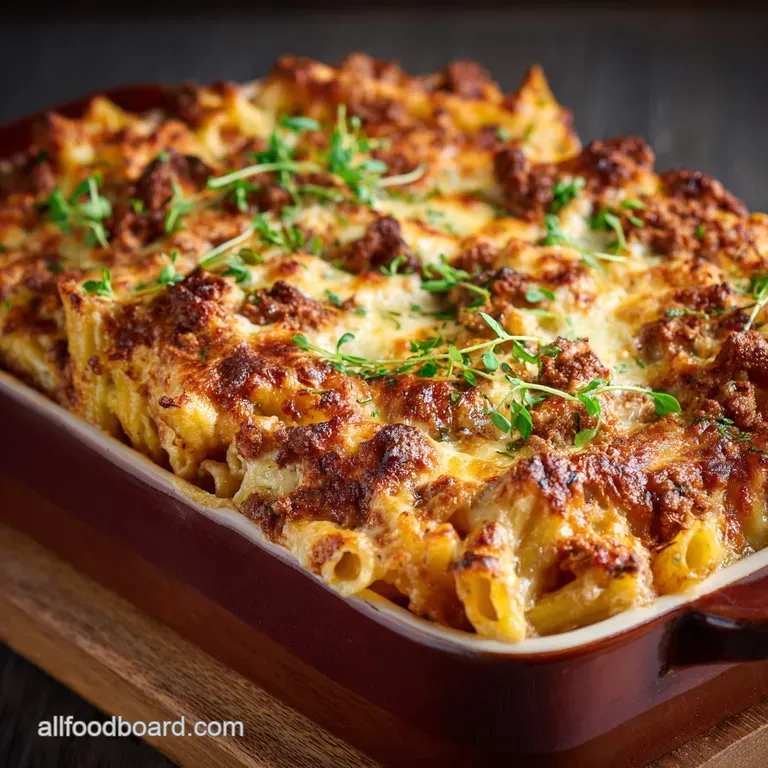
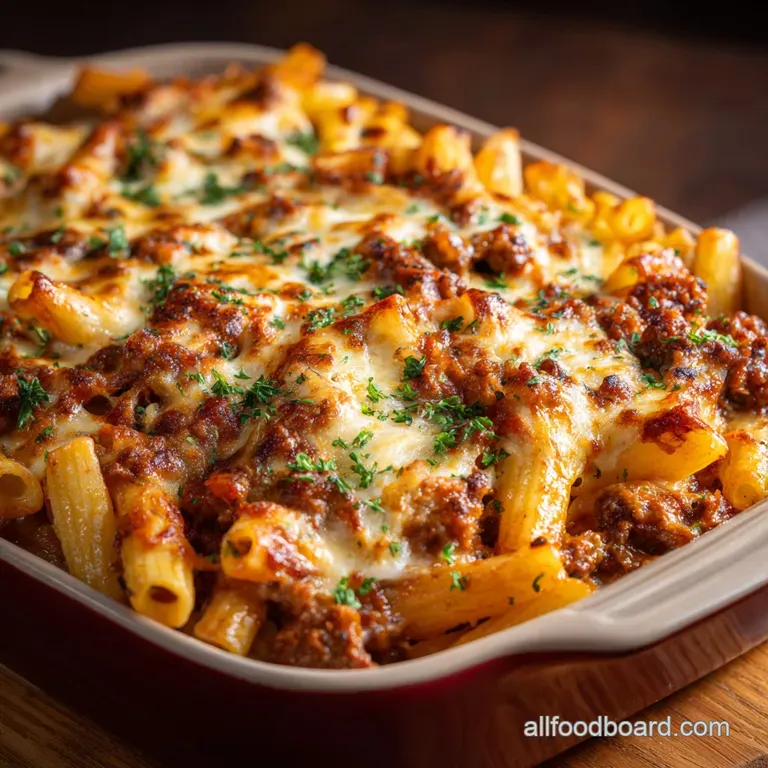
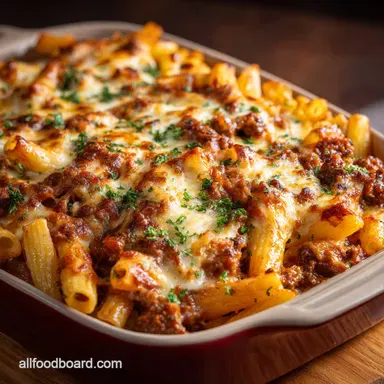
Can you actually smell the savory aroma through the screen? When this casserole comes out of the oven, bubbling, dripping sauce, and sporting a blistered golden cheese crust, it smells exactly like pure, unadulterated comfort. It's truly a thing of beauty, guaranteed to turn heads at any potluck or Sunday dinner table.
This Extra Cheesy Baked Ziti is my absolute lifesaver when I need to feed a crowd without spending all day hovering over the stove. It uses affordable ingredients, builds massive flavor fast, and it can be assembled entirely ahead of time. Think low effort for maximum reward, which is always my cooking motto.
Forget those dry, cardboard textured baked pastas you suffered through in the 90s. We're layering cheese properly, using the best Italian sausage for depth, and tackling those tricky pasta hydration issues head-on. Let's crack on and master the ultimate Ziti Al Forno.
The Science of Satisfaction: Why This Recipe Delivers Maximum Comfort
This isn't just a basic pasta bake; it’s engineered for maximum textural contrast and flavor payoff. We are focusing on a few simple, crucial techniques that take this from good to exceptional.
Moving Beyond the Basic Bake: Elevating the Sauce and Cheese
The key here is layering complexity, not just throwing things in a dish. Standard baked ziti often relies on jarred sauce and two cheeses, which leads to a flat result. We build a rich ragú using Italian sausage the fennel and pork fat are non-negotiable for that deep, savory base.
What Makes This Ziti the Perfect make-ahead Centerpiece
This recipe is built for time travel. Because we undercook the pasta and use a high fat, high moisture cheese mix, the dish actually improves after a day in the fridge. That resting time lets the flavors marry beautifully, making it perfect for preparing on Saturday and baking on Sunday. I often assemble this right alongside my party dip (you know, the creamy, cheesy Mississippi Sin Dip Recipe: Creamy, Cheesy, and Ready in 40 Minutes ) because the prep times overlap so nicely.
Building Umami: Deeply Simmering the Italian Sausage Ragú
We don’t just brown the sausage; we develop the flavor by cooking the aromatics (garlic and onion) in the rendered fat, then blooming the tomato paste. That 30 minute simmer time is essential. It pulls all those rich sausage flavors into the tomato base, creating a sauce that tastes like it cooked all day.
The Three Cheese Trinity: Achieving the Perfect Melt and Tang (Ricotta, Mozza, Parm)
This recipe is called "Extra Cheesy" for a reason. Ricotta delivers the creamy, fluffy texture; mozzarella provides the stretch and glorious melt; and Parmesan brings the salty, nutty tang.
Mixing an egg into the ricotta is my biggest cheat code; it acts like cement, ensuring that beautiful ricotta layer doesn't dissolve into the sauce.
The Secret to Preventing Dry Baked Pasta
If your pasta bake ends up dry and crunchy on the edges, you have one of two problems: you overcooked the pasta before baking, or you didn't include enough liquid. We solve this by cooking the ziti to two minutes shy of al dente and mixing a cup of the finished sauce directly into the pasta before layering.
This coating ensures the pasta stays hydrated and absorbs moisture evenly while baking.
Essential Components for the Ultimate Extra Cheesy Baked Ziti
Selecting the Right Italian Sausage for Maximum Flavor Depth
I always, always use sweet Italian sausage for this dish. The subtle sweetness and the essential fennel seed provide a background warmth that ground pork or beef simply cannot replicate. You need the fat content too; that rendered pork fat is where all the initial flavor building happens.
Preparing the Ricotta Binding Mixture (The Key to Creaminess)
Use whole milk ricotta and try to drain it if it looks watery. The secret ingredient here is the egg and a good amount of freshly grated Parmesan. The egg acts as a binder, stopping the ricotta from turning soupy, while the Parmesan adds the salt and crucial savoriness.
Never use pre-grated Parmesan if you can help it; the fresh stuff melts infinitely better into this mixture.
Understanding Pasta Hydration: Achieving Al Dente for Baking
The number one mistake people make with baked pasta is cooking it to package directions. Don't do it! The pasta will continue to cook and absorb liquid in the oven. If your package says 10 minutes, set the timer for 8 minutes.
It should be noticeably firm in the center when you drain it.
Ingredient Swaps: Adjusting Dairy for Richness
If you're out of one component, don't fret. Here are my favorite adjustments.
| Ingredient | My Preferred Swap | Why it Works |
|---|---|---|
| Ziti Pasta | Penne Rigate or Rigatoni | Ridges hold the heavy ragú better. |
| Sweet Italian Sausage | Ground Pork + Fennel Seeds | Add 1 tsp fennel and 1 tsp smoked paprika for depth. |
| Whole Milk Ricotta | Cottage Cheese (Whipped) | Blend it slightly to remove the curds for a similar texture. |
| Low-Moisture Mozzarella | Shredded Provolone | Adds a sharper, smokier kick, great for depth. |
The Method: Layering Your Brick Lane Bake for Success
Step 1: Developing the Rich Sausage Ragú Foundation
Start by browning the sausage well until you get those crispy, caramelized bits. Drain most of the fat you only need about a tablespoon left to sauté the onions. Adding the tomato paste and cooking it for 60 seconds (called 'blooming') concentrates its sweetness and deepens the final color of the sauce.
Step 2: Coating the Ziti and Preparing the Base Layer
While the sauce simmers, get your pasta done and mix up that ricotta binder. Once the pasta is drained (al dente, remember!), immediately toss it with about a cup of the warm meat sauce. This pre-coats the ziti, stopping it from clumping together and prepping it to absorb moisture later.
Step 3: The Critical Cheese Layering Technique
We are building structure, not just slathering sauce everywhere. Start with a thin layer of sauce on the bottom of the dish to prevent sticking. Add half the sauced pasta, then dot the ricotta mixture over it. Trying to spread the thick ricotta will scrape all the pasta around.
Dot it, then gently smooth those areas.
Chef's Note: The remaining sauce goes over the second layer of pasta, not mixed in. This top layer of sauce keeps the whole casserole moist and provides a nice 'seal' before we add the final mozzarella blanket.
Step 4: Achieving the Golden Crust and Perfect Internal Temperature
We bake this covered for the first 20 minutes. This traps the steam, ensuring the pasta finishes cooking and the cheese layer heats through without drying out.
Then, uncover it for the final 10– 15 minutes until the mozzarella is beautifully golden and bubbling vigorously. You want those little brown spots that’s flavor!
Mastering the Bake: Chef's Tips and Troubleshooting Common Issues
Preventing the "Soggy Middle" Syndrome
The sogginess comes from too much water being released during baking. This is why draining the ricotta is so important, and why we use low-moisture mozzarella, not fresh mozzarella packed in liquid. Also, let it rest!
Resting for 10 minutes lets the layers set and the residual heat finish the job.
The Foil Off Technique: Controlling the Crust Browning
If your crust is browning too fast during the uncovered phase, simply tent the foil back over it loosely. Every oven is different, but starting covered and only removing the foil for the final blast ensures maximum melt and a controlled, golden brown finish.
Troubleshooting: What to do if the Ragú breaks down
If your meat sauce looks oily or separated after simmering, it usually means you didn't drain enough fat from the sausage. Don't panic! Remove the sauce from the heat and stir in about 1 2 tablespoons of cold beef stock or tomato purée rapidly. This often helps emulsify the sauce back together.
Planning Ahead: Storage, Freezing, and Reheating Baked Ziti
Freezer Prep: Assembling the Bake for Later Use
Baked ziti is a freezer hero. Assemble the entire dish exactly up to the point of baking (Step 8), but do not pre-bake it. Cover it tightly with two layers of foil, label it, and freeze for up to 3 months.
When you’re ready, you can bake it directly from frozen just add 45– 60 minutes to the covered baking time.
Safely Thawing and Re-Baking the Dish
If you have time, thawing overnight in the refrigerator is best. If baking from chilled, use the standard baking time (30– 35 minutes covered, 10– 15 minutes uncovered).
If baking straight from the freezer, add an extra hour to the initial covered baking time, aiming for an internal temperature of 74°C / 165°F before uncovering to brown the top.
Reheating Individual Portions without Drying Out
Microwaving often results in a rubbery mess. For leftovers, slice individual portions and place them in an oven safe dish. Add a teaspoon of water or extra sauce around the edges, cover loosely with foil, and bake at 150°C / 300°F for about 15– 20 minutes until heated through.
This gentle heat keeps the pasta and cheese moist.
Perfect Pairings: What to Serve Alongside Your Hearty Ziti
This dish is intensely rich, so you need sides that cut through the fat and add brightness.
- A Crisp Green Salad: Always mandatory. I like a peppery rocket (arugula) salad tossed simply with lemon juice and a shaving of Parmesan.
- Garlic Bread: No one can turn down crusty garlic bread for mopping up residual sauce.
- Crispy Vegetables: If you want something warm but still light, skip the heavy starches. Try my recipe for Baked Sweet Potato Fries: The Secret to Crispy Oven Results — they offer great sweetness and crunch against the savory pasta. Alternatively, simple roasted asparagus works beautifully.

Recipe FAQs
Why did my Baked Ziti turn out dry instead of creamy?
This usually happens if the pasta was overcooked initially, or if the sauce was too thick before baking. Ensure the pasta is cooked only to al dente, as it will absorb liquid during the oven process, and always add a splash of reserved pasta water to the sauce if it seems overly dense before layering.
Can I use ground beef or ground turkey instead of Italian sausage?
Absolutely, but be aware that substituting ground beef or turkey will reduce the overall richness and natural seasoning found in Italian sausage. If you use lean ground meat, make sure to compensate by adding extra spices like fennel seed, red pepper flakes, and dried oregano to match the depth of flavor.
I don't like ricotta. What is the best replacement for the creamy layer?
A fantastic substitution for ricotta is small curd cottage cheese, which offers a similar texture and desirable tanginess to the dish. Alternatively, you can use a thickened béchamel sauce mixed with a small amount of cream cheese to create an equally rich, binding, and creamy layer.
How do I know when the "Brick Lane" Bake is perfectly done?
The ziti is finished when the sauce is bubbling vigorously around the edges of the pan and the top mozzarella layer is fully melted, browned, and caramelized slightly. If the top browns too quickly before the center is hot, cover the pan loosely with foil for the last 15 minutes of baking.
Can I prepare the casserole completely ahead of time?
Yes, you can assemble the entire dish up to 24 hours in advance, but it must remain unbaked. Cover the assembled ziti tightly with plastic wrap and refrigerate until needed; allow the dish to sit at room temperature for 30 minutes before baking, and plan to add 10-15 minutes to the total bake time.
How should I store leftovers, and what is the best way to reheat them?
Store leftovers tightly sealed in an airtight container in the refrigerator for up to four days. To reheat, cover individual portions loosely and microwave, or place the whole pan back in a 350°F (175°C) oven covered with foil until heated through to prevent the top from drying out.
Is it possible to freeze Baked Ziti, and should I bake it before freezing?
It is best to freeze this ziti unbaked to preserve the texture of the pasta and sauce. Assemble the casserole entirely in a freezer safe dish, wrap it tightly in multiple layers of foil, and freeze for up to three months. Always thaw the casserole overnight in the refrigerator before baking as directed.
Proper Extra Cheesy Baked Ziti Recipe
Ingredients:
Instructions:
Nutrition Facts:
| Calories | 657 kcal |
|---|---|
| Protein | 32.0 g |
| Fat | 30.0 g |
| Carbs | 67.0 g |
