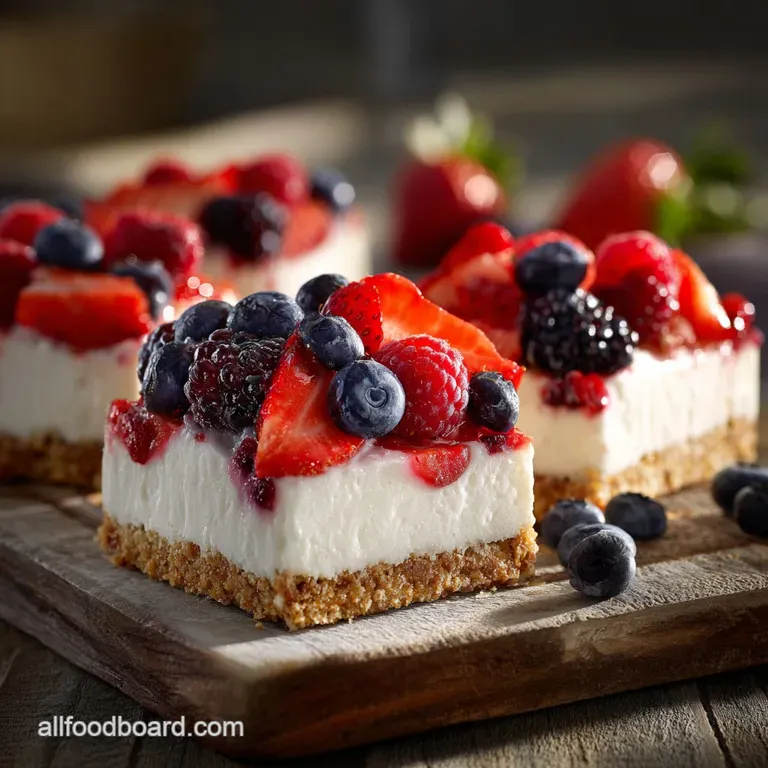
4Th of July Treats Starspangled Nobake Berry Cheesecake Slices
Ditch the Oven: The Ultimate No and Sweat 4th of July Treats
Look, I love my oven. I do. But when the thermometer hits 90 degrees and the humidity is thick enough to chew, the last thing I want is to stand guard over a hot kitchen, making sure my patriotic desserts don’t collapse into sad, sugary puddles. It’s too hot.
The goal of the 4th of July is maximum relaxation and minimum panic. Right?
That’s why this no and bake cheesecake bar recipe is a total life and saver. It is exactly the kind of jaw and dropping, vibrant 4th of July treat that makes people ask for the recipe, but requires nothing more complicated than a mixer and some serious patience during the chilling phase.
Why This Cheesecake Is Your Summer BBQ Showstopper
The best part about this recipe (aside from the lack of baking)? It gets better the longer it sits. Seriously. You can make the whole darn thing two days ahead of time, stash it in the fridge, and you don't have to think about dessert again until it's time to slice and serve.
That leaves you free to tackle the grill, argue about fireworks laws, or, you know, just sit and drink iced tea.
This isn’t some wobbly box and mix situation either. We are using real, full and fat cream cheese and whipping heavy cream until it’s practically structural engineering. The result is a filling that is impossibly light, tangy from the lemon zest, and incredibly creamy.
It’s a sophisticated, yet easy, patriotic dessert.
Decoding the Red, White, and Blue Visual Appeal
The key to turning a simple dessert into a showstopping 4th of July treat is deliberate berry placement. Don’t just dump the berries on top. That looks messy, and you lose the impact.
We focus on two colors: the deep, rich white of the cheesecake filling itself, and the brilliant contrast provided by the berries. I like to use strawberries and blueberries, naturally.
If you want to get really nerdy, you can arrange the blueberries only along the top two rows of slices, mirroring the stars on a flag, and then fill the rest with strawberries. It’s a fun little extra step that costs zero time and adds huge wow factor. It screams '4th of July treats!'
From Prep to Plate: The Joy of Zero Baking Time
Think about the anxiety involved in a baked cheesecake. Is it cracked? Is the middle set? Did I use a water bath? Ugh. Forget all that.
With this no and bake method, your anxiety is limited to whether or not you whipped the cream correctly (spoiler: you probably did). Once the filling is mixed, you simply spread it, cover it, and put it away. That's it. It’s a huge relief.
And when you pull out the perfectly set, ready and to-decorate 9x13 pan, you'll wonder why you ever bothered turning the oven on in the summer in the first place.
Gathering Your Patriotic Pantry Staples

The ingredient list here is mercifully short and relies on heavy hitters. We need rich dairy and fresh, vibrant fruit. No weird stabilizers or weird processed junk required.
Essential Tools for No and Bake Success (9x13 Pan and Mixer)
While you could technically crush the graham crackers with a rolling pin and whisk the cream by hand, I wouldn't recommend it. This recipe is easy, but it demands power for certain steps.
| Tool | Necessity Level | Why You Need It |
|---|---|---|
| Electric Mixer | Essential | To get the stiff peaks in the heavy cream and prevent lumps in the cheese. |
| 9x13 Pan | Required | Creates the perfect bar ratio (crust and to-filling). |
| Food Processor | Helpful | Crushes the crackers in seconds. If you don't have one, use a Ziploc bag and a rolling pin. |
| Offset Spatula | Optional, but Nice | Spreads the filling beautifully smooth without dragging the crust. |
Building the Perfect Crunchy Graham Cracker Base
If I have one major cheesecake regret from my early cooking days, it was the Soggy Bottom Syndrome. It happens when you don't properly compact the crust and you add too much melted butter. The filling seeps down and you lose that satisfying crunch .
The trick is compression. You need just enough butter to bind the crumbs together, making them resemble damp sand, but not so much that it's swimming in grease. Once you press it into the pan, use the bottom of a flat glass or measuring cup to bear down and compact the crust until it is literally rock solid. Seriously.
Press it like you mean it. This creates a barrier against the wet filling and guarantees a delightful crunch in every 4th of July treat slice.
Achieving Ultra and Smooth Cream Cheese Filling Consistency
We need to talk about cream cheese temperature. This is the single most important rule in no and bake cheesecake: your cream cheese must be genuinely, fully, completely at room temperature.
If it’s even slightly cold, it won't incorporate properly with the powdered sugar, and you'll end up with tiny, unwelcome cream cheese pebbles in your otherwise perfect filling. Don't be tempted to microwave it; that ruins the texture. Just leave the blocks on the counter for at least an hour before you start.
Trust me on this. Smoothness is everything.
Fresh Berry Selection for the Star and Spangled Topping
For maximum flavor payoff in these 4th of July treats, we are going to macerate the berries. Doesn’t that sound fancy? It just means sprinkling them with a little sugar and lemon juice and letting them sit.
This draws out their natural juices, creating a quick, gorgeous, light syrup without having to cook them down. It also ensures the berries don't taste flat on top of the rich, sweet cheesecake. When choosing your strawberries and blueberries, pick the ones that look firm and bright.
Mushy berries will turn into a watery mess once you macerate them.
Related Recipes Worth Trying
- Salted Caramel Crunch Nests The Ultimate NoBake Easter Treats — Skip the oven These decadent Mini Egg Nests feature a crunchy chocolate base and luscious homemade salted caramel The perfect easy Easter treats to make for...
- Decadent Brownie Graveyard Pots The Ultimate Halloween Treats Recipe — Rich fudgy brownie pots layered with silky chocolate mousse These individual Halloween treats are perfect for adults and brilliant fun for kids Make them ahead
- Rich NoBake Brownie Bites Fudgy Chocolate Treats Ready Fast — Craving something chocolatey These easy No Bake Brownies are fudgy rich and require zero oven time Perfect for quick afternoon snacks Get the foolproof...
Crafting the Star and Spangled No and Bake Cheesecake Slices
This process is so quick, it almost feels like cheating.
Step One: Pressing the Crust Foundation Firmly
Once you’ve got your crumbs (I usually use a food processor because I’m lazy) and your melted butter and sugar mixed up, dump it into your prepared 9x13 pan. Remember the parchment sling! It’s the easiest way to get the whole thing out later.
Now, press. Start pressing lightly with your fingers to distribute the crumbs, then bring in your heavy glass or flat measuring cup. Go corner to corner, pressing down evenly. We want this base to be uniform and extremely firm, almost like concrete. Chill it immediately.
Step Two: Whipping the Light and Airy Cheesecake Mousse
While the crust chills, tackle the filling. First, combine your room and temp cream cheese, sifted powdered sugar, vanilla, and zest in the mixer bowl. Beat this on medium speed until it’s cloud and like and you see zero lumps. Scrape, scrape, scrape the sides down constantly.
Then, the critical step: the cold heavy cream. Whip it in a separate, cold bowl until you have stiff peaks. This means when you lift the whisk, the peaks hold their shape and stand straight up. This stiff whipped cream is the sole structure holding your no and bake cheesecake together.
Once stiff, gently fold it into the cream cheese mixture in three separate additions. Stop mixing the second you see no streaks of white cream. Overmixing deflates the air, and suddenly, you have soft filling again.
Step Three: The Crucial Chilling and Setting Phase
Spread the glorious filling over the chilled crust using an offset spatula to smooth the surface without disturbing the crumbs underneath.
CRITICAL WARNING: Do not skip this step. This is not a negotiable timeframe. Four hours is the bare minimum, especially for thick 4th of July treats like these bars. If you attempt to slice the cheesecake before it has fully set, it will ooze and look sloppy. Make it the night before.
Seriously.
Cover the pan with plastic wrap (try not to let the wrap touch the surface of the filling) and tuck it into the fridge.
Step Four: Arranging the Festive Berry Topping Decoration
You've waited four hours (or hopefully overnight). The cheesecake is firm. Use the parchment sling to lift the entire block out onto a cutting board.
Take your beautifully macerated berries and drain off any excess liquid we want the flavor, not the extra moisture. Now, arrange them. Remember the visual impact we talked about? Use the strawberries to cover the main surface area, then create a distinct blue corner or band using the blueberries.
Once decorated, slice with a large, sharp knife dipped in hot water (and wiped dry!) between each cut for those perfect, clean lines.
Tips and Tricks for Mastering These 4th of July Treats
Troubleshooting Common Cheesecake Setting Issues
If your cheesecake is looking less like a firm bar and more like a puddle, something went wrong with the structure.
-
Problem:
The filling is sliding or weeping liquid.
- Fix: You didn't whip the cream long enough, or the cream wasn't cold enough. There's not much you can do now except stick it in the freezer for an hour before serving to firm it up temporarily.
-
Problem:
The crust is soggy or oily.
- Fix: Too much butter in the base, or not enough compression. Ensure you use the exact butter amount next time.
-
Problem:
The filling is lumpy.
- Fix: Your cream cheese was cold. Next time, wait longer!
Variations: Customizing Your Crust and Cream Flavors
You don't always need to stick to the graham cracker base, even though it’s a classic 4th of July treat foundation.
Here are a few ways I've customized this recipe over the years:
- Swap the graham cracker base for vanilla wafers or shortbread cookies for a sweeter, buttery flavor.
- Add 1/4 cup of cocoa powder to the crust for a chocolate base.
- Mix 1 teaspoon of almond extract into the filling (along with the vanilla) for a lovely marzipan hint.
- Swirl in 1/4 cup of raspberry jam after folding in the cream for a pink, fruity finish.
How to Store and Serve the Chilled Dessert Perfectly
Because this recipe is all about chilled dairy, proper storage is key. Keep the slices tightly covered in the refrigerator. They will last beautifully for up to four days.
Crucially: Only decorate the cheesecake bars with the fresh berries right before serving. If you put the berries on too early, their moisture will bleed into the pristine white filling, creating a pinkish ring, and nobody wants that when striving for a perfect patriotic dessert.
If transporting to a party, carry the berries and the cheesecake separately and assemble on site.
Calculating Nutritional Data Per Patriotic Slice
I included the nutritional data in the brief recipe outline, but let's be honest: we are using three bricks of full and fat cream cheese and two cups of heavy whipping cream. This is a celebration. This is rich. It’s delicious.
Is this a health food? Absolutely not. Is it a perfect 4th of July treat that you’ll crave all year long? Yes. Plan accordingly, maybe have a slightly smaller slice of the pasta salad, and enjoy every single creamy, crunchy, patriotic bite.

Recipe FAQs
My cheesecake filling seems a bit runny, will it still set properly once I put it in the fridge?
Likely not, mate! The stiffly whipped, icy-cold heavy cream is the structural backbone of this no-bake recipe, acting as the setting agent. If your mixture looks gloopy or soft before chilling, it usually means the cream wasn't whipped to firm enough peaks, and the bar will weep and slide.
Can I make these brilliant 4th of July Treats completely ahead of time, and how long will they keep?
Absolutely, they are brilliant for making ahead! They need a minimum of four hours, but chilling overnight is ideal for a proper set. Store them covered in the fridge for up to 4 days, but crucially, hold off on adding the fresh berry topping until literally just before you plan to serve them.
I’m trying to be a bit healthier; can I use low-fat cream cheese or substitute the heavy cream with whipped topping?
While tempting, low-fat cream cheese simply doesn't contain enough fat to set firmly enough for this style of no-bake bar it will be far too sloppy. You must stick to high fat heavy cream (35% fat minimum) and full fat cream cheese to guarantee a structurally sound and delicious slice.
I need clean slices for a nice presentation what's the best technique for cutting these no-bake slices without making a complete mess?
The trick is to use a long, sharp chef’s knife dipped in hot water and wiped completely dry between every single cut. This melts a tiny layer of the cream cheese, ensuring the blade slides through cleanly, leaving you with picture perfect edges rather than a squished disaster.
I've run out of Graham crackers; can I substitute the base, and will the setting time change?
You can easily substitute the base using shortbread, vanilla wafers, or even rich tea biscuits, keeping the crumb-to-butter ratio roughly the same. The base is held together by the butter, not chilling, so swapping the biscuit won't affect the overall setting time of the cheesecake filling.
Nobake 4th Of July Treats Bars

Ingredients:
Instructions:
Nutrition Facts:
| Calories | 475 kcal |
|---|---|
| Fat | 35 g |
| Fiber | 2 g |
