Homemade Caramels: Velvety & Buttery
- Time: Active 20 minutes, Passive 4 hours, Total 4 hours 20 mins
- Flavor/Texture Hook: Buttery, velvety, and deep amber
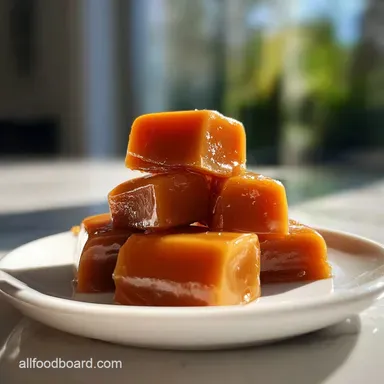
- Perfect for: Holiday gifting, rustic dessert platters, or a cozy weekend project
- Achieve the Perfect Golden Glow with Homemade Caramels
- Scientific Foundations for a Silky Texture
- Essential Metrics for Confectionery Success
- Flour Dusted Memories and Rich Elements
- Heavy Pots and Precise Tools
- Mastering the Amber Caramel Swirl
- Avoiding Grainy Textures and Burns
- Scaling the Sweetness
- Preserving Freshness and Reducing Waste
- Artistic Wrapping and Garnish Strategy
- Recipe FAQs
- 📝 Recipe Card
Achieve the Perfect Golden Glow with Homemade Caramels
Close your eyes and imagine the scent of browning butter swirling through a flour dusted kitchen on a crisp autumn afternoon. There is something deeply evocative about watching pale sugar transform into a bubbling, molten landscape of copper and bronze.
Making a homemade caramels recipe isn't just about the candy, it's about that specific moment when the heavy cream hits the hot sugar and the steam billows up in a sweet, fragrant cloud.
I remember my first attempt at this. I was so terrified of the heat that I pulled it off the stove too early, resulting in a caramel sauce that was better suited for pouring over my Crème de la recipe than cutting into squares. But that's the beauty of sugar work; it teaches you patience and the value of a single degree. This version is the "old fashioned caramels recipe" I eventually perfected, refined for a texture that yields gently to the tooth without sticking to the roof of your mouth.
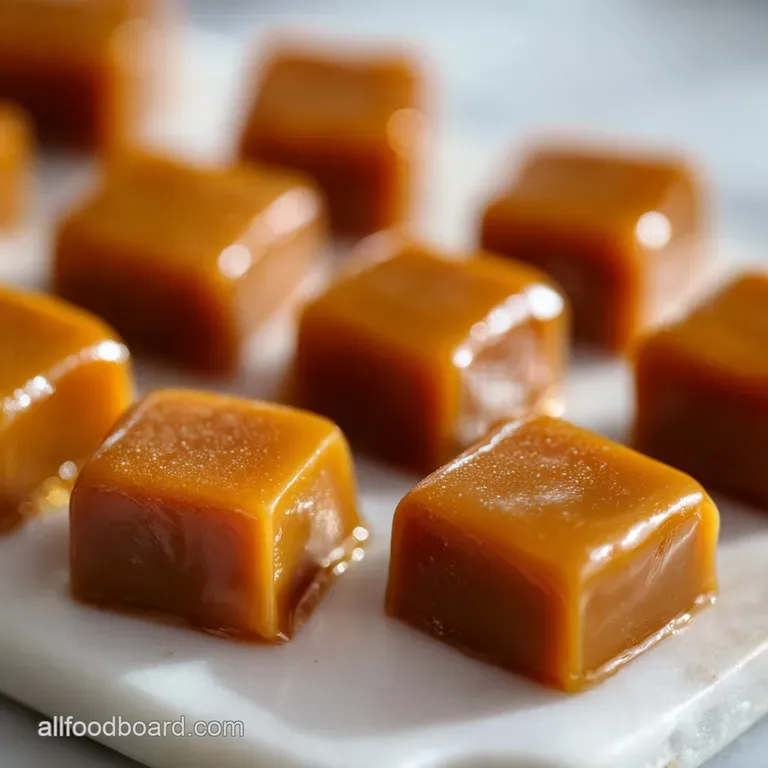
You don't need to be a professional pastry chef to master these. We are looking for that specific "shatter" of flaky salt against the velvety richness of the sugar. Whether you are looking for easy homemade caramels to gift to neighbors or you just want to fill your home with the rustic aroma of toasted sugar, this guide has everything I've learned from my own sticky mishaps.
Scientific Foundations for a Silky Texture
The Science of Why it Works: Maillard Reaction: Amino acids in the condensed milk react with sugars under heat to create hundreds of complex flavor compounds and that characteristic deep brown color.
Sucrose Inversion: The corn syrup acts as an interference agent, physically blocking sugar molecules from bonding together into large, gritty crystals.
| Method | Total Time | Final Texture | Best For |
|---|---|---|---|
| Stovetop | 30 minutes | Custom firmness | Traditionalists wanting precision |
| Microwave | 10 minutes | Softer, chewier | Quick homemade caramels for cravings |
| Slow Cooker | 4 hours | Deeply toasted | Large batches without stirring |
The choice between methods usually comes down to how much control you want over the final bite. While a microwave caramels recipe is incredibly fast, the stovetop allows you to watch the color change in real time, which is essential for developing those complex, bitter sweet notes that define a high end confection.
Essential Metrics for Confectionery Success
| Ingredient | Science Role | Pro Secret |
|---|---|---|
| Sweetened Condensed Milk | Protein Source | Provides the "body" and prevents the caramel from becoming a hard glass. |
| Light Corn Syrup | Crystallization Inhibitor | Use a fresh bottle to ensure the pH balance is right for preventing graininess. |
| Unsalted Butter | Fat Emulsifier | Cube it before starting so it melts evenly into the sugar without breaking the emulsion. |
One mistake I once made was using a cheap, thin bottomed pot. The sugar scorched in seconds. Always reach for your heaviest saucepan something with a thick copper or tri ply base to ensure the heat spreads like a gentle wave rather than a concentrated flame.
This is the secret to the best homemade caramels you'll ever taste.
Flour Dusted Memories and Rich Elements
- 2 cups (400g) granulated sugar Why this? The primary structure for sweetness and color development.
- 1 cup (340g) light corn syrup Why this? Ensures the texture remains glassy and smooth, never gritty.
- 1 cup (227g) unsalted butter, cubed Why this? Adds the fat needed for a melt in-the mouth finish.
- 14 oz (397g) sweetened condensed milk Why this? For that rich, milky depth found in old-fashioned recipes.
- 1/2 cup (120ml) heavy cream Why this? Thins the mixture for better temperature control.
- 1 tablespoon pure vanilla extract Why this? Adds floral notes to balance the cooked sugar.
- 1/2 teaspoon fine sea salt Why this? Cuts through the sugar to highlight the butter.
- 1 teaspoon flaky sea salt Why this? For a crunchy, aesthetic finish on top.
Chef's Tip: Freeze your butter for 10 minutes before cubing. Cold fat takes slightly longer to melt, giving you more time to whisk the milk and sugar into a stable emulsion before the temperature spikes.
Heavy Pots and Precise Tools

You will need an 8x8 inch square baking pan, lined with parchment paper that hangs over the edges like a rustic sling. While some suggest a caramel candy recipe no thermometer is possible using the "cold water test," I strongly recommend a digital clip on thermometer. A difference of just three degrees is the gap between a soft chew and a tooth cracking brick. If you're feeling adventurous with your bakes, this same precision helps when making a Foolproof Classic Cherry recipe.
| Original Ingredient | Substitute | Why It Works |
|---|---|---|
| Light Corn Syrup | Honey (1 cup) | Similar viscosity. Note: Adds floral notes and browns much faster; watch the heat. |
| Unsalted Butter | Salted Butter (1 cup) | Same fat content. Note: Omit the fine sea salt from the recipe. |
| Heavy Cream | Full fat Coconut Milk | High fat content. Note: Adds a subtle tropical flavor and slightly softer set. |
If you are looking for caramels without corn syrup, the honey substitution is your best bet, though the flavor profile shifts from traditional butter scented candy to something more reminiscent of a meadow. It's a lovely variation if you prefer a more rustic, artisanal vibe.
Mastering the Amber Caramel Swirl
- Prep the pan. Line an 8x8 inch pan with parchment paper, leaving an overhang on two sides. Lightly grease the paper with butter.
- Combine the bases. In a heavy saucepan, stir together the 2 cups granulated sugar, 1 cup light corn syrup, and 1 cup cubed butter. Note: Starting them together helps the sugar dissolve before the temperature rises too high.
- Apply medium heat. Heat the mixture over medium, stirring constantly with a silicone spatula until the butter melts and the sugar dissolves.
- Incorporate the dairy. Slowly pour in the 14 oz sweetened condensed milk and 1/2 cup heavy cream while whisking. until the mixture is a uniform pale yellow.
- Monitor the ascent. Clip your thermometer to the side. Continue cooking over medium heat, stirring frequently to prevent the bottom from scorching.
- Reach the target. Cook the mixture until it reaches 245°F (118°C). This is the firm ball stage.
- Final aromatics. Remove from heat immediately. Stir in the 1 tablespoon vanilla extract and 1/2 teaspoon fine sea salt. until the bubbling subsides and the vanilla is fragrant.
- The pour. Carefully pour the molten caramel into the prepared pan. Do not scrape the very bottom of the pot if there are any dark bits.
- The garnish. Let the caramel cool for 20 minutes, then sprinkle the 1 teaspoon flaky sea salt over the top until the surface is evenly jeweled.
- The set. Allow the caramels to set at room temperature for at least 4 hours, or ideally overnight, before lifting the parchment sling and cutting into squares.
Avoiding Grainy Textures and Burns
Why Your Caramel Is Gritty
If your candy feels like sandpaper on the tongue, sugar crystals likely formed on the side of the pot and fell back into the mix. This sets off a chain reaction where the whole batch crystallizes. To prevent this, you can use a wet pastry brush to wash down the sides of the pan during the early stages of boiling.
| Problem | Root Cause | Solution |
|---|---|---|
| Too Soft | Underheated | Re boil the mixture to 245°F with a splash of extra cream. |
| Too Hard | Overheated | Melt it down with 2 tbsp heavy cream and re set (will be softer). |
| Oily Surface | Broken Emulsion | Whisk vigorously while cooling to re incorporate the butter fat. |
Why Your Caramel Burnt
Sugar doesn't just get hot; it undergoes a rapid chemical change once the water evaporates. If you notice black specks, your heat was too high or your pot was too thin. Low and slow is the mantra for homemade caramels with condensed milk because the milk solids burn much faster than the sugar itself.
Common Mistakes Checklist
- ✓ Use a heavy bottomed pot to ensure even heat distribution and prevent hot spots.
- ✓ Avoid stirring too vigorously once the mixture reaches 230°F to prevent splashing.
- ✓ Calibrate your thermometer in boiling water (should read 212°F) before starting.
- ✓ Never double the batch in a small pot; the boil over is dangerous and messy.
- ✓ Ensure the parchment paper is smooth, as wrinkles will leave permanent marks in your candy.
Scaling the Sweetness
If you want to cut the recipe in half, use an 8x4 inch loaf pan to maintain the thickness of the squares. Reduce the cooking time by about 30%, but rely strictly on the thermometer rather than the clock. Half a tin of condensed milk can be stored in the fridge for a few days to use in coffee.
When doubling the recipe for large holiday gifts, use a much larger stockpot than you think you need. Caramel bubbles up significantly often tripling in volume once it hits the boiling point.
You'll need to increase the cooking time by about 15 to 20 minutes since there is more mass to heat.
Preserving Freshness and Reducing Waste
Store your cut caramels wrapped individually in wax paper or parchment squares. This prevents them from merging back into a single giant blob. At room temperature, they will stay buttery and soft for up to 3 weeks.
In the fridge, they last for 2 months, though they should be brought to room temperature before eating to regain their velvety texture.
For zero waste, save any "scraps" or uneven edges from cutting. You can melt these down with a little extra heavy cream to create a decadent caramel sauce for dipping apples or drizzling over brownies.
If you have leftover vanilla bean pods, stick them into your sugar container to infuse it with even more aroma for your next batch.
Artistic Wrapping and Garnish Strategy
Presentation is where the artistic soul of the baker truly shines. Since we are focusing on a rustic, evocative aesthetic, think about the color balance of your final platter. The deep copper of the caramel provides a warm base that needs contrasting accents to truly pop.
- Flaky White Salt: Add this exactly 20 minutes after pouring. If you add it too soon, it melts into the sugar; too late, and it won't stick.
- Dark Chocolate Drizzle: Once the caramels are cut, a thin, zig zag drizzle of 70% dark chocolate provides a sophisticated bitterness and a dark visual contrast.
- Green Herb Accents: If gifting, tuck a small sprig of fresh rosemary into the twine of the package. The piney scent complements the burnt sugar beautifully and adds a splash of earthy color.
Wrapping them in translucent wax paper allows the golden hue to peek through, creating an inviting, handmade look. I like to tie the ends with simple butcher's twine for that flour dusted, old world bakery feel that makes people feel truly cared for.
Trust me, once you hand over a box of these, you'll be the favorite friend in every circle.
Questions About Homemade Caramels
Why did my caramels turn out grainy instead of smooth?
Graininess is usually caused by sugar crystallization. This happens if undissolved sugar crystals on the side of the pot fall back into the boiling mixture. To prevent this, you can use a wet pastry brush to wash down the sides of the pan or avoid stirring the mixture too much once it starts boiling.
Using corn syrup or honey also helps act as an "interference agent" to keep the texture velvety.
Do I really need a candy thermometer for this recipe?
While experienced candy makers can use the "cold water test" (dropping a bit of syrup into ice water to check the firmness), a thermometer is highly recommended for beginners. A difference of just 2-3 degrees can change the texture from a soft chew to a hard candy.
For this recipe, hitting exactly 245°F is the secret to a professional result.
Can I make these caramels without using corn syrup?
Yes, you can substitute the corn syrup with an equal amount of honey or brown rice syrup. However, keep in mind that honey has a lower burning point and a much stronger flavor, which will change the "old fashioned" taste to something more floral and may cause the caramels to darken faster.
How do I stop the caramel from sticking to the knife when I cut it?
The best trick is to lightly coat your knife blade with a neutral oil or a bit of butter before each cut. It also helps to ensure the caramel has set completely ideally overnight in a cool, dry place.
Using a long, sharp chef's knife and pressing straight down rather than sawing will give you the cleanest edges.
My caramel is too soft and won't hold its shape. Can I fix it?
If your caramel is too soft, it simply didn't reach a high enough temperature. You can put the mixture back into a heavy saucepan, add a tablespoon of heavy cream to help it melt smoothly, and bring it back up to 245°F. Re pour it into a freshly lined pan and let it set again.
Why did the butter separate from the sugar while cooking?
This is known as a "broken emulsion." It usually happens if the heat is too high or if the mixture wasn't stirred enough when the dairy was added. If you see oil pooling on top, try whisking vigorously while the mixture is still hot to bring it back together.
If it happens at the end, a tablespoon of very hot water whisked in can sometimes save the batch.

Recipe FAQs
What is the secret to making homemade caramel?
Precise temperature control and the right fat ratio. Achieving the perfect chew relies on hitting the exact target temperature on your candy thermometer; even a few degrees off can lead to a grainy or too-hard candy. The fat from butter emulsifies with the sugar and dairy to create that signature velvety texture, much like the controlled whisking needed for a stable sauce in recipes like Vegetarian Enchiladas Recipe: Smoky Sweet Potato Homemade Rojo Sauce.
Does boiling a can of condensed milk turn into caramel?
No, boiling a sealed can does not create traditional caramel. While it produces a dulce de leche like spread, it's a much simpler process that relies on the Maillard reaction within the sealed can. True caramel involves precise sugar cooking and the addition of fats and other liquids, similar to the careful cooking required for the deep flavor in Homemade Applesauce Taste the Orchards Delight: Zero Watery Mush.
How do you make a simple caramel?
Combine sugar, corn syrup, butter, and sweetened condensed milk in a heavy saucepan. Heat over medium heat, stirring constantly until the butter melts and sugar dissolves, then slowly incorporate the condensed milk and cream while whisking.
Cook, stirring frequently, until the mixture reaches 245°F (firm ball stage).
What not to do when making caramel?
Don't use a thin bottomed pot or overheat the mixture. Thin pots create hot spots that scorch the sugar rapidly, leading to burnt flavor and a gritty texture. Overheating causes excessive crystallization or burns the delicate milk solids in the condensed milk, destroying the smooth chew.
Why is my homemade caramel gritty?
Sugar crystallization is the most common culprit. This happens when undissolved sugar crystals on the side of the pot fall back into the boiling mixture, triggering a chain reaction.
To avoid this, use a wet pastry brush to wash down the sides of the pan and avoid excessive stirring once the mixture boils.
Can I make caramels without a candy thermometer?
While possible, it's challenging and not recommended for beginners. The "cold water test" can be used, but it requires practice and precise judgment of texture. A thermometer ensures accuracy, which is critical as a 2-3 degree difference can drastically alter the final chewiness and texture.
How do I prevent caramel from sticking to the knife when cutting?
Lightly oil or butter your knife blade. Before each cut, dip your knife into a neutral oil or a bit of softened butter. Ensure the caramel has set completely, ideally overnight, for cleaner cuts, similar to how a sharp knife makes clean slices for things like Homemade Herby Croutons: Ultra Crispy Bistro Style Rosemary Garlic.
Homemade Caramels
Ingredients:
Instructions:
Nutrition Facts:
| Calories | 92 kcal |
|---|---|
| Protein | 0.6 g |
| Fat | 4.1 g |
| Carbs | 13.8 g |
| Fiber | 0 g |
| Sugar | 13.7 g |
| Sodium | 28 mg |
