The Proper Crunch Foolproof Homemade English Butter Toffee
- Unlocking the Secret to Shatteringly Crisp Homemade Toffee
- Why This Butter Toffee Recipe Outshines Store-Bought Versions
- Essential Components for Deep Caramelization
- Prepping Your Station: Tools for Success
- The Controlled Burn: Achieving the Ideal Temperature
- Mastering the Stages of Toffee Transformation
- Troubleshooting and Expert Secrets for Flawless Candy
- Recipe FAQs
- 📝 Recipe Card
Unlocking the Secret to Shatteringly Crisp Homemade Toffee
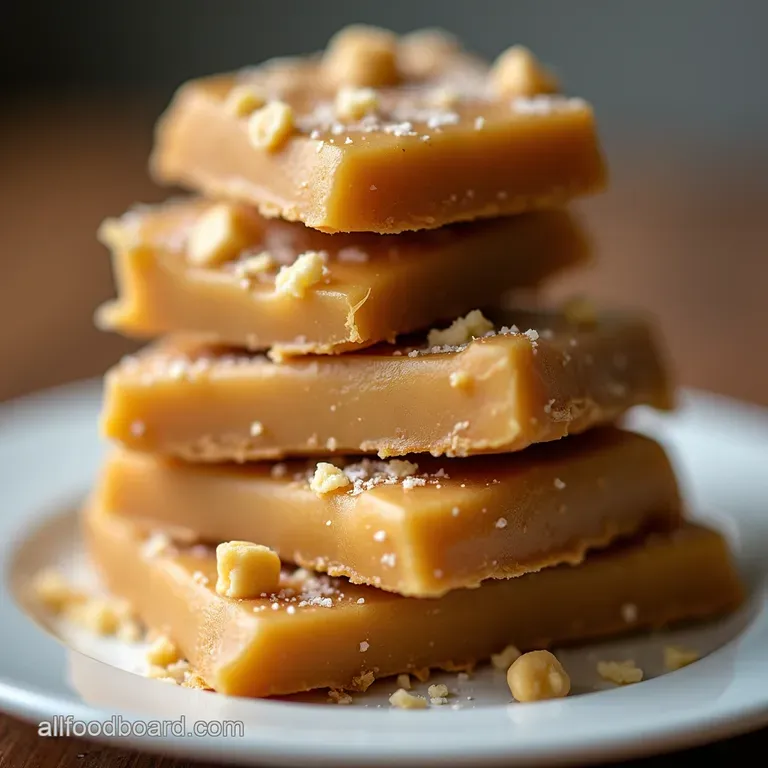
There is a unique satisfaction that comes from conquering a classic confectionery challenge, and few are as rewarding as perfecting Homemade Toffee . This isn't the sticky, chewy stuff you might accidentally stumble upon; we are aiming for that deep, resonant snap when you break off a piece the hallmark of true, well made candy.
Achieving this glorious result relies less on complex ingredients and more on precise temperature control and respecting the science of sugar. This journey into making proper Homemade Toffee Candy starts now, promising a confection that will genuinely redefine your appreciation for this classic treat.
Why This Butter Toffee Recipe Outshines store-bought Versions
store-bought confections often rely on stabilizers and artificial flavourings to maintain a consistent, if somewhat bland, product. By contrast, this Homemade Toffee Recipe uses only the purest elements: butter, sugar, water, and a touch of syrup to manage crystallization.
The result is a depth of flavour that simply cannot be replicated commercially. When you taste this, you immediately recognise the rich, nutty caramelization born from proper heating it’s the very essence of pure indulgence, providing that signature satisfying crunch we all crave.
The Philosophy Behind Blasted Hard Butter Candy
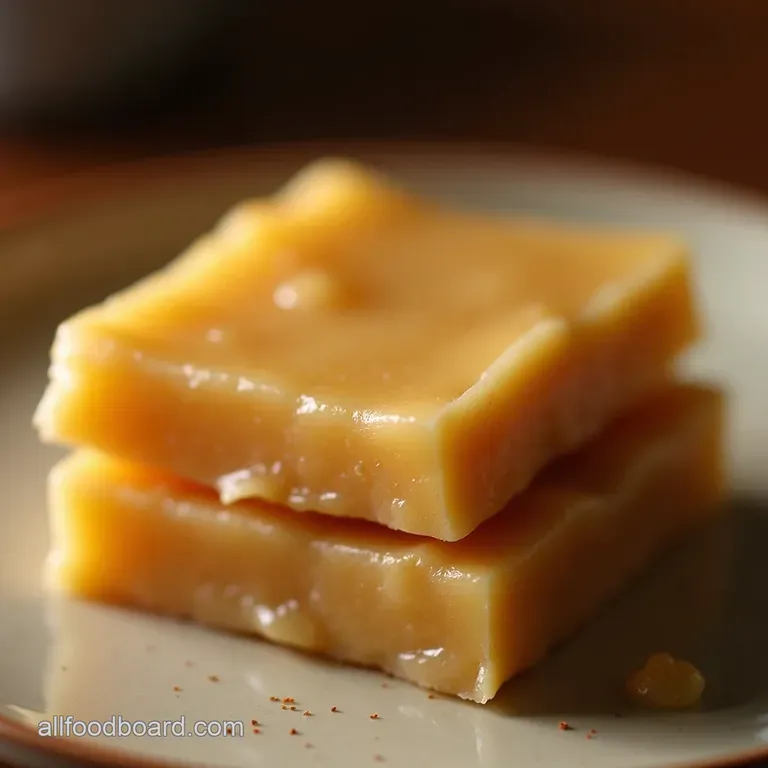
The goal when making this type of toffee, often associated with traditional English Toffee , is to achieve the "hard crack" stage in sugar work. This means boiling the sugar solution until it reaches approximately 305° F ( 152° C).
At this extreme temperature, almost all the water has evaporated, leaving behind a concentrated, glass like structure of caramelized sucrose. The ratio of butter to sugar is carefully balanced to ensure the resulting candy is brittle and shatters rather than bending or remaining chewy a texture that truly defines exceptional Homemade Toffee Bits .
Setting Expectations: The Perfect After Dinner Treat
This deeply flavoured, rich confection is best served in small, potent doses. It isn't meant to be eaten by the handful like fudge; rather, it’s the ideal, sophisticated closer to a rich meal.
Whether enjoyed as a standalone treat or used as an inclusion perhaps crushed for Homemade Toffee for Cookies or scattered over ice cream its intense flavour profile makes it a memorable finale.
Preparing Homemade Candies like this adds a touch of elegance to any gathering.
A Nod to Traditional English Confectionery
While many regions have their own takes on boiled sugar sweets, the richness inherent in this formula leans heavily on traditional British confectionery, which historically relied on ample quantities of high fat dairy.
By ensuring we use high-quality unsalted butter, we build a foundational flavour profile that supports the deep caramel notes created during cooking, resulting in a product that honours its heritage.
Essential Components for Deep Caramelization
Success in this endeavour hinges on the quality and measurement of your inputs. Since there are so few components, each one must pull its weight. For this blueprint, you will require 1 cup (two sticks) of unsalted butter, 2 cups of granulated white sugar, 1/2 cup of water, and a crucial 1/4 cup of light corn syrup (or glucose syrup).
On top of that,, you need 1/4 teaspoon of fine sea salt to provide the necessary counterpoint to all that sweetness.
Related Recipes Worth Trying
- Best Homemade Flaky Biscuits Recipe DinerStyle Lift — Stop making flat biscuits Learn the lamination technique for truly tall tender flaky biscuits from scratch Perfect for gravy or jam Recipe inside
- Foolproof Juicy Flavorful Homemade Chicken Patties Recipe — Ditch the dry freezer finds Learn how to make truly satisfying homemade chicken patties from scratch that stay moist Perfect for an easy weeknight dinner
- The Best Homemade Million Dollar Lasagna Recipe with Ricotta — Forget everything else this Million Dollar Lasagna recipe delivers layers of slowsimmered ragu and creamy ricotta Get the secret to the perfect bake
Prepping Your Station: Tools for Success
Before the heat even touches the pan, you must have your battlefield organized. Candy making moves fast once the temperature climbs, so hesitation means disaster. Prepare your pouring surface first, followed by gathering every required tool so that your hands are free to manage the saucepan.
Quality Counts: Sourcing Your Butter and Sugar
Invest in the best unsalted butter you can find. Because butter constitutes such a high percentage of the final product, its flavour is paramount. Similarly, while standard granulated white sugar works perfectly, ensuring it is fresh and free of clumps helps guarantee smooth dissolution in the initial stage.
The Unsung Hero: Measuring Your Vanilla Extract Precisely
While vanilla is added late, it contributes a beautiful aromatic complexity. Keep the measurement precise; 1 to 1.5 teaspoons is usually sufficient, added right after the mixture comes off the heat. A quality pure vanilla extract will elevate the final flavour beyond simple caramel.
Lining Up Your Pans: Preparing for the Pour
You will need an 8x8 inch baking pan. Line this thoroughly with parchment paper, allowing excess overhang on two opposite sides. This overhang acts as a handle later when you need to lift the completely cooled block of toffee out for breaking.
Lightly grease the parchment itself to ensure there is absolutely no sticking.
Mandatory Equipment Check Before You Start Cooking
The single most important piece of equipment is a reliable, accurate candy thermometer. Do not attempt this Toffee Recipe without one. You also need a heavy bottomed, deep saucepan ideally 3 quarts or larger to allow room for the vigorous boiling without overflowing.
A sturdy wooden spoon or heat proof spatula is necessary for the initial stirring phase.
The Controlled Burn: Achieving the Ideal Temperature
This is where the magic, and the potential danger, resides. The process involves slowly bringing the mixture to a boil, dissolving the sugar crystals completely, and then allowing the temperature to climb unchecked until the required hard crack stage is met.
Accuracy here determines the difference between shatteringly crisp Homemade Toffee Bars and a disappointing, sticky mess.
Mastering the Stages of Toffee Transformation
The total cooking time is usually between 20 to 25 minutes, but every step matters.
step-by-step Melting: Butter, Sugar, and Water Integration
Combine the butter, sugar, water, corn syrup, and salt in the saucepan over medium heat. Stir gently and continuously until the butter has completely melted and you are certain that every grain of sugar has dissolved into the liquid.
You can test this by touching the liquid between your fingers; if it feels gritty, continue stirring until smooth.
Why Stirring Technique Matters Above 300° F
Once the mixture reaches a rolling boil, you must cease stirring. Stirring introduces movement that can cause sugar crystals suspended in the liquid to crash onto the bottom or sides and initiate crystallization throughout the entire batch, resulting in a grainy texture.
Instead, rely on the steady heat and the corn syrup to maintain stability.
The Critical 305° F Mark: Reaching the Hard Crack Phase
Allow the mixture to boil undisturbed until the thermometer registers exactly 300° F to 305° F ( 149° C to 152° C) . This is the non-negotiable endpoint. Immediately remove the pan from the heat.
The mixture should possess a deep, rich amber hue. If it looks pale, return it briefly to very low heat until that desirable, deep caramel colour develops. Immediately stir in your vanilla extract off the heat, then pour swiftly into your prepared pan.
Cooling the Brilliant Batch of Homemade Toffee
Pour the hot liquid into the prepared pan do not scrape the sides of the saucepan, as any cooling sugar adhering there could seize the entire batch. Allow this brilliant batch of Homemade Toffee to cool completely and undisturbed at room temperature for at least an hour and a half until it is utterly solid and brittle.
Troubleshooting and Expert Secrets for Flawless Candy
Even with careful attention, sugar work can occasionally rebel. Knowing how to diagnose and correct minor issues is key to consistent success.
What to Do When Your Toffee Crystalizes Prematurely
If, mid-boil, you notice a grainy texture forming on the surface or sides, it means crystallization has begun. Quickly dip a pastry brush in hot water and gently wash down the sides of the pan above the liquid line to remove any stray crystals.
If the whole batch looks grainy, unfortunately, it is often too late to save, but adding a tiny splash more water and bringing it back to a gentle boil can sometimes re-dissolve the crystals, although this requires extreme care.
Extending the Shelf Life of Your Homemade Toffee Creation
When properly made and stored correctly, this hard toffee can last for several weeks. The main enemy of hard toffee is humidity, which causes the candy to "weep" or become sticky. Airtight storage is paramount for maintaining the structural integrity of your Homemade Toffee Bits .
Flavor Twists: Incorporating Nuts or Sea Salt
For those looking to utilize this base for Homemade Toffee Popcorn or simply enhance the flavour, consider sprinkling toasted nuts like pecans or almonds over the poured toffee while it is still slightly warm, about 10 minutes after pouring.
A generous finishing sprinkle of flaky sea salt at this stage provides an addictive sweet and-salty profile.
The Definitive Guide to Storing Hard Toffee Candy
Once completely cooled and broken into pieces, layer the hard toffee candy between sheets of parchment paper inside a rigid, airtight container. Keep this container in a cool, dry place never the refrigerator, as the condensation there will ruin the texture.
Stored properly, your efforts in creating this spectacular Homemade Toffee will last until the next craving strikes.

Recipe FAQs
My Homemade Toffee turned out chewy instead of hard what did I do wrong?
Ah, that’s the classic novice’s conundrum! It almost always means your sugar mixture didn't get hot enough; it needed to reach the hard crack stage, 300°F (149°C). If it cools down even slightly below that, it retains a taffy like consistency.
Ensure your thermometer is accurate and that you avoid stirring once the mixture starts boiling fiercely.
Can I make this toffee recipe without using a candy thermometer?
Honestly, it's a proper gamble without one! While some old recipes rely on the 'cold water test' (dropping a bit of syrup into cold water to see if it forms hard threads), that takes serious practice.
For guaranteed success with brittle toffee, the thermometer is non-negotiable; it’s the only way to ensure you hit that specific temperature for a proper, satisfying crunch.
Why did my Homemade Toffee start getting grainy or crystallizing while cooking?
That grainy texture happens when the sugar solution breaks down prematurely a process called seeding or crystallization. This is often caused by undissolved sugar granules on the side of the pan splashing back in, or by stirring the mixture too much after it starts boiling.
Make sure you carefully wash down the pan sides with a wet brush before the boil starts, and then leave it well alone!
How should I store this hard butter toffee to keep it crisp?
The enemy of crisp toffee is moisture, so forget the fridge that’s a sure fire way to make it sticky. Keep your shattered pieces in a completely airtight container at room temperature.
Layering the pieces between sheets of parchment paper works wonders to stop them sticking together, and it should keep beautifully for a couple of weeks, though it rarely lasts that long!
I noticed the recipe calls for corn syrup; can I use golden syrup or honey instead?
You absolutely can substitute it with golden syrup or liquid glucose for a similar anti crystallization effect it’s essential for a smooth set. Honey can also work, but be aware that it has a stronger, distinct flavour profile that will change the traditional buttery taste.
If substituting, use the same amount, but remember it might affect the final colour.
Foolproof Homemade Toffee
Ingredients:
Instructions:
Nutrition Facts:
| Calories | 102 kcal |
|---|---|
| Protein | 0.5 g |
| Fat | 9.5 g |
| Carbs | 19.7 g |
| Fiber | 0.5 g |
| Sodium | 3340 mg |
