The Chefs Crispy Chicken Parmigiana No Soggy Bottoms Allowed
- Achieving the Ultimate Crunch: Why This Recipe Works
- The Importance of Sauce and Cheese Integration
- Gathering Your Supplies: Ingredients and Substitutions
- Mastering the Breading Station Components
- Step-by-Step: Constructing the Ultimate Crispy Crust
- Frying, Baking, and Finishing the Chicken Parmesan
- Expert Tips and Chicken Parmesan Troubleshooting
- Meal Planning, Variations, and Serving Suggestions
- Recipe FAQs
- 📝 Recipe Card
Achieving the Ultimate Crunch: Why This Recipe Works
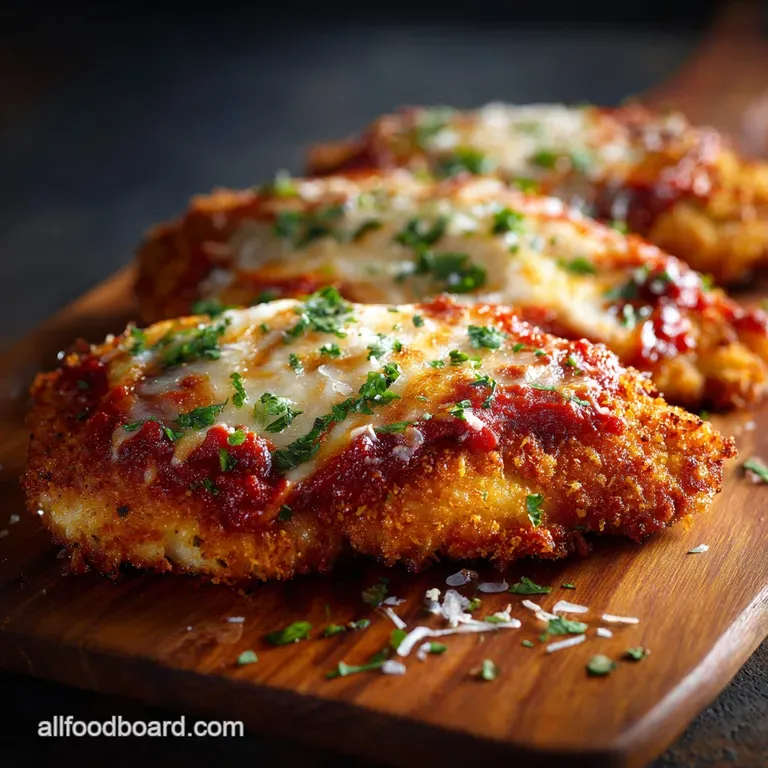
The greatest culinary tragedy involving this classic dish is a soggy bottom. Far too often, an otherwise delicious Chicken Parmesan Recipe is ruined because the crispy exterior the very point of the dish has turned mushy beneath a blanket of sauce and cheese.
This specific method guarantees success by employing a crucial two-step cooking process that ensures maximum structural integrity and flavour depth. We move beyond the standard Chicken Parmesan Recipe Easy approach by first shallow frying the Breaded Chicken Breast until it achieves a deeply golden, shatteringly crisp crust.
This initial blast of heat sets the Panko breading permanently. We then transfer the cutlets to the oven to finish cooking, allowing the cheese to melt and the sauce to warm through without dissolving the precious breading.
It is this combination of the textural resilience of Panko, fortified with finely grated Parmesan, and the strategic layering during the bake that makes this particular Chicken Parmigiana unforgettable.
The Importance of Sauce and Cheese Integration
When crafting Baked Chicken Parmesan , the relationship between the wet components (sauce and cheese) and the dry components (the fried crust) must be managed carefully.
Our simple tomato sauce, made from high-quality San Marzano tomatoes, is cooked down just enough to be rich and flavourful but not overly watery. Crucially, we use low-moisture mozzarella, which melts beautifully without releasing excess liquid that could turn the cutlets damp.
The integration of these elements is controlled during the assembly phase, ensuring the flavour permeates the dish while the crunch remains non-negotiable.
The Crucial Difference in Chicken Parmigiana Preparation
Many rushed recipes attempt to bake the chicken straight from the breading station, or only pan-fry without a finish in the oven. The oven only technique, while easier, often fails to deliver the golden, intense crust achieved by hot oil.
Conversely, frying the chicken until it is fully cooked risks drying out the interior by the time the crust is perfect. The key distinction in our Chicken Parmesan Recipe Oven technique is that the shallow fry sets the crust and par-cooks the meat (to about 145 150°F), allowing the final 12– 15 minutes in the 400°F (200°C) oven to gently finish the interior cooking while the cheese blankets melt.
Defeating the Damp: Prepping Your Cutlets for Perfection
Achieving truly tender and uniformly cooked chicken requires prepping the meat properly. We start with two large chicken breasts, which are horizontally sliced into four thinner cutlets. These cutlets are then carefully pounded to a consistent thickness of about 1/4 inch (6 mm).
Uniformity is vital because it guarantees all four cutlets finish cooking at the exact same moment. Once pounded, the meat must be aggressively seasoned with salt and pepper. Seasoning the meat directly, rather than relying solely on the seasoning in the flour and Panko, is essential for deep flavour penetration.
Understanding the Chicken Cutlet Prep Secret
After the tedious work of breading is complete, there is one small, yet absolutely vital, step that separates the amateurs from the pros: chilling. Once the cutlets are fully coated in the flour, egg, and Panko/Parm mixture, they must be placed on a wire rack and refrigerated for a minimum of 10 minutes.
This pause allows the egg wash the "glue" to properly set and fully adhere the breading to the protein. This hydration process prevents the coating from sloughing off prematurely when it hits the hot oil, ensuring you retain every last crisp shard of your beautiful crust.
Why We Skip the Quick Bake Method
While a quick bake might seem like an Easy Baked Chicken solution, relying solely on the oven to cook the raw, breaded chicken results in a lacklustre, drier crust.
Baking relies on radiant heat, which simply cannot replicate the high, direct heat transfer of oil, which is necessary to flash fry and seal the exterior. Our hybrid method harnesses the best of both worlds: the superior crispness delivered by the pan-fry, followed by the gentle, even finish provided by the Chicken Parmesan Recipe Oven setting.
Gathering Your Supplies: Ingredients and Substitutions
Success in any Italian American dish hinges on the quality of a few core components. For this Chicken Parmesan , you will need two key items for the crust: the highly texturized Japanese Panko breadcrumbs (1 1/2 cups) and 1/2 cup of finely grated, aged Parmesan cheese.
For the rich, simple sauce, source the best whole, peeled San Marzano tomatoes you can find (a 28 oz can), crushed by hand for texture. You’ll need two large eggs, 1/2 cup of all-purpose flour, and approximately 6 ounces of low-moisture mozzarella for the melty top.
For frying, a neutral, high smoke point oil like canola or grapeseed is preferred.
Mastering the Breading Station Components
A well organized breading station is the hallmark of a clean and efficient cooking process. Setting up three separate, shallow dishes in assembly line fashion (flour, egg, Panko) minimizes mess and ensures consistency when creating your Breaded Chicken Breast cutlets.
Quality Check: Sourcing the Best Italian Components
The integrity of the finished dish relies heavily on the quality of your base ingredients. Beyond the chicken, insist on using authentic San Marzano tomatoes for their sweetness and low acidity.
When selecting mozzarella, ensure it is low-moisture the fresh, watery balls of mozzarella are lovely for salads but will cause a significant moisture release in the oven, compromising your crispness.
Tool Checklist: Equipment for Perfect Deep Frying
While this isn't deep frying, per se, the right equipment is critical for achieving a perfect shallow fry. You’ll need a heavy bottomed, 10 inch cast iron skillet or a similar heavy frying pan. The density of cast iron helps regulate and maintain the oil temperature when the cold chicken is introduced.
Also essential is a 9x13 inch baking dish for the final assembly and a baking sheet fitted with a wire rack used both for chilling the breaded cutlets and for draining the freshly fried chicken.
The Science of Perfect Parmigiano Reggiano
The cheese mixed into the Panko is not just for flavour; it serves a functional purpose. Genuine Parmigiano Reggiano, grated finely, contains enough fat and salt to enhance browning and help seal the Panko layer. It adds an incomparable depth of umami to the crust that powdered or pre-grated cheeses cannot match.
Prepping the Chicken: Slicing and Pounding Techniques
Start with boneless, skinless chicken breasts. Lay the breast flat on a cutting board, place your non-dominant hand firmly on top, and slice horizontally to create two uniform pieces. Place these cutlets between plastic wrap or parchment paper to prevent tearing.
Using a smooth sided meat mallet or even a rolling pin, gently pound the thicker areas until the entire cutlet reaches that perfect 1/4 inch thickness.
Related Recipes Worth Trying
- 18Minute Keto Garlic Parmesan Zucchini Noodles Pasta Recipe — This Garlic Parmesan Zucchini Noodles Pasta is your quick weeknight winner Learn the secret to nonsoggy tendercrisp Keto Zucchini Noodles coated in a creamy...
- How To Roast The Perfect Lemon and Garlic Whole Roasted Chicken — Master this easy Lemon and Garlic Whole Roasted Chicken recipe Our method guarantees shatteringly crisp skin and juicy meat every time The essential whole...
- Spanish Chicken Chorizo One Skillet Meals Easy Paella Dinner — Ditch the washing up with this cracking Spanish Skillet Meal Smoky chorizo tender chicken and creamy ricea foolproof Easy Skillet Dinner ready in under an hour
step-by-step: Constructing the Ultimate Crispy Crust
The process of creating a non-soggy crust must be methodical. Begin with the flour station, which should be seasoned with salt and pepper; this layer adheres to the slightly moist chicken surface, drying it out and providing a stable foundation.
Next, the cutlet is dipped fully into the lightly whisked egg the essential binder. Finally, press the cutlet firmly into the Panko/Parm mixture. Do not simply lay it in; press hard on both sides to ensure the Japanese breadcrumbs fully embed themselves into the moist egg layer, guaranteeing maximum surface area for crunch.
Frying, Baking, and Finishing the Chicken Parmesan
This stage is the final transformation, turning perfectly prepped ingredients into a glorious Chicken Parmesan .
Pounding, Seasoning, and Drying the Chicken Cutlets
Before starting the breading process, ensure the seasoned and pounded cutlets have been patted dry with paper towels. Any surface moisture, aside from the deliberate egg wash, will inhibit the adherence of the flour and could lead to a less reliable crust structure.
Executing the Triple Dip Breading Process
Maintain cleanliness throughout the triple dip process: keep one hand designated as the "wet" hand (for egg) and the other as the "dry" hand (for flour and Panko). This simple rule prevents clumping and maintains the integrity of your ingredients.
Ensure each cutlet is completely coated, shaking off excess flour and allowing excess egg to drip before moving to the next station.
Monitor and Maintain: Achieving the Correct Oil Temperature
Pour about 1/2 cup of high heat neutral oil into your heavy skillet. Heat the oil over medium high heat until it reaches approximately 350°F (175°C). If you don't have a thermometer, a small pinch of Panko should sizzle instantly but not burn.
Fry only two cutlets at a time to prevent the oil temperature from dropping drastically. Cook for 2 to 3 minutes per side until they are deeply golden, then immediately move them to the wire rack to drain while you fry the remaining batch.
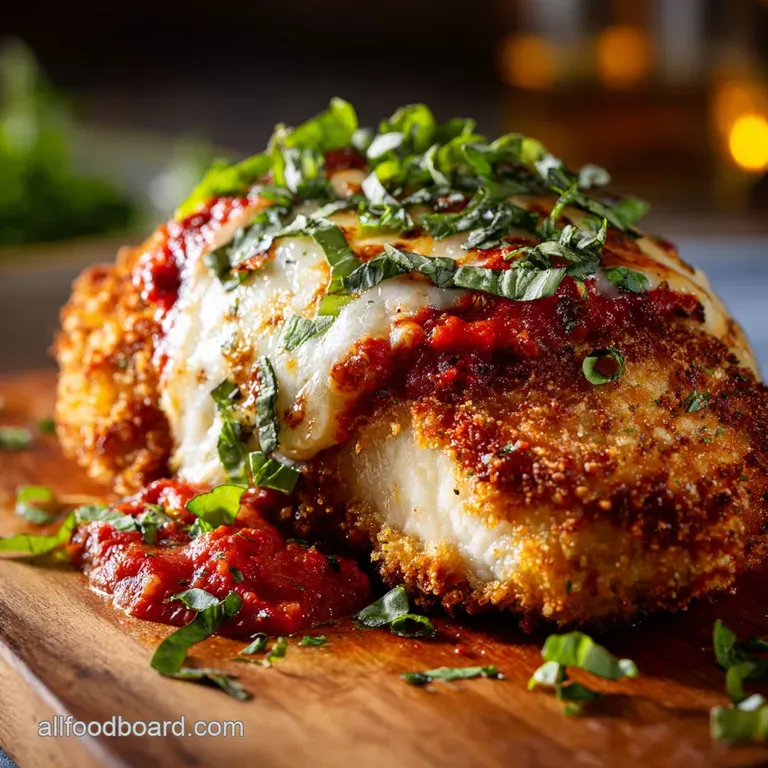
Layering Logic: Building the Baked Dish for Crispness
Preheat your oven to 400°F (200°C). Begin assembly by spreading a thin, sparing layer of the simple tomato sauce across the bottom of the 9x13-inch baking dish this prevents the chicken from sticking but avoids saturation. Place the crispy cutlets atop the sauce.
Spoon just 2 3 tablespoons of sauce over the centre of each cutlet, leaving the edges of the crust exposed. Top generously with shredded low-moisture mozzarella and a final sprinkle of Parmesan. Bake for 12– 15 minutes.
For that picture perfect molten brown top, finish the Baked Chicken Parmesan under a hot broiler for a minute, watching carefully to prevent burning.
Expert Tips and Chicken Parmesan Troubleshooting
The most crucial advice for ensuring a successful Chicken Parmesan hinges on preparation and temperature control. Always heed the 10-minute chilling rule after breading; this step is non-negotiable for crust integrity.
When frying, remember that oil that is too cool will saturate the cutlet, resulting in an oily, dense texture, while oil that is too hot will burn the Panko before the meat has a chance to par-cook.
On top of that,, do not overcrowd the skillet during frying; maintain space for even cooking and consistent oil temperature.
Meal Planning, Variations, and Serving Suggestions
Can I Use an Air Fryer for the Cutlets? (Crispness Comparison)
For those looking for a slightly lighter take on this classic, the Chicken Parmesan Air Fryer method is an excellent alternative to shallow frying. Air frying, while requiring less oil, achieves remarkably satisfying crispness and provides a fantastic alternative to traditional pan-frying.
Preheat your air fryer, mist the breaded cutlets lightly with cooking spray, and cook until golden. While the pan-fried cutlet offers a richer, oil-sealed flavour, the air fryer delivers a lighter, crunchier Easy Baked Chicken foundation.
Reheating Strategies to Restore the Original Crunch
Never reheat leftover Chicken Parmesan in the microwave; it is the death knell for the crisp crust. To restore the original texture, preheat your oven to 350°F (175°C).
Place the leftovers directly on a baking sheet (not in the sauce filled dish) and reheat for 10– 15 minutes until warmed through and the crust is revitalized. Alternatively, the air fryer works wonders for quick reheating and re-crisping.
Meal Prepping: Assembling Chicken Parm Ahead of Time
You can easily break down the Chicken Parmesan Recipe into stages for meal prepping. The tomato sauce can be made days in advance. The breaded cutlets, before frying, can be frozen solid on a tray and then transferred to a freezer bag for storage.
When ready to cook, fry them straight from frozen, then proceed with the final assembly and bake. Avoid fully assembling the dish until the day you plan to serve it, as prolonged contact with the sauce will inevitably soften the cutlets.
Suggested Pairings: Sides that Complement the Richness
The richness of the Chicken Parmesan demands side dishes that offer balance. The classic pairing is serving the cutlets over a tangle of buttery, garlic infused spaghetti or linguine.
For a lighter approach, serve alongside a sharply dressed arugula or rocket salad tossed with a simple lemon vinaigrette. The peppery bite and bright acid of the salad provide a welcome counterpoint to the cheesy, savoury depth of the dish.
A medium bodied Italian red, like a Chianti, is the perfect beverage to complement the acidity of the tomato and the hearty protein.

Recipe FAQs
My biggest fear is a soggy bottom! How do I guarantee my Chicken Parmesan stays beautifully crispy?
You’ve hit the nail on the head; nobody wants a soggy bottom! The secret lies in Panko breadcrumbs they are the crisp champion and a non-negotiable upgrade from standard fine crumbs.
Crucially, don't over sauce the chicken; use a thin layer beneath the cutlet and spoon only a minimal amount on top of the crust before baking. Finally, the chilling step after breading locks the coat onto the chicken, preventing it from flaking off in the oil.
This looks like a bit of a marathon; what parts can I prep ahead of time to save a few precious minutes?
Absolutely, you can get ahead of the game! Treat the tomato sauce like Sunday dinner gravy; it only gets better with age, so make it up to three days in advance. You can also complete the entire three stage breading process (flour, egg, Panko/Parm) and place the raw, coated cutlets on a wire rack.
Cover them loosely and chill for up to 12 hours. When it's time for dinner, all the hard graft is done and dusted.
I’m trying to cut back on oil. Can I skip the initial pan-fry and just bake these cutlets straight away?
While technically possible, skipping the pan-fry means you sacrifice that gorgeous golden colour and crucial textural crunch that makes Chicken Parm so appealing. The brief frying step is key to setting the crust firmly.
If you must skip it, spray the breaded cutlets liberally with cooking spray or a light coat of olive oil before baking them at a slightly higher temperature (around 425°F/220°C). This will encourage browning, but do manage your expectations on the final crispness!
It's quite a heavy dish what are the best pairings or side dishes to serve alongside Chicken Parm?
Because Chicken Parm is such a rich, hefty classic, you need something sharp and fresh to cut through that cheesy, fried goodness. A simple, peppery rocket (arugula) salad dressed with a sharp lemon vinaigrette is spot on, keeping things light and acidic.
If you need a carb fix, avoid heavily sauced pasta; stick to simple buttered linguine or even some garlicky sautéed green beans for an easier option. Job done.
Got a mountain of leftovers. How should I store and reheat Chicken Parm without turning the crust into mush?
Store leftovers in an airtight container in the fridge for up to three days, but avoid the microwave like the plague when reheating that’s a recipe for instant mush. To bring the crust back to life, place the cutlets on a wire rack over a baking sheet.
Reheat them in a preheated oven (350°F/175°C) until warmed through. The rack allows air to circulate underneath, reviving that crispy exterior beautifully, making the leftovers taste nearly as good as the first serving.
Crispy Panko Chicken Parmesan

Ingredients:
Instructions:
Nutrition Facts:
| Calories | 1987 kcal |
|---|---|
| Protein | 48.0 g |
| Fat | 33.2 g |
| Carbs | 105.4 g |
| Fiber | 35.1 g |
| Sodium | 1286 mg |
