Grits: the Quintessential Creamy, Cheesy Lowcountry Recipe
- The Definitive Guide to Creamy, Stone-Ground Grits
- Why This Creamy Grits Recipe Works: The Science of Simmering
- Essential Ingredients and Expert Substitutions
- Making the Quintessential Creamy, Cheesy Grits (Step-by-Step)
- Chef's Tips, Troubleshooting, and Common Grits Mistakes
- Storage and Reheating Creamy Grits
- Perfect Serving Suggestions and Lowcountry Pairings
- Recipe FAQs
- 📝 Recipe Card
The Definitive Guide to Creamy, Stone Ground Grits
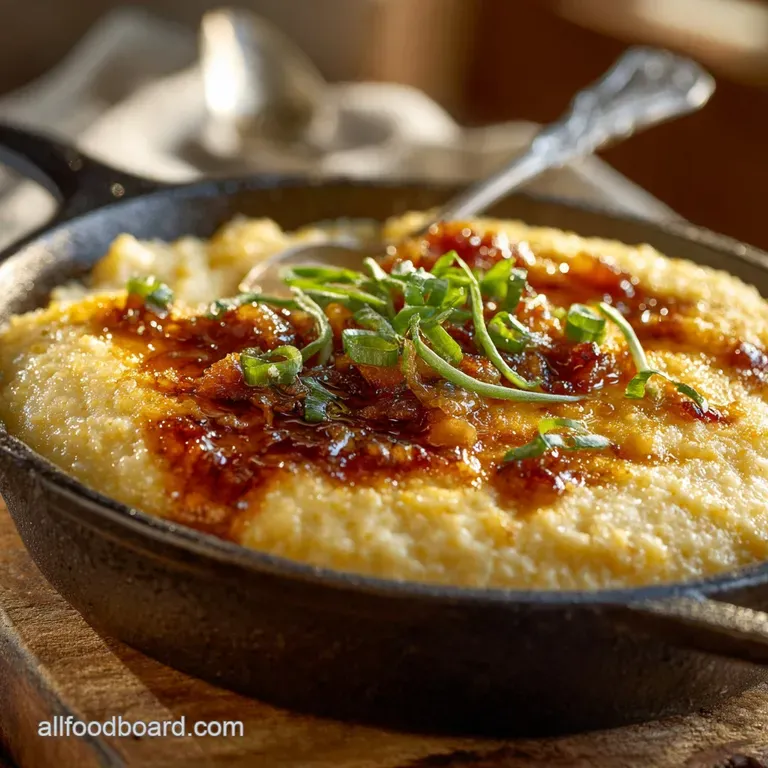
Forget everything you think you know about sad, lumpy breakfast mush right now. When proper, Lowcountry style grits are done correctly, they smell profoundly of sweet, slow cooked corn and warm, melted butter.
The texture should be like a thick, silky river flowing off your spoon, not rigid wallpaper paste; it’s an absolute game changer.
Sure, this method takes a little more time than those terrible instant packets, but the hands-on effort is honestly minimal. Grits are one of the cheapest, most comforting things you can whip up, effortlessly transforming basic pantry corn into pure, savoury gold.
Learning this specific slow simmering trick changed my whole perspective on Southern cooking, seriously.
We're going to use real, stone ground grits today the kind that hold up beautifully and deliver serious flavor. Grab your heaviest saucepan, settle in, and let’s get this glorious, creamy journey started.
Why This Creamy Grits Recipe Works: The Science of Simmering
What Makes Lowcountry Grits Different?
Lowcountry style isn't just about geography; it's a dedicated technique focused on maximum richness and depth of flavour. This means we are ditching plain tap water for a blend of savory stock and finishing everything with generous amounts of high fat dairy. We are aiming for serious, unforgettable richness here, baby.
Achieving the Perfect Risotto Like Texture
We want our finished dish to be perfectly spoonable, not solid or grainy. The goal is a velvety texture that flows off the spoon, much like a well made Italian risotto. Achieving this texture relies entirely on using the correct liquid ratio and exercising patience during the long, gentle simmer.
Recipe Notes: Time and Yield
Yes, these stone ground beauties require about 45 minutes of cooking time, but your active stirring time is maybe only ten minutes total. Patience is non-negotiable with the coarser corn.
This batch yields four very generous side servings, perfect for a hearty brunch or pairing with rich proteins.
Maximizing Corn Flavor Through Slow Hydration
If you try to rush the cooking process, you end up with a raw, grainy taste; no thank you. Slow, gentle hydration allows the tough corn proteins to fully swell and the flavor compounds to deepen significantly. It’s similar to making bone broth the long process yields a vastly superior depth of flavour.
The Importance of Constant Stirring and Starch Release
Stirring constantly is primarily about preventing scorching (and believe me, the smell of burnt grits lingers forever!). More importantly, stirring gently breaks down the outer layer of starch on the corn kernels.
This released starch is what naturally thickens the liquid and emulsifies the added butter, creating that signature, impossibly creamy texture.
Choosing the Right Fat and Dairy for Unmatched Richness
I always finish my grits with cold, unsalted butter first, then whole milk or half and half. The fat coats the individual grains, preventing sticking, and adds a magnificent, mouth coating quality.
For true decadence, don't be afraid to use a splash of heavy cream at the very end it’s totally worth the extra calorie commitment.
Essential Ingredients and Expert Substitutions
Stone Ground Grits vs. Instant Varieties
Instant grits are engineered for speed, but they honestly taste flavorless and lack any satisfying texture. Always hunt down stone ground grits ; they have a robust texture and deep, nutty corn flavor because they still contain the nutrient rich corn germ.
This is the only way to experience truly great yellow corn grits recipes.
The Best Liquid Blend: Water, Stock, and Milk Ratios
A simple 3:1 ratio of water to savory stock (chicken or veggie) adds a subtle complexity to the final product. This depth of flavor is what makes your creamy grits recipe taste gourmet instead of watery. We finish the mixture with rich milk, not just plain water, for that perfect, luxurious sheen.
Selecting Sharp Cheese for Maximum Zing
You absolutely need something tangy and bold to cut through all that rich butter and dairy. Sharp cheddar is the industry standard because it melts beautifully and delivers a satisfying, necessary punch of flavour. If you choose a mild cheese, your dish will taste flat.
Salt and Pepper: When and How Much to Add
Salt is truly your secret weapon here, and grits require a surprising amount of seasoning. Add a full teaspoon to the initial boiling liquid; the corn absorbs seasoning best during the actual cooking process. Don't forget to grind in copious amounts of black pepper at the very end, too.
| Ingredient | My Recommendation | Expert Substitution |
|---|---|---|
| Stone Ground Grits | Medium Grind Yellow | Coarse Polenta (longer cook time) |
| Stock (Chicken/Veggie) | Low Sodium | Water + 1 tsp good Bouillon Powder |
| Sharp Cheddar | Aged White or Yellow | Gruyère or Smoked Gouda |
| Whole Milk | Half and Half | Cashew Cream (for dairy-free) |
Making the Quintessential Creamy, Cheesy Grits (step-by-step)

Pre-Soaking: Reducing Cook Time and Ensuring Uniformity
You don’t actually need to soak the corn itself; the real key is ensuring your cooking liquid is violently boiling first. This prevents the heavy cornmeal from sinking immediately and forming those dreaded gluey clumps. It’s a simple preventative measure that saves huge headaches later on.
The Initial Simmer: Combining Grits and Liquid Base
Pour the water, stock, and salt into your heavy pot and bring it to a rolling boil over high heat. Once it’s roaring, reduce the heat slightly to medium high. Pour the dry grits in a slow, steady stream while whisking vigorously for a full 30 seconds; this is your absolute insurance policy against lumpy grits.
Low and Slow: The Crucial 45 Minute Hydration Period
Immediately reduce the heat to the absolute lowest setting your stove can manage; we are talking about maintaining only the gentlest burble, never a boil. Cover the pot tightly. Cook for 35– 45 minutes, but you must lift the lid and stir deeply, scraping the bottom, every 5– 7 minutes to prevent scorching.
Finishing Touches: Folding in Cheese and Butter
Take the pot completely off the heat before you add anything else. Stir in the measured butter first until fully melted, giving the mixture a glorious sheen. Then, incorporate the milk or cream, followed by your grated cheese, folding gently until it melts into a perfectly gooey consistency.
Chef's Note: If you want a truly spectacular, Lowcountry restaurant result, you should reserve about a half cup of the boiling stock. Use this hot liquid to thin the grits out right before you serve them; it keeps them beautifully loose and spoonable, even if they've thickened slightly off the heat.
Chef's Tips, Troubleshooting, and Common Grits Mistakes
How to Rescue Overly Thick or Stiff Grits
Did your grits seize up while you waited for the bacon to crisp? Don't panic, it happens all the time. Gently stir in a small splash of hot milk or hot water maybe 1/4 cup at a time until they relax.
Bring them back to a gentle simmer for just two minutes while stirring continuously, and they will immediately regain that beautiful creamy texture.
Preventing Clumping and Achieving Smoothness
Lumpy grits are a direct result of two things: using cold liquid, or dumping all the cornmeal in at once without whisking. The fix is always the same: Whisk while you pour . Maintain a steady, vigorous boil when the grits first hit the liquid, then reduce the heat immediately.
The Role of Resting Time Off the Heat
Grits benefit hugely from a five minute rest after you’ve added the cheese and butter. Simply cover the pot and let them sit. This allows the residual heat to perfectly finish melting the cheese and lets those starches relax into a truly velvet, cohesive texture.
Storage and Reheating Creamy Grits
Refrigerating Leftovers: Keeping Them Fresh for Days
Freshly cooked grits keep incredibly well in the fridge for up to four days when stored in an airtight container. Be warned, they will solidify completely upon cooling! They will look exactly like a firm block of yellow polenta.
The Best Method for Restoring Day-Old Texture
Reheating cooked grits requires adding back moisture. Place the stiff, portioned block into a small saucepan with 1/4 cup of milk or water per serving. Stir constantly over the lowest heat setting until they melt back down into that gorgeous creamy state.
You will likely need to adjust seasoning with extra salt and pepper afterward.
Can You Freeze Grits? (Spoiler: Proceed with Caution)
Yes, you can freeze them, but I must warn you that the texture suffers a bit. They sometimes turn slightly grainy upon thawing because the dairy fats separate from the cooked corn.
For best results, freeze them before adding the cheese, store them flat in a zip-top bag, and try to use them within three months for the best quality.
Perfect Serving Suggestions and Lowcountry Pairings
These creamy grits are the ultimate comfort food foundation. They work as an incredibly versatile side dish or a substantial savory breakfast.
If you’re going classic, serve them topped with a runny fried egg and maybe some crispy prosciutto or crumbled breakfast sausage. A dash of tangy, vinegary hot sauce (like a Louisiana style or Pecan Pepper Sauce) cuts through the richness beautifully.
Or, if you want to use them as the perfect foundation for a classic Southern main, they are the absolute cornerstone of my famous Old Charleston Shrimp and Grits My Secrets Out recipe they are honestly divine together. For drinks, a strong coffee is a must for breakfast, or try a crisp, dry white wine like Sauvignon Blanc for a dinner pairing.

Recipe FAQs
Why are my grits lumpy or becoming too thick too quickly?
Lumps usually occur when the grits are added too quickly to boiling liquid; whisk constantly as you pour the grains into the pot in a slow, steady stream. If the mixture becomes excessively thick before the grains are fully tender, simply stir in an extra splash of hot water or stock until the desired loose consistency is achieved.
Can I use instant or quick cooking grits instead of stone ground?
While you can substitute them, quick cooking varieties will not achieve the rich depth of flavor or the signature luxurious texture required for this recipe. Stone ground grits require the long simmering time to fully hydrate and release their starch, which is essential for that creamy, spoonable result.
What is the best liquid ratio for maximum creaminess?
The standard ratio is 4:1 (liquid to grits), but the secret to maximum creaminess is using a blend of half water/half stock for flavor during the cooking process. For the final addition, finish the dish by stirring in whole milk, half and-half, or heavy cream just before adding the cheese and butter.
How can I make these cheesy grits vegan or dairy-free?
Substitute the butter with a vegan butter stick or refined coconut oil, and use full fat oat milk or cashew cream for the dairy addition at the end. For the cheesy flavor, incorporate generous amounts of nutritional yeast or a high-quality vegan smoked cheddar alternative.
When should I add the salt, cheese, and other seasonings?
You should only incorporate the salt, cheese, and final seasonings, like black pepper or hot sauce, after the grits are fully cooked and removed from the heat. Adding cheese too early can sometimes result in a grainy texture, and adding salt too soon can hinder the hydration of the corn kernels.
Why do stone ground grits take so much longer to cook than other varieties?
Stone ground grits are less processed, meaning the corn kernels are coarsely ground, retaining their hull and germ. This larger particle size requires extensive simmering often 45 minutes to an hour to fully break down the starches, which is necessary for superior texture and flavor development.
How should I store and reheat leftover grits?
Store leftovers tightly sealed in the refrigerator for up to four days; they will solidify significantly due to starch cooling. To reheat, scoop the hardened grits into a saucepan and gradually whisk in hot milk or water (about 1/4 cup per serving) until they become loose and creamy again.
Creamy Lowcountry Stone Ground Grits Recipe

Ingredients:
Instructions:
Nutrition Facts:
| Calories | 595 kcal |
|---|---|
| Protein | 22.2 g |
| Fat | 33.5 g |
| Carbs | 51.9 g |
