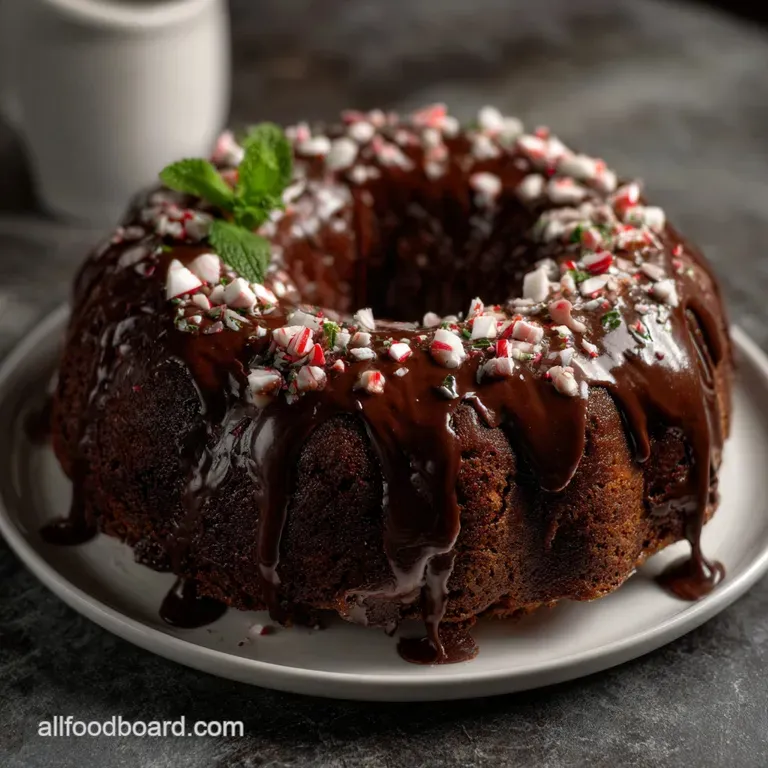
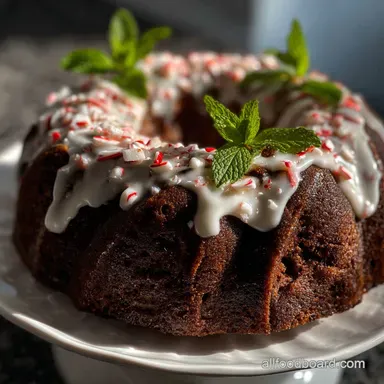
Homemade Chocolate Peppermint Bundt Cake
- Time: Active 15 minutes, Passive 50 minutes, Total 1 hour 5 minutes
- Flavor/Texture Hook: Cooling mint meets fudgy, dark chocolate
- Perfect for: Holiday parties, family gatherings, or winter cravings
- The Best Homemade Chocolate Peppermint Bundt Cake
- Smart Techniques for Better Baking
- Essentials for Festive Bundt Success
- Deep Dive Into Key Ingredients
- Required Tools for Success
- Step-by-Step Baking Process
- Common Baking Hurdles Solved
- Smart Ingredient Swap Options
- Batch Size Guidelines
- Kitchen Folklore Realities
- Storage Tips and Reducing Waste
- Creative Ways to Serve
- FAQ: Making the Best Choices
- Common Questions
- 📝 Recipe Card
The aroma of peppermint hitting hot chocolate is one of those sensory triggers that immediately signals the holidays. It’s that sharp, cooling scent mixed with the earthy, rich smell of dark cocoa.
But let’s be honest, many festive cakes look beautiful on the outside and end up being as dry as a desert once you slice into them. I've spent years trying to find the balance between a cake that stands up to a heavy bundt mold and one that actually melts in your mouth, which is why I developed this specific Homemade Chocolate Peppermint Bundt Cake.
If you’ve ever felt disappointed by a store-bought dessert that tasted more like sugar than actual chocolate, this is your solution. We’re going for a deep, nearly black chocolate base that provides a dramatic backdrop for the white chocolate drizzle.
It's a crowd pleaser that doesn't require advanced decorating skills, which is a massive win when you’re busy with family, making this Homemade Chocolate Peppermint Bundt Cake a holiday essential.
Right then, let's talk about what makes this specific cake different from the rest. Most recipes rely solely on butter for flavor, but we’re using a combination of oil and sour cream. Why?
Because oil stays liquid at room temperature, ensuring the cake remains moist for days, while the sour cream adds a subtle tang that balances the sweetness. Trust me on this, once you try the "boiling water trick" in this recipe, you'll never go back to standard mixing methods for a chocolate cake like this Homemade Chocolate Peppermint Bundt Cake.
The Best Homemade Chocolate Peppermint Bundt Cake
Smart Techniques for Better Baking
Getting that signature "shatter" from the peppermint topping while keeping the cake interior silky requires a bit of science. Here is why the technique used for this Homemade Chocolate Peppermint Bundt Cake outperforms your standard box mix or traditional sponge.
- Cocoa Blooming: Adding 240ml boiling water to the cocoa powder triggers "blooming," which dissolves the cocoa solids and releases aromatic compounds that remain trapped in dry powder.
- Starch Gelatinization: The heat from the boiling water partially cooks the 260g all-purpose flour instantly, creating a more stable structure that holds moisture better during the 50 minutes bake time.
- Acidic Leavening: Using both 2 tsp baking soda and 2 tsp baking powder allows the acidity in the 240g full fat sour cream to react immediately, creating tiny air pockets for a lighter crumb.
- Protein Denaturation: The 2 large eggs provide the scaffolding, but because we mix them with 120ml vegetable oil first, we coat the proteins to prevent a rubbery texture in your final Homemade Chocolate Peppermint Bundt Cake.
Fast vs Classic Method Comparison
| Feature | Fast Method (This Recipe) | Classic Creaming Method |
|---|---|---|
| Fat Source | Oil and Sour Cream | Solid Butter |
| Mixing Time | 5 minutes (One bowl) | 15 minutes (Creaming butter/sugar) |
| Texture | Fudgy and Velvety | Light and Airy |
| Shelf Life | Stays moist for 4 5 days | Dries out after 2 days |
Essentials for Festive Bundt Success
The Science of Why it Works: The Maillard reaction occurs between the 400g granulated sugar and the proteins in the 2 large eggs, creating that deep brown, flavorful crust.
Simultaneously, the 2 tsp baking soda reacts with the acidic cocoa and sour cream to produce carbon dioxide, ensuring the heavy batter of the Homemade Chocolate Peppermint Bundt Cake rises beautifully.
Chemical Function Table
| Ingredient | Chemical/Physical Role (Science) | The Pro Secret (Why This Matters) |
|---|---|---|
| Dutch process Cocoa | Alkalized pH level (neutralized acidity) | Provides the darkest color and smoothest chocolate flavor without bitterness. |
| Full fat Sour Cream | Acid based fat emulsification | Softens gluten strands to ensure the cake doesn't become tough or bread like. |
| Boiling Water | Solvent based flavor extraction | Hydrates the cocoa particles more deeply than cold milk or water ever could. |
| Peppermint Extract | Volatile oil aromatic delivery | Provides a concentrated burst of flavor that doesn't bake off at high temperatures. |
Deep Dive Into Key Ingredients
To get the results we want, specific ingredients matter more than others. Just like when I'm making my Homemade Breakfast Biscuits recipe, the fat content and temperature are non-negotiable for success when baking the Homemade Chocolate Peppermint Bundt Cake.
- 260g All-purpose Flour: Provides enough gluten for structure without the heaviness of bread flour.
- 400g Granulated Sugar: Why this? It provides bulk and hygroscopic properties, keeping the cake moist by attracting water.
- 75g Unsweetened Dutch process Cocoa Powder: Why this? The alkalization process makes it darker and less acidic than natural cocoa.
- 2 tsp Peppermint Extract: Don't use "mint" extract, which can taste like toothpaste; stick to pure peppermint.
- 240g Full fat Sour Cream: Why this? The high fat and lactic acid create a tender, almost creamy mouthfeel.
- 120ml Vegetable Oil: Using oil instead of butter ensures the cake stays soft even when refrigerated, a key feature of this Homemade Chocolate Peppermint Bundt Cake.
- 170g White Chocolate Chips: These form the base of our ganache; use a high-quality brand like Ghirardelli for better melting.
Chef's Tip: Freeze your 50g of candy canes for 10 minutes before crushing them. This prevents them from becoming sticky and allows for cleaner, sharper "shatter" pieces when you garnish the cake.
Required Tools for Success
You don't need a kitchen full of gadgets, but a few specific items make this much easier. A Nordic Ware 10 12 Cup Bundt Pan is the gold standard because its heavy cast aluminum ensures even heat distribution for an evenly baked Homemade Chocolate Peppermint Bundt Cake.
You'll also want a Pyrex Glass Measuring Cup for that boiling water plastic can sometimes warp or hold onto old scents.
A sturdy Whisk is actually better than a stand mixer for this recipe. Since we aren't creaming butter, a hand whisk allows you to feel the texture of the batter and prevents over mixing. Over mixing leads to a tough cake, and we want this to be as tender as possible. If you love a good chocolatey treat but want something colder, you might also enjoy my Chocolate Milkshake recipe for a quick afternoon snack.
step-by-step Baking Process
- 1. Oven Temp
- Exactly 350°F (175°C).
- 2. Internal Temp
- 205°F to 210°F for the perfect crumb.
- 3. Cooling Time
- Exactly 10 minutes in the pan before flipping.
Step 1: Prep the Pan for a Clean Release
Grease a 12 cup non-stick Bundt pan thoroughly with baking spray or melted shortening. Note: This prevents the delicate intricate designs of the pan from catching the batter. Dust with a little cocoa powder instead of flour to avoid white streaks on your dark cake.
Step 2: Combine the Dry Elements
Whisk 260g all-purpose flour, 400g granulated sugar, 75g cocoa powder, 2 tsp baking soda, 2 tsp baking powder, and 1 tsp salt in a large bowl. Note: Sifting the cocoa powder here prevents stubborn lumps from forming later. Mix until the color is a uniform light brown, ensuring the dry base for the Homemade Chocolate Peppermint Bundt Cake is ready.
Step 3: Integrate the Liquid Ingredients
Add 2 large eggs, 240g full fat sour cream, 120ml vegetable oil, and 2 tsp peppermint extract to the dry mix. Note: Mixing the fats and proteins now creates a protective barrier around the flour's gluten. Stir with a whisk until the batter is thick and very dark.
Step 4: The Boiling Water Pour
Slowly stream in 240ml boiling water while whisking constantly. Note: The heat "blooms" the cocoa and thins the batter to a pourable consistency. The batter will look very thin, almost like a heavy soup, but don't worry that's exactly what we want for this type of cake.
Step 5: Bake Until Set
Pour the batter into the prepared pan and bake for 50 minutes until a skewer inserted comes out with just a few moist crumbs. Note: The surface should look matte and feel slightly springy to the touch. Avoid opening the oven door before the 40 minute mark to prevent the cake from collapsing.
Step 6: The Critical Cool Down
Let the cake rest in the pan for 10 minutes until the edges start to pull away from the sides. Note: This brief rest allows the structure to firm up so it doesn't break during the flip. Invert onto a wire rack and let cool completely before glazing your Homemade Chocolate Peppermint Bundt Cake.
Step 7: Melt the Peppermint Ganache
Heat 60ml heavy cream in a small saucepan until it just begins to simmer and tiny bubbles form around the edges. Note: Avoid boiling the cream as it can scorch the white chocolate. Pour over 170g white chocolate chips and 1/4 tsp peppermint extract, letting it sit for 2 minutes before stirring until silky.
Step 8: Apply the Festive Garnish
Drizzle the warm white chocolate ganache over the cooled cake until it drips slowly down the ridges. Note: If the cake is too warm, the ganache will run off and look messy. Immediately sprinkle with 50g crushed candy canes so they stick to the wet chocolate, completing the look of the Homemade Chocolate Peppermint Bundt Cake.
Common Baking Hurdles Solved

Even experienced bakers run into trouble with Bundt cakes. The most common heartbreak is the cake sticking to the pan. This usually happens because the sugar in the batter caramelizes and "glues" itself to the metal.
Why Your Cake Stuck to the Pan
If your cake comes out in chunks, it's likely a temperature issue. If you flip it too early (while it's too hot), the internal steam hasn't finished setting the structure. If you wait too long (until it's cold), the sugars have hardened like cement.
Mastering the flip is key to perfectly presenting your Homemade Chocolate Peppermint Bundt Cake.
| Problem | Root Cause | The Fix | Pro Protocol |
|---|---|---|---|
| Cake breaks on flip | Flipped while too hot | Wait exactly 10 minutes | Use a timer; don't guess the cooling period. |
| Weak mint flavor | Extract evaporated | Use pure peppermint | Add extract to the fat, not the boiling water. |
| Soggy bottom | Cooled in pan too long | Invert to wire rack | Use a rack to allow air circulation underneath. |
Smart Ingredient Swap Options
Sometimes you're halfway through a recipe and realize you're out of something. It happens to the best of us! I've made similar pivots when working on my Homemade Cheesy Breadsticks recipe. The core science behind this Homemade Chocolate Peppermint Bundt Cake remains sound even with minor swaps.
| Original Ingredient | Substitute | Why It Works |
|---|---|---|
| Full fat Sour Cream | Greek Yogurt (Plain, 240g) | Similar acidity and fat. Note: Crumb will be slightly less rich. |
| Vegetable Oil | Melted Coconut Oil (120ml) | High fat content. Note: Adds a very faint nutty flavor. |
| Dutch process Cocoa | Natural Cocoa + 1/4 tsp Soda | Adjusts pH levels. Note: Result will be lighter in color. |
| White Chocolate Chips | Dark Chocolate Chips (170g) | Changes the look. Note: Provides a more intense, less sweet finish. |
Batch Size Guidelines
Scaling Down (1/2 batch): If you want to make a mini version, use a 6 cup Bundt pan. For the eggs, beat one egg and use exactly 25g. Reduce the baking time by about 20% start checking for doneness at 35 minutes.
Baking a half batch of this Homemade Chocolate Peppermint Bundt Cake is perfect for a smaller gathering.
Scaling Up (2x batch): If you're making two cakes, do not double the peppermint extract exactly; use 1.5x (3 tsp) to avoid a medicinal taste. Work in batches for the boiling water to ensure it's truly hot for both cakes.
Drop the oven temp to 325°F and bake for about 10 minutes longer to account for the extra mass in the oven.
Kitchen Folklore Realities
Myth: You must use butter for a high-quality cake. Truth: While butter adds flavor, oil provides a superior texture in chocolate cakes. Cocoa powder is inherently drying; oil coats the flour particles more efficiently than butter, resulting in a much moister crumb for this type of dessert.
Myth: Peppermint extract is the same as mint extract. Truth: Mint extract is usually a blend of spearmint and peppermint. Spearmint has a "grassy" flavor that clashes with chocolate.
Pure peppermint extract is essential for that clean, cool holiday taste when making your Homemade Chocolate Peppermint Bundt Cake.
Storage Tips and Reducing Waste
Storage: Keep this cake in an airtight container at room temperature for up to 3 days. For longer storage, the fridge works for up to 5 days, but let it sit at room temperature for 20 minutes before serving to soften the fats.
You can freeze the unglazed cake for up to 3 months wrap it tightly in plastic wrap and then foil.
Zero Waste: Don't throw away those leftover candy cane crumbs! I like to stir them into my morning coffee or sprinkle them over a bowl of oatmeal. If you have extra white chocolate ganache, it makes a fantastic dip for strawberries or can be thinned with a little more cream to make a peppermint creamer for tea.
Creative Ways to Serve
This cake is a showstopper on its own, but a few extras can take it to another level. I love serving a thick slice with a dollop of barely sweetened whipped cream. The cream cuts through the intensity of the Dutch process cocoa.
If you want a more "Mocha" vibe, add a teaspoon of espresso powder to the dry ingredients. It doesn't make the cake taste like coffee; it just makes the chocolate taste "more like itself" in the Homemade Chocolate Peppermint Bundt Cake.
For a kids' party, you could even serve smaller slices alongside a warm glass of milk. It’s a versatile dessert that feels fancy but remains rooted in simple, everyday comfort.
If you have leftovers, they actually make incredible cake truffles just crumble the cake, mix with a little frosting, and dip in more chocolate!
FAQ: Making the Best Choices
Should the eggs be cold or room temperature? Always use room temperature eggs. Cold eggs can seize the oil and sour cream, leading to a lumpy batter that doesn't rise evenly. If you forgot to take them out, just soak them in warm water for 5 minutes.
Can I use peppermint oil instead of extract? Be careful here. Peppermint oil is much more concentrated than extract. If you must use oil, use only 1/4 tsp for the entire cake, or you'll end up with something that tastes like a cough drop.
What if my ganache is too thin? If the ganache looks like water, let it sit for 5 10 minutes. As the white chocolate cools, the fats begin to crystallize, which thickens the sauce.
You want it to be the consistency of heavy honey before pouring it over your masterpiece, the Homemade Chocolate Peppermint Bundt Cake.

Common Questions
Can I substitute baking powder for baking soda?
No, substitution causes structural collapse. Baking soda needs an acid (sour cream/cocoa) to activate the rise; baking powder is complete. Using only powder yields a flat cake due to insufficient acid reaction.
What is the ideal internal temperature for doneness?
205°F to 210°F. Baking past this range forces moisture out of the crumb structure, resulting in dryness. This precise temperature ensures the starch is set but still pliable.
Why is my finished cake crumb tough and rubbery?
Over mixing the final batter caused excess gluten development. Vigorous mixing after adding liquid activates gluten strands too much, forming a dense network instead of tender pockets.
- Mix only until streaks disappear
- Use a whisk, not a mixer, for the final incorporation
- The boiling water is added last to limit mixing time
Should I use salted or unsalted butter for the ganache?
Unsalted butter for precision control. Salted brands vary wildly in sodium content, making standardization impossible when balancing the sweet white chocolate. Unsalted allows you to control the exact sodium profile.
Is it safe to use milk instead of sour cream?
No, milk yields a drier, denser texture. Sour cream provides both fat content and essential lactic acid required to tenderize the chocolate crumb. If substituting, use Greek yogurt, which shares the necessary acidity for balance, similar to how acid is used to stabilize emulsions in recipes like our Homemade Spaetzle Noodles Recipe: Quick German Egg Noodles.
Myth: The bundt pan must be perfectly non-stick for release.
Myth: You must use non-stick spray only. Reality: A cocoa powder dusting over a thoroughly greased (shortening) pan provides the best non-stick release barrier for dark batters, preventing white flour streaks.
Myth: Peppermint extract is interchangeable with mint extract.
Myth: Peppermint extract and mint extract taste the same. Reality: Mint extract often contains spearmint, which yields a "grassy" flavor profile unsuitable for chocolate. Use only pure peppermint for that clean holiday cooling sensation.
Chocolate Peppermint Bundt Cake
Ingredients:
Instructions:
Nutrition Facts:
| Calories | 462 kcal |
|---|---|
| Protein | 5.8 g |
| Fat | 21.1 g |
| Carbs | 66.9 g |
| Fiber | 2.4 g |
| Sugar | 46.8 g |
| Sodium | 518 mg |
