Decadent Chocolate Mousse Cheesecake Recipe
- Time: Active 45 minutes, Passive 7 hours, Total 7 hours 45 mins
- Flavor/Texture Hook: Velvety cocoa crumb and airy chocolate
- Perfect for: Milestone celebrations or showing off at dinner parties
- Mastering the Rich Decadent Chocolate Mousse Cheesecake
- The Physics of the Silky Set
- Vital Recipe Component Analysis
- Essential Elements and Smart Substitutions
- Required Kitchen Gear and Tools
- Step-by-Step Layering and Baking
- Solving Common Baking and Set Issues
- Customizing Flavors and Dietary Needs
- Debunking Popular Cocoa and Baking Misconceptions
- Storage Guidelines and Waste Reduction
- Elegant Plating and Garnish Ideas
- Recipe FAQs
- 📝 Recipe Card
Mastering the Rich Decadent Chocolate Mousse Cheesecake
The scent of 60% bittersweet chocolate melting into a pool of heavy cream is enough to make anyone lose their focus. I remember the first time I attempted this dish back in my tiny apartment.
I was so impatient that I tried to pour the mousse layer over a cheesecake that was still lukewarm, and let's just say it turned into a soup that would have made a pastry chef weep. But that failure was the best teacher, because it taught me that temperature is everything when you're chasing that velvety finish.
We've all been there, staring at those towering slices in the glass case of a fancy bakery, wondering how they get those distinct, clean lines between the fudgy base and the airy top. It feels like a high wire act, but honestly, it's just about following a few non negotiable rules regarding fat and air.
Once you get the hang of the cooling stages, you'll realize this isn't just a dessert, it's a structural triumph that tastes like a dream.
Trust me, your kitchen is about to smell like the best chocolate shop in town. We aren't just baking a cake here; we are layering textures. From the snap of the chocolate wafer crust to the buttery richness of the cocoa infused center, every bite is designed to hit a different sensory note.
Let's get into the nitty gritty of why this specific method works every single time.
The Physics of the Silky Set
Starch Gelatinization: Cocoa powder absorbs moisture from the cream cheese, creating a structural framework that prevents the cheesecake from collapsing after it cools.
Emulsion Stability: Slow mixing the room temperature eggs ensures the fat and water in the cheese don't separate, which leads to a grainy texture.
Gelatin Lattice: The unflavored gelatin creates a flexible web in the mousse, allowing it to hold air bubbles even under the weight of the ganache.
Carryover Solidification: Removing the cheesecake while the center still wobbles allows the residual heat to finish the set without drying out the proteins.
| Method | Total Time | Texture Outcome | Difficulty |
|---|---|---|---|
| Traditional Bake | 7 hours 45 mins | Dense, fudgy, and intensely rich | Intermediate |
| No Bake Version | 4 hours | Light, airy, more like a pudding | Easy |
| Pressure Cooker | 2 hours | Ultra moist, custard like finish | Advanced |
Choosing the classic baked method provides that iconic "snap" in the crust and a deep, developed cocoa flavor that no bake versions just can't touch. If you have the time, the slow baked route is always the winner for a true showstopper.
Vital Recipe Component Analysis
| Ingredient | Science Role | Pro Secret |
|---|---|---|
| Full fat Cream Cheese | Provides the structural fat base | Always use blocks, never the tub variety |
| 70% Dark Chocolate | Adds complexity and stabilizes ganache | Chop it finely for a faster, smoother melt |
| Unflavored Gelatin | Holds the mousse height | Bloom it in cold water before heating |
| Dutch processed Cocoa | Neutralizes acidity for a smoother taste | Sift it twice to avoid bitter lumps |
Selecting the right fat content is the difference between a cheesecake that stands tall and one that sags on the plate. We use full fat blocks because the stabilizers in low-fat versions can interfere with the way the eggs bind during the baking process.
Essential Elements and Smart Substitutions
To get started, you'll need to gather a few high-quality basics. This recipe relies on the interaction between dark chocolates and dairy, so don't skimp on the quality of your cocoa.
- 2 cups (200g) Chocolate wafer crumbs: Why this? Provides a dark, bitter contrast to the sweet filling. (Sub: Crushed Oreo cookies with the cream removed)
- 5 tbsp (70g) Unsalted butter, melted: Why this? Acts as the glue for the crumb foundation. (Sub: Salted butter, just omit the extra salt)
- 1 tbsp (12g) Granulated sugar: Adds a touch of sweetness to the base.
- 1/4 tsp Sea salt: Balances the intensity of the chocolate.
- 24 oz (680g) Full fat cream cheese, room temperature: Why this? Ensures a smooth batter without overbeating. (Sub: Mascarpone for a tangier, richer profile)
- 1 cup (200g) Granulated sugar: For the main filling sweetness.
- 1/4 cup (25g) Dutch processed cocoa powder: Provides the deep mahogany color.
- 3 Large eggs, room temperature: The binding agent for the bake.
- 4 oz (115g) 60% Bittersweet chocolate, melted and cooled: Adds body to the cheesecake.
- 1 tsp Pure vanilla extract: Rounds out the cocoa notes.
- 1/2 cup (120ml) Heavy cream: Adds a velvety mouthfeel to the batter.
- 1 cup (170g) Semi sweet chocolate chips: The base for the mousse layer.
- 1.5 cups (360ml) Heavy whipping cream, divided: Provides the volume for the mousse.
- 2 tbsp (25g) Powdered sugar: Stabilizes the whipped cream.
- 1 tsp Unflavored gelatin: Keeps the mousse from weeping.
- 4 oz (115g) 70% Dark chocolate, finely chopped: For the glossy ganache.
- 1/2 cup (120ml) Heavy cream for ganache: Creates the pourable glaze.
- 1 tsp Light corn syrup: Why this? Gives the ganache a professional mirror shine.
| Original Ingredient | Substitute | Why It Works |
|---|---|---|
| Chocolate Wafers | Graham Crackers | Similar crunch. Note: Lacks the deep cocoa punch. |
| Bittersweet Chocolate | Semi sweet Baking Bar | Same fat content. Note: Will be significantly sweeter. |
| Dutch processed Cocoa | Natural Cocoa Powder | Both add chocolate flavor. Note: Natural is more acidic/lighter. |
If you find yourself short on chocolate wafers, using a Classic Mississippi Mud recipe style crust with graham crackers and extra cocoa works in a pinch. It changes the vibe slightly but keeps that crunchy foundation we need.
Required Kitchen Gear and Tools
You don't need a professional pastry kitchen to pull off a Decadent Chocolate Mousse Cheesecake, but a few specific items make it much easier. A 9 inch springform pan is non negotiable here; trying to lift a layered cheesecake out of a standard cake pan is a recipe for heartbreak.
A stand mixer or a reliable hand mixer will save your arms from the workout of a lifetime. You'll also need a fine mesh sieve to sift your cocoa powder. Those little lumps of dry cocoa are impossible to whisk out once they hit the wet ingredients, so sifting is your best friend.
Finally,, grab some heavy duty aluminum foil to wrap the bottom of your pan even if you aren't using a water bath, it helps insulate the edges.
Chef's Tip: Freeze your butter for 10 minutes before melting it. It sounds weird, but slightly chilled butter that is then melted quickly seems to bind the crumbs better without making the crust greasy.
Also, always add a tiny splash of espresso to your melted chocolate; it doesn't make it taste like coffee, it just makes the chocolate taste "more like itself."
step-by-step Layering and Baking
1. Build the Foundation
Preheat your oven to 350°F (180°C). Combine the chocolate wafer crumbs, 5 tbsp melted butter, 1 tbsp sugar, and salt in a bowl. Press this mixture firmly into the bottom of a 9 inch springform pan.
Bake for 10 minutes until the crust smells toasted and set. Let it cool completely while you prep the filling.
2. The Slow Baked Silk
Lower the oven to 325°F (160°C). Beat the 24 oz cream cheese and 1 cup sugar until smooth and free of lumps. Sift in the 1/4 cup cocoa powder and add the vanilla. Add the 3 eggs one at a time, mixing on low speed just until combined.
Note: Overmixing at this stage incorporates air, which causes the cake to puff and then crack.
3. Incorporating the Chocolate
Fold in the 4 oz melted and cooled bittersweet chocolate and 1/2 cup heavy cream. Pour the batter over the cooled crust. Bake for 55-60 minutes until the edges are set but the center still jiggles like Jell O. Turn off the oven, crack the door, and let it sit for 1 hour.
This slow cooling is vital.
4. The Cloud Like Elevation
Bloom the 1 tsp gelatin in 2 tbsp cold water for 5 mins, then microwave for 10 seconds to melt. Melt the 1 cup chocolate chips with 1/2 cup heavy cream until glossy and smooth. Stir in the gelatin.
In a separate bowl, whip the remaining 1 cup heavy cream with powdered sugar to stiff peaks. Fold the chocolate mixture into the whipped cream gently.
5. The Mirror Finish
Spread the mousse over the chilled cheesecake. Chill for at least 4 hours. For the ganache, heat the remaining 1/2 cup heavy cream and pour it over the 4 oz chopped dark chocolate. Let it sit for 2 mins, add the corn syrup, and whisk until it looks like liquid silk.
Pour over the mousse and tilt the pan to coat.
Solving Common Baking and Set Issues
Why Your Cheesecake Surface Cracked
Cracks usually happen because of sudden temperature shifts or overbeating the eggs. When you whip too much air into the batter, it rises like a souffle and then collapses as it cools, stretching the surface until it snaps.
By letting the cake cool in the oven with the door cracked, you allow the structure to firm up slowly.
Why Your Mousse Is Grainy
If your melted chocolate was too cold when you added it to the whipped cream, it likely formed tiny "shards" instead of blending. This gives the mousse a gritty texture. On the flip side, if the chocolate was too hot, it would have deflated the cream.
Aim for "baby bottle warm" (around 90°F or 32°C) for the perfect emulsion.
| Problem | Root Cause | Solution |
|---|---|---|
| Crust falls apart | Not enough butter/pressure | Press harder with a flat bottomed cup |
| Lumpy batter | Cold cream cheese | Use room temp ingredients only |
| Runny mousse | Gelatin wasn't bloomed | Ensure gelatin is fully melted and stirred in |
Common Mistakes Checklist
- ✓ Always use room temperature cream cheese (prevents lumps).
- ✓ Never skip the "jiggle test" overbaking leads to a dry, crumbly texture.
- ✓ Bloom your gelatin in cold liquid first to ensure it dissolves perfectly.
- ✓ Wipe your knife with a warm, damp cloth between every single slice.
- ✓ Avoid opening the oven door during the first 45 minutes of baking.
If you enjoy the textural contrast of this dish, you might find the layering process similar to what's required for a Sopapilla Cheesecake recipe, though that one leans more toward a cinnamon sugar profile.
Customizing Flavors and Dietary Needs
To Make It gluten-free
Swap the chocolate wafers for a gluten-free cookie alternative or a mix of almond flour, cocoa, and butter. Almond flour provides a moisture rich but denser crumb than AP flour based wafers. Ensure your chocolate chips are certified gluten-free as well, as some brands use malt based stabilizers.
For a Salted Caramel Upgrade
Before pouring the ganache, drizzle a thick layer of homemade salted caramel over the mousse. Let it set in the fridge for 20 minutes before adding the chocolate glaze. This adds a "lava cake" effect when you cut into the slice, creating a beautiful golden contrast against the dark cocoa layers.
Precise Control Checkpoints
- Temperature: Ensure cream cheese is exactly 70°F (21°C) before mixing to avoid a "curdled" look.
- Bake Time: Pull the cake when the internal temperature of the center reaches 150°F (65°C).
- Weight: Use exactly 200g of crumbs; too many crumbs will make the base too thick to cut through cleanly.
Debunking Popular Cocoa and Baking Misconceptions
A common myth is that you must use a water bath (bain marie) to prevent cracks. While a water bath provides moisture, you can achieve a crack free surface simply by managing your cooling process and not over incorporating air.
The "oven cooling" method is much easier for home cooks and avoids the risk of water leaking into your springform pan.
Another misconception is that more eggs equal a richer cake. In reality, too many eggs make the cheesecake taste like a sweet omelet and cause it to puff excessively. Three large eggs provide the perfect amount of protein to set the 24 oz of cheese without making the texture rubbery or overly airy.
Storage Guidelines and Waste Reduction
This Decadent Chocolate Mousse Cheesecake actually tastes better on the second day because the flavors have time to marry. Store it in the fridge for up to 5 days, tightly covered with plastic wrap or in a cake carrier. If you have leftover ganache, don't throw it out!
It can be chilled, rolled into balls, and dusted with cocoa powder to make quick chocolate truffles.
For long term storage, you can freeze the cheesecake (without the ganache) for up to 2 months. Thaw it overnight in the fridge before adding the final glaze. If you have extra crust crumbs, toss them over vanilla ice cream or use them as a "dirt" topping for a chocolate pudding cup to ensure zero waste.
Elegant Plating and Garnish Ideas
To get those restaurant quality slices, use a thin, sharp knife dipped in hot water. Wipe the blade clean after every single cut. This prevents the mousse from dragging into the cheesecake layer, keeping the lines sharp and beautiful. It's a bit tedious, but the visual result is worth the extra few minutes of effort.
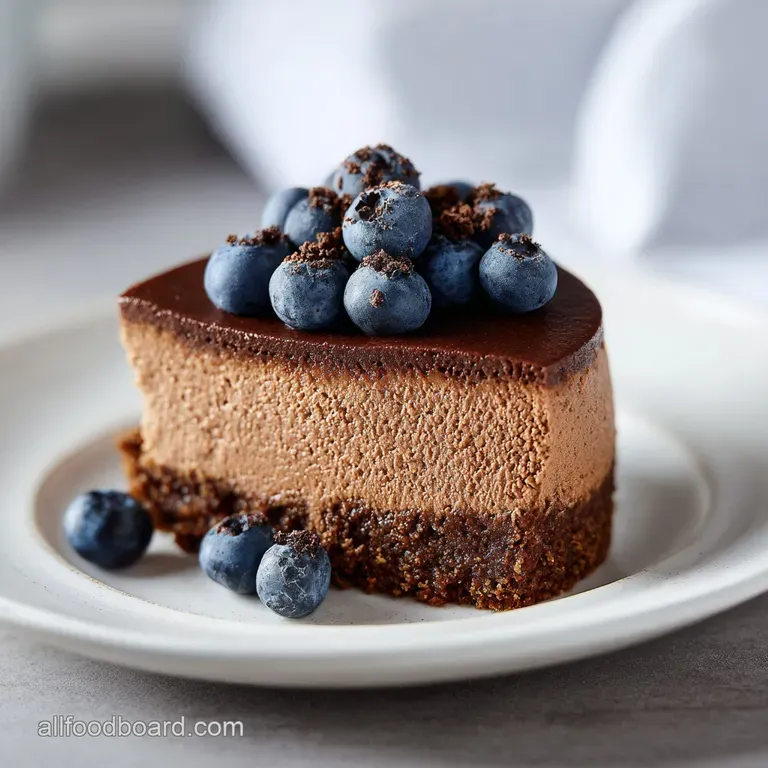
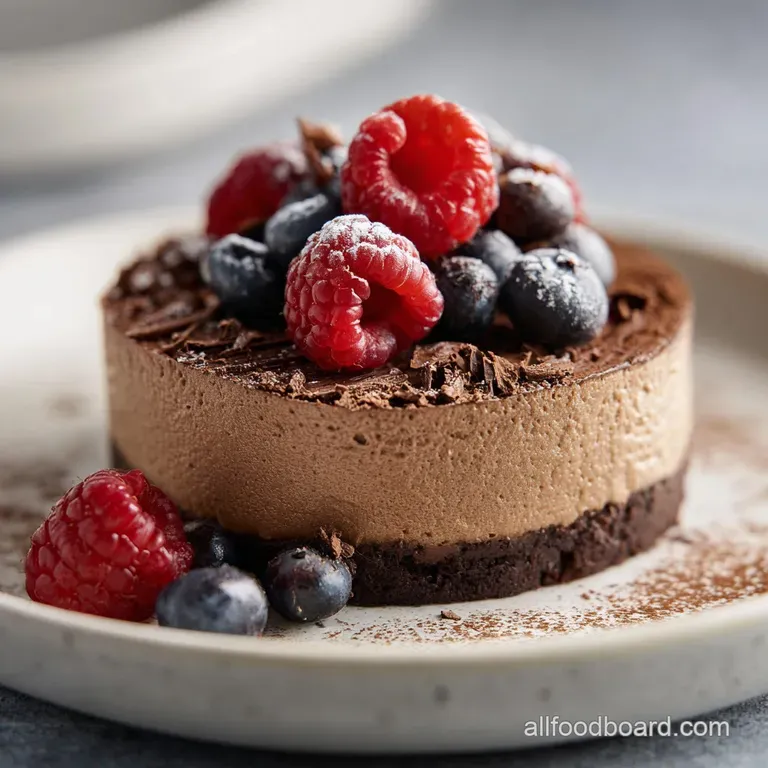
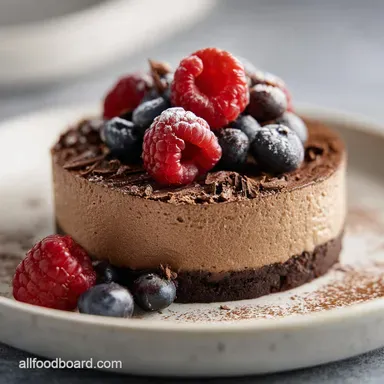
Top each slice with a few fresh raspberries or a single large strawberry to provide a tart contrast to the deep chocolate. A light dusting of extra dark cocoa powder or a few curls of shaved white chocolate can also break up the dark color palette. If you want to go all out, serve it with a dollop of unsweetened whipped cream to balance the intensity of the 70% dark chocolate ganache. For another layered inspiration, check out my How to Bake recipe which uses similar cooling techniques for cookie bars.

Recipe FAQs
What is the difference between chocolate mousse cake and cheesecake?
Cheesecake has a dense, baked or chilled cheese/egg filling, while mousse cake relies on stabilized, airy whipped cream or egg whites for its light texture. This recipe uniquely combines both: a dense, baked chocolate cheesecake base topped with a light, airy chocolate mousse layer.
What is decadent chocolate in the context of this recipe?
Decadent chocolate means using high-quality, high percentage cocoa solids (60% to 70% bittersweet) combined with high fat dairy. This combination ensures a profound, intense chocolate flavor without excessive sugar, leading to that signature rich mouthfeel.
What are the common mistakes when making mousse cake layers?
The primary mistake is deflating the whipped cream while folding in the melted chocolate. The melted chocolate must be cooled to roughly 90°F before gently folding it in thirds to maintain maximum aeration and volume in the final mousse structure.
What are common cheesecake mistakes that ruin the texture?
Overmixing the batter, particularly after adding the eggs, is the leading cause of cracking and a porous texture. Overmixing incorporates too much air, which causes the cheesecake to puff rapidly in the oven and then collapse, resulting in cracks upon cooling.
Is it true I must use a water bath (bain marie) for this baked cheesecake?
No, this is a common misconception for experienced bakers. A gentle cool down period inside the turned off oven prevents the drastic temperature shift that causes cracking, making the water bath unnecessary and less messy.
How to ensure the gelatin sets the mousse layer firmly?
Bloom the gelatin completely in cold water before gently melting it, and ensure it is fully incorporated into the warm chocolate mixture before folding it into the whipped cream. If you enjoyed mastering precise temperature control here, see how the same principle of liquid suspension applies to stabilizing fillings in our Crème de la recipe.
How to achieve perfectly clean slices through the dense base and soft mousse?
Dip a long, thin knife in hot water, wipe it completely dry, and slice quickly, repeating the cleaning step between every single cut. This melts the chocolate slightly on the blade, preventing the mousse from dragging and the dense cheesecake from sticking.
Chocolate Mousse Cheesecake Recipe
Ingredients:
Instructions:
Nutrition Facts:
| Calories | 758 kcal |
|---|---|
| Protein | 9.7 g |
| Fat | 59.2 g |
| Carbs | 50.4 g |
| Fiber | 3.8 g |
| Sugar | 42.1 g |
| Sodium | 284 mg |
