Golden Crusted Chicken Biscuit Cobbler the Ultimate Comfort Bake
- Why This Golden Crusted Chicken Biscuit Cobbler Reigns Supreme
- The Ultimate Comfort Bake Defined: Pot Pie Meets Fluffy Topping
- Assembling Your Pantry for the Chicken Biscuit Cobbler Filling
- What You'll Need for the Fluffy Biscuit Crown
- Crafting the Velvety Savory Base
- Biscuit Topping Technique for Maximum Lift
- The Final Bake: Achieving Golden Perfection
- Elevating Your Chicken Biscuit Cobbler Experience
- Storage and Reheating Guidelines for Leftovers
- Frequently Asked Questions
- 📝 Recipe Card
Why This Golden Crusted Chicken Biscuit Cobbler Reigns Supreme
There are certain dishes that don't just feed you; they envelop you in a culinary hug. Our Chicken Biscuit Cobbler falls squarely into that category. It’s the epitome of cozy comfort food, marrying the deeply savoury, herbaceous heart of a classic chicken pot pie with a topping that is decidedly lighter, fluffier, and easier than any traditional pie crust.
When you crave something truly satisfying a genuine Chicken Biscuit Dinner that feels both nostalgic and perfectly executed this recipe delivers.
We’re taking humble ingredients and transforming them into a bake so rich and comforting, you’ll wonder why you haven’t made this Easy Chicken Cobbler sooner.
The Ultimate Comfort Bake Defined: Pot Pie Meets Fluffy Topping
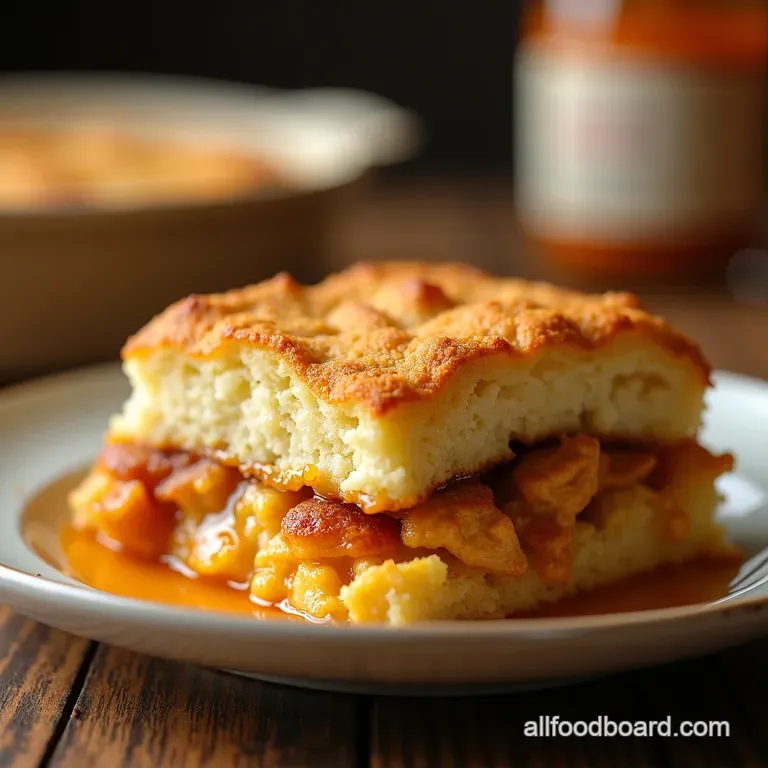
What exactly makes this dish so compelling? It’s the textural contrast. You have that rich, steaming interior a thick, creamy matrix of shredded chicken, sweet carrots, and tender peas suspended in a velvety sauce seasoned perfectly with thyme.
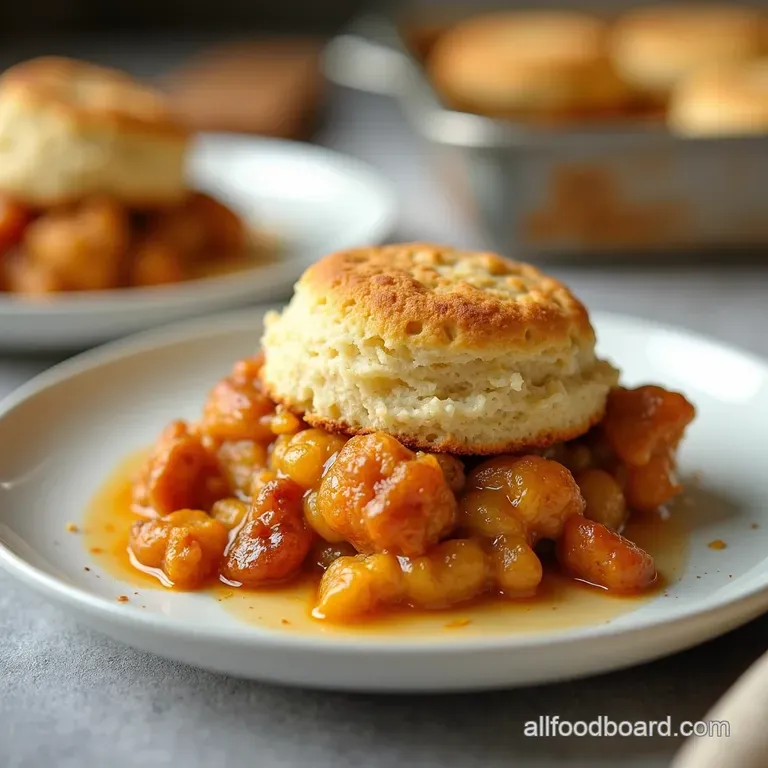
Then, you encounter the crown: tender, golden brown American style biscuits that have absorbed some of the steam from below, resulting in a slightly crisp top layer giving way to an ethereally soft interior.
This layering of textures is what defines this specific style of Southern Chicken and Biscuit Cobbler . It achieves maximum reward for comparatively minimal fuss.
Revolutionizing Weeknight Dinner with Savory Cobbler Magic
While traditional pot pies demand careful rolling and crimping, this Quick Family Dinner Chicken alternative utilizes a drop biscuit topping. This method bypasses many pitfalls associated with pastry work.
Instead of worrying about flaky layers that shrink in the oven, you simply dollop the dough onto the filling. This allows for a rustic, wonderfully varied presentation where every person gets a slightly different, yet equally delicious, biscuit piece to scoop up the gravy.
It brings sophistication to the table without demanding hours of attention.
The Secret to Achieving Unbelievably Tender Chicken Filling
The key to a superior filling is twofold: using pre-cooked, shredded chicken and mastering the roux. We rely on the slow simmering of aromatics onion, carrots, and celery to build a foundational sweetness before thickening the sauce.
The initial step of cooking the flour with the fat creates a roux, the backbone of any luxurious gravy. If you’re aiming for the richest flavour, using rotisserie chicken adds complexity from the initial roasting process, making this the ultimate utilization of leftovers in a Chicken Biscuit Dinner .
Understanding the Cobbler Concept: More Than Just a Topping
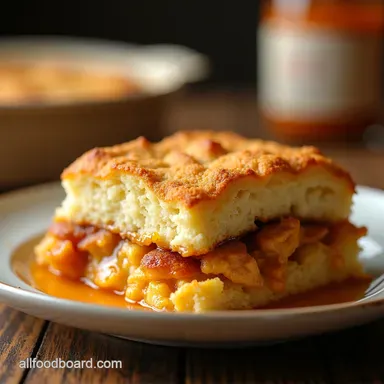
A true cobbler, historically, refers to a fruit bake topped with a biscuit or batter topping dropped in mounds, resembling cobblestones. When we apply this principle to a savoury dish, like our Chicken & Biscuit Cobbler , the result is elevated homestyle cooking.
Unlike a layered casserole, the biscuits sit distinctively atop the filling, allowing them to bake up high and golden while the sauce beneath simmers to perfection.
Assembling Your Pantry for the Chicken Biscuit Cobbler Filling
Before we dive into the process, gathering your components ensures a smooth assembly. For the heart of this bake, you will need approximately three cups of cooked chicken shredded or cubed works equally well.
The aromatics are vital: one medium yellow onion, two celery stalks, and one cup of diced carrots form the traditional mirepoix base. You will also need robust stock and a touch of cream to achieve that satisfying, coating consistency in the sauce.
What You'll Need for the Fluffy Biscuit Crown
The topping is what distinguishes this bake, making it more approachable than a true pie. For the biscuits themselves, the main components are simple: two cups of all-purpose flour, a generous tablespoon of baking powder for lift, and salt.
But the critical element here is fat: we use six tablespoons of unsalted butter, which must be kept very cold. This cold butter, when cut into the flour, creates the steam pockets necessary for a light, towering biscuit.
The Core Components: Chicken, Cream, and Herbs
Beyond the structural elements, the flavour profile leans heavily into classic poultry seasoning. A teaspoon of fresh thyme leaves will provide that unmistakable earthy perfume that sings alongside the chicken. Black pepper is crucial don’t be shy; this dish handles bold seasoning well.
Finally, the incorporation of frozen peas, added right at the end, provides a welcome burst of sweetness and colour contrast against the golden top.
Selecting the Best Dairy for the Rich Sauce Base
The texture of the sauce is determined by the dairy used. While you can use whole milk, opting for heavy cream (about a half cup) significantly enriches the mouthfeel, lending a luxurious, velvety texture to the final product.
This richness is what makes the Cheddar Biscuit Chicken Cobbler variation so satisfying when you add cheese to the topping. Ensure your milk or cream is cold for better emulsification when incorporated into the hot roux.
Crucial Equipment for Seamless Preparation
To execute this dish without stress, focus on a robust baking dish, ideally a 9x13 inch casserole or equivalent 3-quart dish, to give the filling enough surface area for even bubbling. A medium saucepan is needed to create the roux and simmer the sauce.
For the biscuit dough, a large mixing bowl and a pastry blender (or two sturdy table knives) are essential for cutting the cold butter into the flour without melting it with the warmth of your hands.
Related Recipes Worth Trying
- Easy Chicken Cobbler Dinner Casserole with Fluffy Biscuit Topping — Rescue your midweek dinner This Easy Chicken Cobbler Casserole delivers comfort food perfection with minimal fuss thanks to a cheesy biscuit shortcut Ready fast
- Easy Slow Cooker Chicken and Dumplings Recipe for Dinner — Forget faffing about This Easy Slow Cooker Chicken and Dumplings recipe delivers a proper hug in a bowl with fluffy homemade dumplings on top Get the full...
- Easy Crockpot Chicken and Dumplings Recipe Comfort Food Magic — Need a proper job dinner This easy Crockpot Chicken and Dumplings recipe makes the fluffiest creamiest dumplings with minimal effort Perfect for busy families
Crafting the Velvety Savory Base
The journey begins by softening your diced carrots, onions, and celery in melted butter until they become tender and fragrant about seven to eight minutes. This sweet foundation is then dusted with flour, creating the roux that will thicken our sauce.
Once this flour cooks for a minute to eliminate any raw taste, we slowly whisk in 1.5 cups of chicken broth, taking care to achieve a smooth, lump free base before incorporating the cream and seasonings.
The final step before topping is folding in the cooked chicken and frozen peas, pouring this hearty mixture into your prepared baking dish.
Biscuit Topping Technique for Maximum Lift
This is where precision meets simplicity. We mix the dry ingredients for the biscuits, then cut in the icy cold butter until it forms small crumbs. Next, we add the cold milk and stir quickly— just until the flour is incorporated into a shaggy, messy mass.
Any sign of significant kneading will result in tough biscuits, which defeats the purpose of this Easy Chicken Cobbler . We want minimal gluten development here.
The Final Bake: Achieving Golden Perfection
Once the filling is nestled in its dish, we move to assembly. The spoonfuls of biscuit dough are dropped directly onto the warm filling, leaving small gaps to allow for expansion during the bake.
Brushing these tops with a simple egg wash one egg whisked with a tablespoon of water is the secret weapon that guarantees that beautiful, deep golden brown sheen we associate with professional baking.
step-by-step: Building the Flavor Layers of the Filling
Remember the order: sauté the hardy vegetables first to build sweetness, create the roux for body, slowly whisk in the broth to form the gravy, enrich it with cream and herbs, and finally, fold in your pre-cooked protein and frozen vegetables off the heat.
This layering prevents the chicken from overcooking and ensures the vegetables are tender, not mushy, when the final product emerges.
Mixing the Biscuit Dough: Handling Gently is Key
As we highlighted, gentle handling is paramount for the topping. Think of it like tossing a salad quick, light movements. When the milk hits the flour and butter mixture, you only want to incorporate the wet and dry elements until they just adhere.
The dough should look uneven; this texture is the direct precursor to fluffy, light biscuits, making this Bisquick Chicken Cobbler approach highly rewarding.
How to Properly Arrange Biscuits for Even Cooking
Drop the biscuit dough in approximately 2-tablespoon sized mounds, spacing them roughly an inch apart across the surface of the filling. This spacing is vital because these biscuits will swell significantly, eventually touching and creating continuous "islands" of golden crust over the bubbling sauce.
Ensure the biscuits aren't overly thin, or they will sink into the gravy before they can properly set.
Determining Doneness: Internal Temperatures and Visual Cues
The visual cues are your best friend here. You are looking for a filling that is vigorously bubbling up between the biscuits, indicating it has reached serving temperature. Simultaneously, the biscuits must be a deep, appetizing golden brown.
If the tops brown too quickly before the center is cooked (often around 25 minutes), you can loosely tent the dish with foil for the remaining bake time. Ideally, an inserted toothpick into the thickest part of a biscuit should emerge clean, confirming a perfect Chicken Biscuit Dinner completion.
Elevating Your Chicken Biscuit Cobbler Experience
To truly elevate this Cozy Chicken Meals standard, consider incorporating 1/2 cup of sharp white cheddar cheese into your biscuit dough for a savory, cheesy crust.
Alternatively, a dash of dry sherry stirred into the sauce base before adding the broth adds a beautiful depth that hints at slow cooked tradition, even though this recipe is fast.
Storage and Reheating Guidelines for Leftovers
Any fortunate leftovers of this wonderful Chicken Biscuit Cobbler Recipe store beautifully. Place cooled leftovers in an airtight container and refrigerate for up to three days. When reheating, the oven is superior to the microwave.
Bake portions, covered loosely with foil to protect the crust, at 350° F ( 175° C) until heated through, usually 15- 20 minutes. This process re-crisps the biscuit tops beautifully.
Creative Vegetable Swaps for Seasonal Variations
This bake is incredibly adaptable to what’s seasonal. In the spring, swap peas for asparagus tips or finely chopped broccoli florets. In the autumn, incorporate roasted butternut squash cubes along with the carrots.
Just ensure any added vegetable is either pre-cooked slightly or cut small enough to soften fully during the 35-minute bake time of the cobbler itself.
Boosting Flavor: Herbs, Spices, and Cheesy Toppers
If you want to lean into the Cheddar Biscuit Chicken Cobbler concept without altering the biscuit dough, sprinkle a handful of grated Gruyère or sharp cheddar over the top of the egg-washed biscuits during the last 10 minutes of baking.
For an herbaceous punch, mix finely chopped fresh rosemary into the filling along with the thyme for an extra layer of woody aroma.
Making Ahead: Preparing Components for Faster Assembly
To make this a true weeknight hero, prepare the filling entirely a day in advance. Cool it completely, then pour it into your baking dish and cover it tightly. Store the biscuit dough mixture (without the milk) separately.
When ready to bake, simply cut in the cold butter, add the milk, dollop the toppings, and proceed directly to the oven, adjusting the bake time slightly longer since the filling will be cold.

Frequently Asked Questions
Can I make the filling for this Chicken Biscuit Cobbler ahead of time?
Absolutely! The filling is brilliant for prepping in advance; it actually deepens the flavour overnight. You can make the entire filling (Steps A.1 through A.6) up to two days ahead and store it covered in the fridge.
Just remember to let it sit on the counter for about 30 minutes before topping with the raw biscuits and baking, as it will need to be piping hot before you add the cold dough.
My biscuits are coming out dense and tough, what am I doing wrong?
Ah, the classic biscuit blunder! This usually means the butter wasn't cold enough, or you've simply mixed the dough too much. Remember, when mixing the topping, you want a 'shaggy' look; stop mixing the very second the flour is incorporated.
Overworking the dough develops gluten, making them chewy rather than light and fluffy we want a lovely, melt-in-your mouth texture, not a paving stone!
How do I store leftovers of the Golden Crusted Chicken & Biscuit Cobbler?
Wrap any leftovers tightly in cling film or transfer them to an airtight container and pop them in the fridge; they’ll happily keep for 3-4 days. When you’re ready for seconds, the best way to reheat is in a moderate oven (around 350°F or 175°C) for about 15-20 minutes until the filling is bubbling again.
This helps crisp up those biscuits, which can get a bit soggy when refrigerated.
Can I use store-bought biscuits instead of making them from scratch?
If you’re short on time and feeling a bit like a duchess who needs a quick fix, yes, you certainly can substitute! Use 6-8 refrigerated, canned biscuits just drop them over the hot filling as per the instructions.
However, be aware that the flavour and texture won't be quite as magnificent as homemade, but it's a perfectly acceptable shortcut for a weeknight scramble.
My filling is bubbling, but the biscuits are still pale. What should I do?
Don't panic; your filling is likely cooked, but the top needs a bit more colour, which is a common issue! If the filling is already hot, you can carefully move the baking dish to a higher rack for the last 5-10 minutes, or switch the oven setting to 'broil' (grill) on a low setting.
Keep a very close eye on it, though biscuits go from golden to charcoal quicker than you can say 'tea time'!
Chicken Biscuit Cobbler Bake
Ingredients:
Instructions:
Nutrition Facts:
| Calories | 706 kcal |
|---|---|
| Protein | 15.8 g |
| Fat | 39.5 g |
| Carbs | 71.1 g |
| Fiber | 12.2 g |
| Sodium | 6808 mg |
