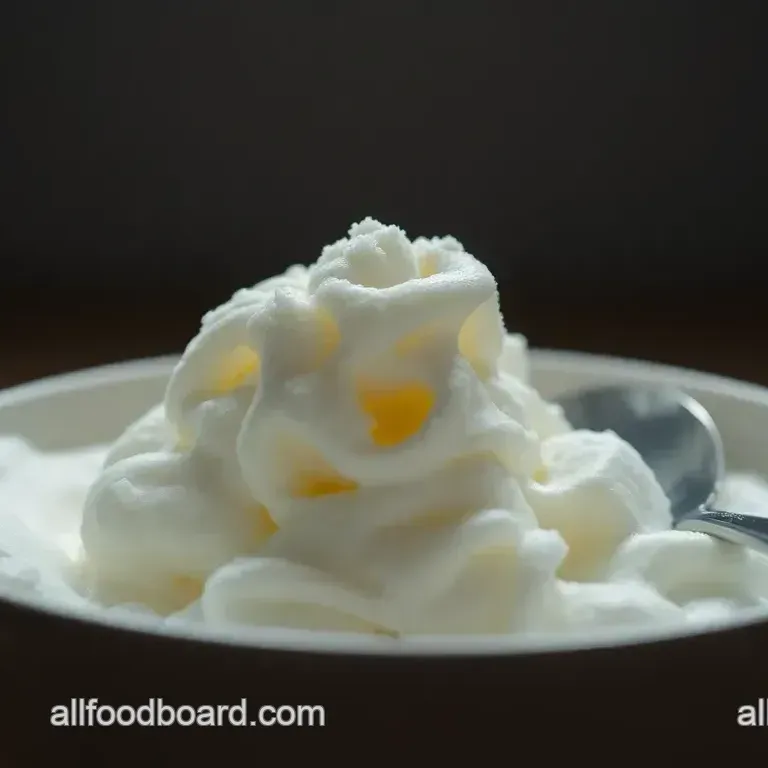
Fluffy & Sweet Snow Cream: a Classic Winter Treat
- Let’s Talk Snow Cream: That Magical Winter Dessert You Didn’t Know You Needed
- Your Ultimate Guide to Essential Ingredients for Snow Cream Magic
- Mastering the Professional Cooking Method: How to Make Snow Cream Like a Pro
- Extra Lowdown on How to Make Snow Cream: Insider Tips & Tricks
- Frequently Asked Questions
- 📝 Recipe Card
Let’s Talk Snow Cream: That Magical Winter Dessert You Didn’t Know You Needed
Have you ever stepped outside after a fresh snowy day, looked at that perfectly pristine, fluffy white stuff, and thought, “hey, i wonder how to make snow cream out of this?” i sure have more times than i can count!
honestly, there’s something snow much fun about scooping up fresh snow and turning it into a sweet, creamy delight.
It’s like capturing winter magic with your spoon.
When i first heard about snow ice cream, i was like, “wait, people make ice cream from snow ?” it sounded wild but kinda brilliant.
It’s this classic kitchen hack that’s been around forever but somehow never goes out of style. it’s like the original flavor ice before all those fancy popsicles and frozen yogurts took the world by storm.
Whether you’re a kid or just a big kid at heart, snow cream feels cozy and joyful.
What’s the Deal with Snow Cream? A Little History Scoop
Snow cream has roots deep in north american winter culture. back in the day, before refrigerators got fancy and ice cream makers were kitchen staples, folks actually whipped up this easy treat using fresh, clean snow combined with a simple sweet custard mixture.
It’s sort of the og winter treat that you can make on the spot no long freezes or mushy store-bought stuff needed.
Nowadays, it’s still a popular way to celebrate snow days . think of it as a fun tradition when your backyard transforms into a fluffy white playground.
I swear, whenever there’s snow on the ground, my family and i can’t resist giving it a go. plus, it’s pretty quick you need about 15 minutes tops from start to finish.
And because it’s basically made from snow and a handful of simple ingredients, it won’t break the bank.
Why You’ll Love Making and Eating This Snow Fun
Okay, here’s the cool part: snow cream isn’t just about fun and nostalgia. it’s got some surprisingly neat benefits too! first off, since the custard base uses dairy, you’re getting a bit of protein and calcium bonus points for nutrition.
Plus, it’s way lighter than traditional ice cream because the snow adds volume without extra calories (score if you’re watching your sweet tooth).
Another thing? it’s super versatile. you can dress it up with chocolate syrup, cinnamon, fresh berries, or whatever you have on hand making it perfect for impromptu family gatherings or even adult versions like frosé twists (ever tried that? game changer!).
And when you’re craving something cold but don’t want a heavy dessert, snow cream wins hands down.
Compared to other frozen desserts like ice cream popsicles, snow cream melts faster so yeah, eat it quickly! but that’s also what makes it special.
It captures the essence of that fleeting snowy outdoors moment. the light, fluffy texture is unlike anything else, making it stand out.
Honestly, there’s nothing quite like grabbing a bowl of this right after some outdoor snowball fights or sled rides. it’s like a little reward from nature itself.
Time to See What You’ll Need to Make Snow Cream
I’m super excited to share with you this simple yet delightful recipe. all you really need are the classic ice cream ingredients for the custard base milk (or half and-half if you’re feeling fancy), sugar, egg yolk, vanilla, and the star of the show fresh, clean snow.
If you’re ever stuck without snow, crushed ice can work too, but don’t expect the same magic.
Now that you’re on board with the snow cream hype, let’s dive into the details and get your kitchen ready.
The kitchen is my playground , and i’m thrilled to guide you on how to whip up this snowy treat that’ll brighten your chilly days.
Stick around for the ingredient list and step-by-step tips trust me, you won’t want to miss it!
Ready to bring the snow inside your kitchen? Let’s make some snow cream magic happen!
Your Ultimate Guide to Essential Ingredients for Snow Cream Magic
Alright, so you wanna know how to make snow cream that wow factor? trust me, it ain’t just about digging into the snow and throwing in sugar.
Nope, there’s some serious love and know how behind those fluffy scoops of snow ice cream that make winter days just that much sweeter.
Whether you’re a newbie or a kitchen ninja like me (the kitchen is my playground, always), having the right ingredients and knowing what makes them tick is where the magic begins.
Premium Core Components: The Heart of Snow Cream
First off, let’s talk about the baseline of your snow cream: the custard base. you’ll need 2 cups (480 ml) whole milk or half and-half i swear by half and-half for that extra creaminess 1/2 cup (100 g) granulated sugar , 1 tablespoon (15 g) cornstarch , 1 teaspoon (5 ml) pure vanilla extract , and 1 large egg yolk .
Here’s the kicker: quality matters. use fresh, organic eggs if you can; it really makes a difference in taste and texture.
Trust me i once tried with some old eggs and ended up with a custard that was meh and kinda off.
Store your dry ingredients (sugar, cornstarch) in airtight containers to keep moisture out. milk and half and-half, obviously, go in the fridge.
The shelf life for milk is usually a week past the sell-by date, but do a sniff test fresh milk smells sweet, not sour!
When you’re picking vanilla extract, go for pure stuff. Artificial vanilla is meh and won’t give you that cozy, warming note that screams “Winter Treats” like the real deal.
Signature Seasoning Blend: Keeping It Sweet, Simple, and Yum
Okay, snow cream doesn’t need crazy spices like pumpkin spice or chili powder (as fun as that sounds for a summer twist), but vanilla is your ride-or-die flavor enhancer.
I’ve experimented with adding a pinch of cinnamon or a splash of almond extract, and it kinda flips the vibe in a cool way.
Want to get fancy? toss in fresh herbs like a little mint or lavender trust me, it sounds wild but goes amazing with the snow’s cold freshness.
Just keep your herb additions subtle so they don’t overpower the custard.
Oh, and if you’re channeling that regional vibe say you’re doing a southern u.s. spin you might throw in a dash of bourbon vanilla or even a splash of bourbon (adults only, obviously).
Adds that little warmth on a snowy day.
Smart Substitutions: Because Life Happens
No snow where you live? no sweat! i’ve had to improvise loads of times. crushed ice works in a pinch, but it’s not quite the same fluffy texture we all crave.
If you’re thinking dairy-free (hello, lactose intolerant friends), swap milk for coconut or almond milk and thicken with a little extra cornstarch.
And you can nix the egg yolk, too; works fine without it but texture shifts slightly.
Sugar giving you grief? Honey, maple syrup, or agave are all fantastic natural swaps. I personally love a little maple syrup for that hint of woodsy sweetness.
Emergency replacement? Psst keeping powdered sugar handy is a lifesaver. It dissolves faster in the custard mix, preventing any grainy surprises.
Kitchen Equipment Essentials: Work Smart, Not Hard
For whipping up this snowy delight, make sure you have these tools at arm’s reach:
- Medium saucepan (for custard glory)
- Whisk (no lumps allowed!)
- Mixing bowl — chilling this is a game changer, I promise
- Measuring cups and spoons — accuracy matters here
- Fine mesh sieve (optional, but makes your custard silky smooth)
- Spoon or spatula for folding in the snow gently
If you lack a whisk (hey, i’ve been there), a fork works in a bind, just takes a bit more elbow grease.
Chilling the bowl beforehand is a pro tip i picked up from gimme some oven cold tools keep your custard firm and light.
Keep your tools clean and dry after use. Store mixing bowls stacked safely to avoid cracks trust me, cracked bowls = bad vibes and potential fridge spills.
Honestly, tackling these ingredients and gear is part of the fun of making snow cream. it’s like prepping for a tiny winter celebration in your kitchen.
I love how simple it feels but also the little details make the snow much fun in every bite.
Now that you’re all set with ingredients and know the tricks to pick the best ones, it’s time to get into the real heart of the action: whipping up your first batch.
Let’s dive into those step-by-step instructions and turn your snowy day into a joyful dessert fest!
Mastering the Professional Cooking Method: How to Make Snow Cream Like a Pro
Alright, listen up! if you’ve ever wondered how to make snow cream that’s as fluffy and dreamy as what you’d get at a fancy winter festival, you’re in the right place.
Making this classic winter treat isn’t just about scooping snow into a bowl and mixing it’s an art, a little science, and, honestly, a whole lot of snow much fun .
Here’s my down-to-earth take on the professional cooking method you can use right in your [classic kitchen], no fancy gear needed.
Essential Prep: Getting Your Mise en Place On Point
First thing mise en place. i know, it sounds fancy, but it’s really just french for “putting everything in place.” for snow cream, this means prepping your ice cream ingredients ahead of time.
I always set out my measuring cups, whisk, egg yolk, sugar, milk, cornstarch, and vanilla. the custard base the heart of the snow cream needs focus.
Pro tip: collect your fresh, clean snow early in the day. avoid any snow near roads or dirty patches. if you don’t have snow, crushed ice is your backup, but it won’t be quite the same fluffy texture.
And remember, everything should be cold except that custard you’ll make on the stove.
For time management, plan about 10 minutes to mix your custard base and an extra 5 minutes on the stove for it to thicken.
Cooling time is crucial pop that custard in the fridge for at least 10 minutes before folding in the snow.
Trying to rush this step? trust me, it’s a rookie move and your texture will suffer.
Lastly, stay organized by prepping any toppings think chocolate syrup, cinnamon, or fresh berries so when that snow cream’s ready, you’re not hunting around for the good stuff.
The step-by-step Make Snow Cream Process
Ready for the magic? Here’s how I make my snow cream step-by-step.
- Heat your milk and sugar in a saucepan over medium heat until warm, but do not let it boil. (This is about 160° F , just before bubbling.)
- Whisk together the egg yolk and cornstarch in a separate bowl. Slowly pour a ladle of the warm milk into this mixture. Whisk fast this tempers the yolk, so you don’t end up with scrambled eggs.
- Pour this back into the saucepan. Cook on low, stirring constantly until the custard thickens —it should coat the back of your spoon. This takes roughly 5 minutes and is your critical point.
- Stir in the vanilla extract, then transfer the custard to a chilled bowl and cover with plastic wrap touching the surface. Chill for at least 10 minutes .
- Gently fold in about 6 cups of fresh, clean snow until the mixture looks fluffy and creamy. Don’t stir aggressively! You want to keep the snow light and airy.
Visual cue? When your snow cream holds its shape and feels like a soft cloud, you nailed it.
Pro Tips: Secrets From The Kitchen Is My Playground
Oh man, professional cooks swear by folding, not stirring, when mixing snow cream. it keeps the fluff without melting the snow too fast.
Another thing temperature control is everything here. overheated custard or warmed snow will ruin your end result. i learned the hard way during a snowy day cookout when i just dumped hot custard over snow i basically ended up with milk soup.
Yeah, not cute.
Quality checkpoints: your custard should be silky, without lumps a quick strain through a fine mesh sieve can save your life here.
Fold in snow gradually too much too fast will turn it into a slush mess.
If your snow cream turns too watery, chances are the snow wasn’t fresh or you stirred too hard. Oh, and always serve immediately! It’s no good sitting around the fluff melts faster than you can say snow fun!
How to Nail Success Every Time: No Ordinary Snow Ice Cream
Common mistake alert: Using dirty snow or snow that’s been walked on. Gross! Also, rushing the custard thickening phase is a quick way to fail. Slow and steady wins the race here.
For quality assurance, always taste your custard base it should be sweet, creamy, and vanilla scented but not overly eggy. i like to add a tiny pinch of salt to enhance the sweetness, a little trick i picked up from gimme some oven’s recipes.
Want to make this ahead? You can prepare the custard base a day in advance and keep it chilled. Just fold in the snow right before serving, and you’re golden.
Honestly, making snow cream feels a bit like capturing winter in a bowl a perfect balance of science, patience, and a sprinkle of nostalgia.
If you’re craving a fresh winter treat with that snow icecream vibe, this is your jam.
Next up, let’s dive into some additional information to jazz up your snow cream creations! i’ve got ideas on flavor variations, fun toppings, and how to keep this classic cozy during those snowy days.
Stay tuned!
Extra Lowdown on How to Make Snow Cream: Insider Tips & Tricks
Okay, so you’re ready to dive into the snowy wonderland of snow ice cream , huh? honestly, this classic winter treat is one of those things that takes you right back to childhood snow days remember zipping outside, scooping up fresh snow, and whipping up that dreamy fluff? yeah, that.
Let me share some stuff i’ve learned from my own snow cream adventures, so yours turns out just right without any hiccups.
Pro Tips & Secrets From the Kitchen Is My Playground
First off, always use the cleanest, freshest snow you can find i can't stress this enough. it’s tempting to just scoop anything white, but think about it: snow near roads or sidewalks? not your best bet, no matter how tempting.
I usually grab mine right after a fresh snowfall, and that first fluff is pure magic.
Here’s a little chef’s secret i picked up: don’t rush the custard base! i know, it feels minor, but heating your milk and sugar gently while slowly tempering that egg yolk is what gives you that velvety base.
Rushing causes lumps or even scrambled eggs not cute in your snow cream. plus, chilling your custard before folding in snow works wonders to help that texture stay light and airy.
Oh, and about folding not stirring gently fold the snow into the custard to keep it fluffy. Stirring too hard will turn it watery, and no one wants a soggy snow ice cream situation.
Perfect Presentation: Make Snow Cream Look So Good You’ll Want to Eat It Twice
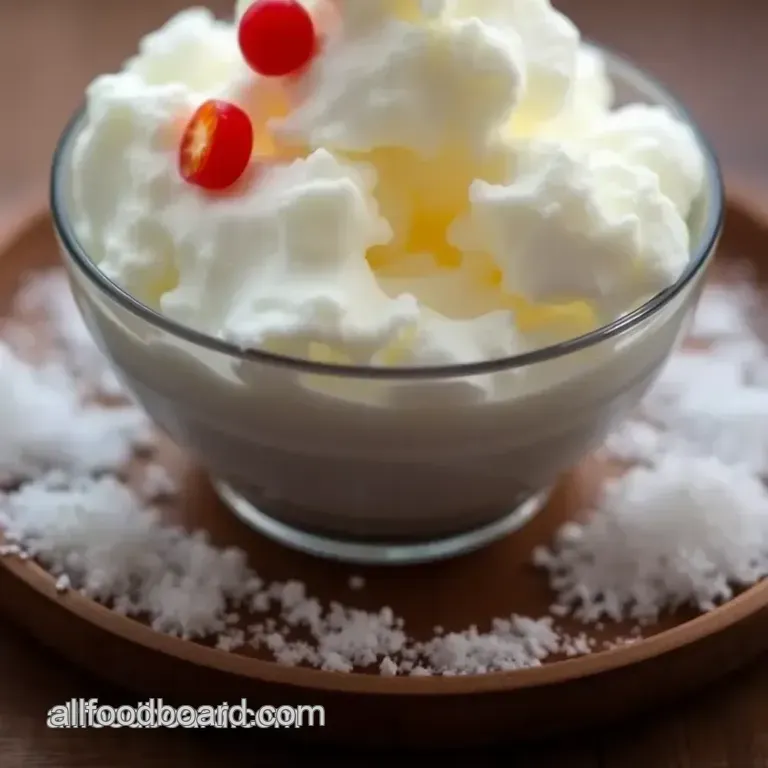
Presentation isn’t just for fancy restaurants! even your snow cream deserves to look snow much fun on the plate. scoop your fluffy snow ice cream into bright bowls or mason jars to bring out those frosty vibes.
Want to up your game? top it with fresh berries, sprinkle a pinch of cinnamon or crushed nuts. bright reds and greens are my go-to because they pop against the white snowy base .
Plus, a drizzle of chocolate syrup (hello, 90s diner throwback) adds that perfectly nostalgic, indulgent look.
For extra sparkle, dust a little like powdered sugar or even crushed candy canes around the rim. it’s simple, but the contrast in color and texture makes it feel like a real winter party on a plate.
Storage & make-ahead: Keepin' Your Snow Cream Fresh and Tasty
Here’s the deal: snow cream is best eaten fresh . like, minutes fresh. once it sits, it melts and loses that fluffy magic we all love.
If you’re prepping some custard ahead (highly recommended), cover it tightly and chill in the fridge for up to 24 hours.
If you have leftovers (which is rare since it’s that good ), store them in the freezer in an airtight container.
But heads up once frozen, the texture turns more icy, kinda like snow ice cream popsicles , so it’s not the same dreamy fluff.
Warming it up? Nope, that defeats the whole icy vibe. Instead, just treat leftovers like a frozen sorbet and dig in with a sturdy spoon.
Creative Variations: Put Your Own Spin on This Classic
Honestly, one of the best parts about learning how to make snow cream is realizing how easy it is to twist the flavors.
Craving something fruity? drop in some fresh berry puree or swirl in your favorite fruit syrup. there’s nothing like that tangy burst amidst creamy snow.
For my health conscious pals or those with dietary needs, swapping whole milk for coconut or almond milk totally works. just thickening with cornstarch and skipping the egg is a game changer for vegan or egg-free versions.
I gave this a shot once during a snow day hangout, and it was surprisingly good!
Try a winter inspired twist by adding a touch of cinnamon or even a splash of frosé (yeah, frozen rosé!) for something grown-up and festive. The possibilities are as endless as the flakes!
Complete Nutrition Guide: What’s Inside That Bowl?
Giving credit where it’s due, snow cream isn’t just a fun treat it’s kinda nutritious too! with a moderate amount of protein and calcium from the milk, plus enough sweetness to satisfy those winter cravings, it’s a nice little pick-me-up after trudging through the cold.
Keep portion sizes reasonable though. a serving had me at around 180 calories, which is a sweet spot not too heavy, not too light (pun intended).
Great for sharing, especially when paired with gingerbread or a cup of hot cocoa.
So there you have it! whether you’re making this for the kids after a couple of snow days or just looking for a playful dessert to brighten a snowy day , learning exactly how to make snow cream is like joining a delicious, wintery secret club.
It’s simple, sweet, and endlessly customizable.
Next time you're staring at a fresh pile of snow or craving a nostalgic swirl of snow ice cream , pull out this recipe.
Trust me, once you taste that light, creamy, cold with-a-hint-of-vanilla magic, you’ll be hooked just like i was on my very first try, when my kitchen kinda turned into a snowy playground.
Go on, embrace the snow fun and make your winter day into a tasty adventure! You’ll be shouting “Gimme some oven’d be lost without snow cream!” before you know it.
Frequently Asked Questions
What’s the best way to make snow cream taste creamy without it turning watery?
To keep your snow cream fluffy and creamy, gently fold the snow into the chilled custard base rather than stirring vigorously. This helps maintain airiness and prevents the snow from melting too quickly, which would cause a watery texture. Also, make sure the custard is well chilled before combining.
Can you explain how to make snow cream if there’s no fresh snow around?
If you don’t have access to fresh snow, crushed or shaved ice makes a fine substitute. Although the texture won’t be as fluffy, it will still deliver a refreshing treat. Just crush the ice finely and fold it slowly into the custard base, adjusting quantity for the desired creaminess.
How do you make snow cream safely, especially for kids?
Safety’s key always collect snow from a clean, uncontaminated area far from roads or animals. Supervise kids during preparation, particularly when handling the warm custard and raw egg yolk.
For extra caution, you can use pasteurised eggs or a cooked custard base, and ensure all utensils and bowls are clean.
What’s the easiest way for beginners to learn how to make snow cream?
Start with the basic recipe: make a simple custard base, chill it thoroughly, then gently fold in clean, fresh snow. Focus on gentle mixing and keep the custard cold to achieve that classic fluffy texture. The recipe is beginner friendly and fun perfect for a first try on a snowy day!
Are there any tasty variations or toppings you recommend for snow cream?
Absolutely! You can jazz up your snow cream by adding cocoa powder to create chocolate snow cream or swirl in pureed berries for a fruity twist. Top with chocolate syrup, cinnamon, chopped nuts, or fresh berries to add texture and flavour. It’s a great way to personalise this simple dessert.
Can I store snow cream leftovers, or is it best eaten immediately?
Snow cream is best enjoyed immediately due to its delicate texture once it starts to melt, it loses that airy quality. If you must store it, keep it in an airtight container in the freezer, but be aware it might freeze solid and lose creaminess.
For the best experience, prepare only as much as you plan to eat right away.
Fluffy Sweet Snow Cream A Classic Winter Treat
Ingredients:
Instructions:
Nutrition Facts:
| Calories | 180 kcal |
|---|---|
| Protein | 4 g |
| Fat | 6 g |
| Carbs | 28 g |
| Fiber | 0 g |
| Sugar | 24 g |
| Sodium | 60 mg |
