Delicious Bake Garlic Cheese Bombs
- Welcome to Cheesy Heaven
- A Little Nostalgia with a Modern Twist
- Why You Need These in Your Life
- Time to Gather Your Ingredients
- Essential Ingredients Guide: The Secret to Mouthwatering Bites
- Get Ready to Elevate Your Cooking Game!
- Pro Tips & Secrets
- Perfect Presentation
- Storage & Make-Ahead
- Creative Variations
- Complete Nutrition Guide
- Expert FAQ Solutions
- 📝 Recipe Card
Welcome to Cheesy Heaven
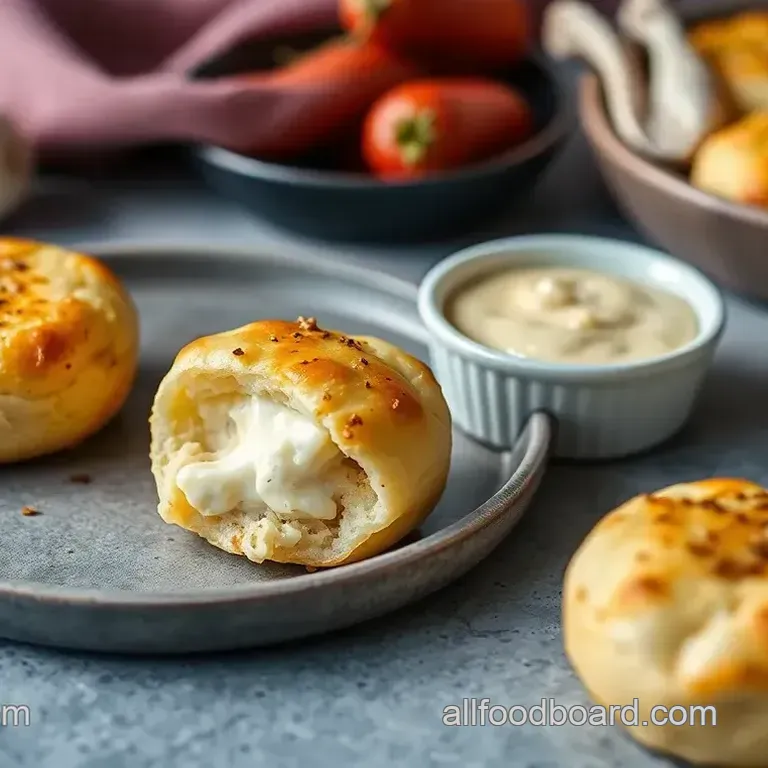
You know that moment when you bite into something and it feels like a warm hug? that’s how i felt the first time i made bake garlic cheese bombs: cheesy delights .
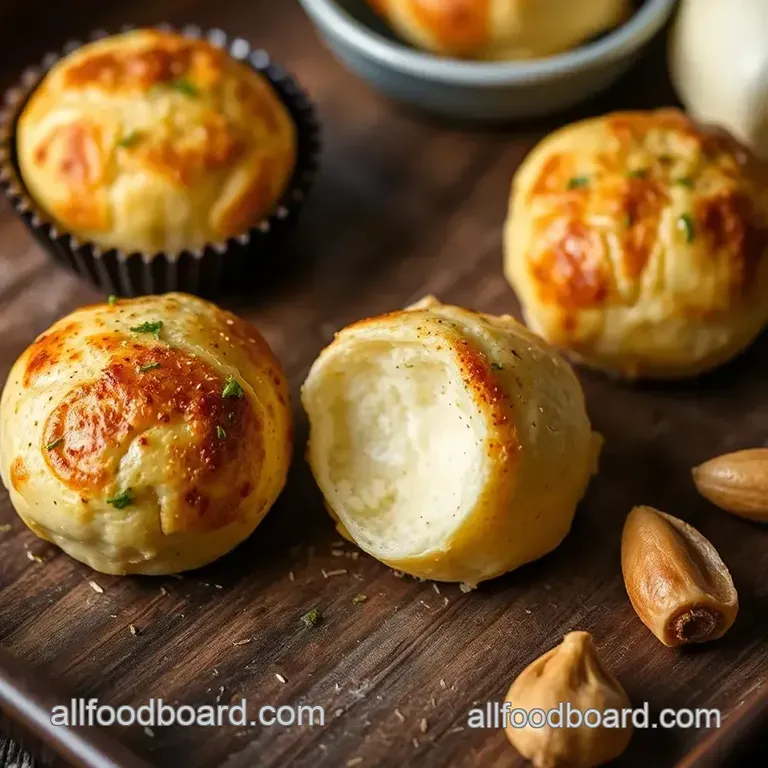
Seriously, if you’re a cheese lover like me, you’re in for a treat! picture it: gooey melted cheese wrapped in the softest garlic infused dough.
Oh my gosh, it’s just heavenly ! i remember whipping these up for a casual get-together, and they were gone before i knew it.
So, do yourself a favor and let’s dive into the scrumptious world of garlic cheese bites together.
A Little Nostalgia with a Modern Twist
These cheesy garlic rolls have roots that go way back, connecting to comfort food traditions that many cultures cherish. but let’s be honest these little bad boys have taken a new life in the modern kitchen! quick and easy appetizer recipes like this one are perfect for our fast paced lifestyles.
They fit right into parties, family dinners, or even as your late night snack when the craving hits. you can prep them in roughly 15 minutes not counting that 30-minute chill time where you can maybe scroll your social media or catch up on your favorite show.
Thinking about costs? they won’t break the bank either! with a yield of about 12 cheese bombs , you can make sure everyone gets a taste of that cheesy goodness without spending your entire grocery budget.
Why You Need These in Your Life
Let’s break down what makes these savory cheese snacks a must try. first off, they’re pretty darn healthy compared to other snack options.
You’ve got protein rich cheese , and if you pair them with marinara sauce, that’s just an extra boost of flavor and nutrients.
Not to mention, these bombs are perfect for special occasions! whether it’s a birthday bash or a holiday gathering, you can rely on these bad boys to please a crowd.
What really sets them apart? these aren’t your standard oven baked cheese treats . with their herby, garlic infused dough, they bring a unique flavor that’ll make your finger foods for parties the talk of the town.
Plus, who could resist a hot, cheesy snack that goes “pop” in your mouth?
Time to Gather Your Ingredients
So, are you ready to jump into the kitchen and whip up some cheese filled pastries ? gather your ingredients and get ready to transform your day with these irresistible cheese snacks .
You’ll need basic items found in most pantries, like flour and baking powder, along with tasty cheeses like mozzarella and parmesan .
Don’t forget the fresh or dried herbs; they add that extra zing!
Let’s gather those ingredients, and we’ll get cooking in no time. I can already smell the garlic wafting through the air, and I bet you’ll be dreaming of these cheesy delights before long!
Stay tuned as we walk through the steps of making these magical melted cheese bombs . Trust me; once you’ve had a taste, you’ll understand why these will become your new go-to easy entertaining recipes for anyone who shows up at your door hungry!
Essential Ingredients Guide: The Secret to Mouthwatering Bites
Jumping into the world of cooking, especially for snacks like our bake garlic cheese bombs: cheesy delights , starts with knowing your essentials.
Seriously, having the right ingredients is half the battle won. so, let’s dive into the nitty gritty of what you need to make amazing cheesy garlic bites.
Premium Core Components
First off, let’s talk about measurements . for all you bakers out there, whether you’re using cups or grams, nothing beats precision.
For making those cheesy dough balls, you’ll need 2 cups (240g) of all-purpose flour and 1/2 cup (115g) of melted unsalted butter .
When it comes to quality , look for that nice, soft flour and fresh butter trust me, it makes a difference!
Now, about storage . keep your flour in a cool, dry place. unopened, it can last for up to a year , but once you crack the bag, use it within 6 months for the best flavor.
And if you’ve got leftover cheese, make sure you wrap it tightly and stick it in the fridge; it should last about 1 week .
Freshness tips ? always choose cheeses that are brightly colored, and smell just like you want to dive in. for the parsley, going fresh is the way to go! if you're grabbing dried parsley , it should still be fragrant.
Freshness might seem minor, but it seriously cranks up the flavor of your cheesy garlic rolls.
Signature Seasoning Blend
Now, the real magic happens when you blend in your signature seasonings . the right spices can elevate your cheesy garlic treats from good to absolutely irresistible.
I always throw in 1 teaspoon of garlic powder for that real kick of flavor.
When it comes to herbs , think fresh parsley or maybe even some thyme and oregano if you're feeling adventurous.
The combination can really brighten those savory cheese snacks . and don’t forget about regional variations ! you could toss in some cajun seasonings for a southern twist or even some italian seasoning to channel that pizza vibe.
Smart Substitutions
Life can get hectic, right? so, let’s chat about substitutions . say you’re out of mozzarella no stress! you can easily swap it with pepper jack for a spicy kick, or even ricotta , just be cautious with the moisture.
Got a dietary restriction? no problem! use a gluten-free flour unless you enjoy a good challenge.
In a pinch? use greek yogurt for a healthier take on the dough. and if you’re in summertime and fresh herbs are a bit scarce, dried herbs still pack a punch and can save the day in a pinch.
Kitchen Equipment Essentials
Let’s not forget about the gear! you don’t need a fancy culinary toolkit, but there are a few must have tools .
A good mixing bowl and a whisk will get you through most of the action. if you have a baking sheet , great! if not, a simple parchment paper will save your cheese bombs from sticking.
If you have a muffin tin , go on and use it for a different presentation . it can be fun to make mini cheese bites too! and let’s not forget about storing : a nice airtight container will keep your leftovers (if there are any!) fresh for days.
Now that we’ve discussed all the essentials, it’s time to roll up your sleeves and jump into the delicious world of cheesy goodness! let’s get into the instructions for these glorious bake garlic cheese bombs that will definitely steal the show at any party or just make your weeknight dinner feel fancy.
Trust me, your taste buds will be cheering for more!
Get Ready to Elevate Your Cooking Game!
When it comes to impressing friends and family without breaking a sweat, knowing a professional cooking method can totally change the game.
Let’s dive into the essential preparation steps that will ensure your next cook off runs smoother than a well oiled kitchen machine!
Essential Preparation Steps
Alright, first things first let’s talk mise en place . this fancy chef term just means “everything in its place.” before you even think about cooking those dreamy bake garlic cheese bombs: cheesy delights , being organized is key.
Gather your ingredients, bowls, and utensils first. trust me, it saves a ton of time and hassle later.
Now onto time management . set yourself a timer for each step, especially when you’re baking those cheesy bombs (we're talking about that 15 minutes in the oven!).
And make sure to leave some room in your schedule for the dough to rest for about 30 minutes .
It’s like giving it a little nap for ultimate fluffiness!
Then, there’s organization . Clearing your workspace as you go is crucial. An organized kitchen is a happy kitchen! And let’s not forget safety always keep those hands clean, especially after handling raw ingredients, and keep that cheese away from the ground no one wants a cheese floor surprise!
Step-by-step Process
- Prepare the Dough : Start mixing the flour, baking powder, and salt, remember: it’s all about getting those dry ingredients blended.
- Rest the Dough : Let it chill for 30 minutes you’ll love how it transforms.
- Make the Filling : Grab that gooey mozzarella and mix in the garlic and herbs. This is where the magic happens, folks!
- Assemble the Cheese Bombs : Preheat your oven to 375° F ( 190° C) . This is trust me, the temperature where those cheesy beauties will come to life!
- Bake : Pop those cheese bombs in for 15 minutes and keep an eye out. When they're golden and puffed, you’ll know you hit the jackpot!
- Serve : Let them cool just a tad. Nobody wants cheese burns!
Expert Techniques
Let’s shake things up with some pro tips ! first, always choose fresh cheese ; the meltiness really matters. if your dough gets sticky, don’t panic just pop it in the fridge for a minute.
And really, don’t overfill no one wants a cheese explosion on their baking tray.
While baking, look for those visual cues for doneness . Are they golden brown? If so, it’s showtime!
Success Strategies
So, what are the common mistakes? overfilling is one. another? not letting that dough rest! and to avoid a disaster, be sure to do a quality check: are your cheese bombs puffed and golden? if not, give ‘em a few more minutes.
But hey, if you’re planning ahead, feel free to make these cheese filled pastries before your gathering. They freeze beautifully too just pop them in the oven when your guests arrive, and voilà , you've got hot and cheesy snacks ready!
Wrapping It All Up
Whether it's game day or just a tuesday night, bake garlic cheese bombs: cheesy delights are an easy, crowd pleasing hit.
Perfect as finger foods for parties or just a delightful treat for yourself, you can’t go wrong with cheesy garlic bliss! seriously, once you nail this recipe, it's a go-to, and you can literally whip up quick appetizers for guests in no time!
Ready to dive into the next tasty section? Stick around for more additional information that will have you cooking like a pro in no time!
Pro Tips & Secrets
Alright, let’s dish about those bake garlic cheese bombs: cheesy delights . they’re not just delicious; they’re also super easy once you get the hang of it.
Here are some pro tips to make them shine even brighter.
First off, use fresh cheese instead of that pre-shredded stuff. seriously, the flavor is on another level! freshly shredded mozzarella melts like a dream.
Also, if your dough gets a bit sticky, don’t panic. just pop it in the fridge for a few minutes.
It’ll become way easier to handle.
Wanna jazz up the flavors? try tossing in some italian seasoning or even a pinch of crushed red pepper flakes into your cheese mix.
Just think about it, those little extras turn your savory cheese snacks into something special!
And hey, when you’re filling those dough balls, be mindful don’t overstuff them! we’re going for cheese bombs that don’t explode, right? nothing worse than watching all that cheesy goodness ooze out into the oven.
Perfect Presentation
Now, let’s talk about presentation. These little cheese bombs deserve to look as good as they taste!
For plating, grab a nice round plate. lay down the cheese bombs so they form a little circle or starburst.
Sprinkle some extra parsley around for that pop of color. a little greenery makes everything look appetizing. plus, it’s all about the eye candy!
And if you want to get fancy, drizzle some garlic infused oil over the tops right before serving. it adds a gorgeous shine and an extra layer of flavor.
Trust me, your friends will think you're some kind of gourmet chef.
Storage & make-ahead
If you find yourself overwhelmed with cheese bombs, don’t worry! these delicious bites store really well. you can keep them in an airtight container in the fridge for about four days.
Just make sure to let them cool completely before sealing them up.
Need to make them ahead of time? easy! you can prepare the dough and filling a day before. roll them up and freeze those little cheesy treasures.
When you’re ready to bake, just grab them straight from the freezer and pop them in the oven. they might need a couple more minutes to cook, but that’s a small price for freshly baked cheese puffs !
Creative Variations
Feeling adventurous? here’s where you can really get creative with these cheesy joys. switch up the filling to keep your taste buds happy! how about spinach and feta bombs for a mediterranean twist? or try out buffalo chicken cheese bombs if you're craving something with a kick.
Seasonal variations can also be fun. During summer, toss in some fresh herbs and tomatoes for a burst of freshness. In fall, think about blending in some pumpkin puree with your cheese!
And if you have dietary restrictions, substitutions are a breeze. Going gluten-free? Use a 1:1 baking flour. Vegan? Try plant based cheese and milk. It’s all about making it work for you!
Complete Nutrition Guide
Now, I know we can’t ignore the nutritional aspects, right? Each cheese bomb packs in around 180 calories, boasting about 6 grams of protein pretty solid for a snack!
As with everything, moderation is key, especially if you’re watching your sodium intake. but hey, these are easy snack ideas for a reason! they hit the spot without totally derailing your meal plan when enjoyed in moderation.
Expert FAQ Solutions
Okay, let's tackle some common questions. people often wonder, "why did my cheese bombs burst?" most of the time, it's because they were overfilled or the dough was too thin.
Stick to the recommended dough thickness and keep it simple.
“What if they're not browning nicely?” Try a little more melted butter on top before you bake. And pro tip: if you rotate the baking sheet halfway through baking, you’ll get an even golden color!
There you have it! Bake Garlic Cheese Bombs: Cheesy Delights are not just a treat, they’re an experience. From the gooey center to the crispy outer shell, every bite is sheer delight.
So whether you’re whipping these up for a casual snack while binge watching your favorite show or serving them as party appetizers for friends, you’re bound to impress.
Gather your ingredients, roll up those sleeves, and enjoy the cheesy goodness because who doesn’t love a great comfort food recipe that brings smiles all around?
Delicious Garlic Cheese Bombs