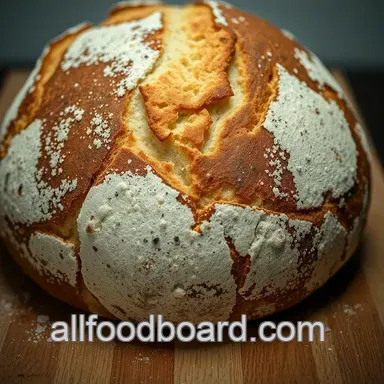
Artisan Sourdough Bread: a Rustic Delight at Home

A Slice of Heaven: My Sourdough Bread Journey
Oh my gosh! let me take you back to the moment i first whipped up a sourdough bread recipe . it was a chilly sunday morning, and i was feeling a bit fancy.
You know, that kind of mood where you want to impress your family and friends without getting too wild? i thought to myself, “hey, why not try my hand at some homemade sourdough ?” spoiler alert: it turned out amazing!
The smell wafting through my house was so intoxicating that my neighbors probably thought i was running a bakery.
Bread baking definitely has this magical quality about it!
The Roots of Sourdough: A Quick Recipe Overview
Now, let’s dive into the history. sourdough isn't just some trendy artisan bread recipe ; its origins stretch back thousands of years.
Ancient egyptians were likely the first to bake with wild yeast, and since then, it’s been a staple around the world.
Fast forward to us folks today, and it’s like a bread renaissance, with sourdough rising to fame, especially during the pandemic.
Everyone wanted to bake bread at home and fill their kitchens with that freshly baked bread aroma .
How long does it take? you might be surprised! while hands-on time isn’t crazy about 30 minutes for prep the total time spans over 12 hours (but don’t worry, most of that is just the dough chilling out).
It’s rated as a medium difficulty. it takes a bit of patience, but if i can do it, trust me, you can too!
And let’s talk money. Making your own sourdough can be super cost effective. Most of the ingredients you probably have already! Plus, you’ll end up with an entire loaf that’s about 12 servings of chewy crust bread goodness!
Sourdough Benefits You Didn’t Know You Needed
Now, let’s get into the juicy bits! sourdough isn’t just a treat for your taste buds. it actually has some solid health benefits .
The nutritional value of sourdough is impressive, thanks to the fermentation process that helps break down gluten and makes it easier to digest.
Those tummy friendly probiotics? yes, please!
Plus, think about all the special occasions that could use a homemade loaf sunday brunch, cozy family dinners, or just because it’s tuesday.
And don't you just love that tangy sourdough flavor ? it’s like a cozy blanket in winter; it just warms your heart.
When we flip through sourdough bread variations , there are so many fun routes to take! you could toss in some roasted garlic, sprinkle in seeds, or even make a no-knead sourdough if you’re feeling adventurous.
Seriously, the options are endless!
Ready to Get Started? Let’s Gather Ingredients!
So, if you’re like me and you’re ready to fill your kitchen with a crusty artisan bread scent, it's time to prep! hold onto your aprons, folks, because we’re about to embark on a delicious journey.
Make sure your sourdough starter is bubbly and ready trust me, that’s the magic ingredient.
You won’t regret diving into this easy sourdough recipe . it’ll take you through the joys of bread baking techniques , and before you know it, you'll be the star of your kitchen.
So, keep your kitchen tools close; we’re about to shape that luscious dough into the best loaf of your life!
Are you excited? I know I am! Let’s pull together everything you need and get rolling happy baking!
Essential Ingredients Guide

Baking bread at home is like inviting a warm hug into your kitchen. seriously, what can beat the aroma of freshly baked bread ? if you're diving into a sourdough bread recipe , let’s chat about the essentials you’ll want to have.
This guide will help you understand the better choices for your ingredients, tools, and those nifty substitutions that can make or break your dough game!
Premium Core Components
So, first things first! Let’s break down the ingredients we need for an amazing loaf . You can measure in both US and metric , so no excuses, okay?
Bread flour vs. all-purpose flour : if you're chasing that chewy crust bread we all love, i’m gonna tell you that bread flour is a must.
It has a higher protein content, leading to a better gluten structure. now if the only thing you have is all-purpose, it'll still work, but the texture won't be quite as epic.
Water : Always use room temperature water . It’s about 70° F ( 21° C). Too cold? Your yeast will be sluggish. Too warm? You might kill them. Balance is key!
Salt : Don't skimp on this one! Sea salt is the way to go. It adds flavor and helps control yeast activity.
Sourdough starter : it’s like your friendly neighborhood monster in the fridge. a well fed, bubbly starter brings that beautiful tangy sourdough flavor .
If it’s not bubbly and happy, your bread might turn out flat and sad.
Storage guidelines & shelf life : keep most ingredients in a cool, dry place. your bread flour will last about 6-12 months , while a starter can be kept for ages with the right care.
But let’s be real once you start baking, it probably won’t last long, right?
Signature Seasoning Blend
Now let’s spice things up! You don’t just want plain, right? Let’s explore some signature seasoning blends :
- Essential Spice Combinations : Try adding rosemary or garlic to your dough. It’s heavenly.
- Herb Selections and Pairings : Thyme or oregano can give your bread a Mediterranean flair.
- Regional Variations : If you’re feeling adventurous, throw in some caraway seeds for that rye bread vibe. Adjust to suit your taste!
Smart Substitutions
Life happens, and so does your shopping situation. Sometimes, you find yourself in a pinch! Here’s a quick rundown of common substitutions.
- Common Alternatives : If you run out of bread flour, all-purpose flour will do, but just keep in mind, your loaf may be a bit less chewy.
- Dietary Modifications : gluten-free? No problem! There are great blends available, but it might take some experimenting to get your fluffy bread texture just right.
- Emergency Replacements : No sourdough starter? You can use instant yeast instead. However, you’ll miss that signature flavor development.
Kitchen Equipment Essentials
Alright, warriors in the bread baking battle! Here’s what you really need in your arsenal to craft that crusty artisan bread :
- Must Have Tools : A sturdy mixing bowl , digital kitchen scale, and a Dutch oven are a must. No Dutch oven? Use a baking stone instead!
- Prep Tips : Keep everything clean and organized. It’ll save you from a major mess later.
- Storage Solutions : Once your loaf is ready, put it on a cooling rack! And if you’ve got leftovers, wrap that bread in a cloth to keep the crust nice and crunchy.
Now that we’ve got all our ingredients and equipment in place, it’s time to roll up our sleeves! if you’re ready to embrace the fermentation process in bread and create something truly magical, head over to the instructions section .
Trust me, your kitchen is about to become the best smelling place around! happy baking!
Mastering Professional Cooking: The Art of Sourdough Bread
Let’s get real. when you think of baking bread at home , all that fluffy goodness and that freshly baked bread aroma wafting through your kitchen is hard to resist, right? and what better way to dive deep into the world of bread baking than with a classic sourdough bread recipe ?
Seriously, it’s a labor of love but worth every second.
So, grab your apron, and let’s get into the nitty gritty of a professional cooking method tailored for you!
Essential Preparation Steps
Mise en place? you bet! it’s a fancy french term that just means having everything ready before you start. get your ingredients for the homemade sourdough , like that bubbly sourdough starter, measured and prepped.
It’s like having your ducks in a row before the baking fest begins.
Time management is crucial here. with sourdough bread , you're not just baking; you’re scheduling. trust me, you'll want to plan out your day.
The fermentation process can take a chunk of time, so think ahead.
Speaking of organization, keep your workspace neat. i mean, who enjoys a cluttered area while working with that sticky dough? put down a clean towel for kneading and gather your tools mixing bowls, a dough scraper, and all that jazz.
Safety considerations are no joke, though! Watch out for hot surfaces and sharp tools. Keep your area tidy it’s just safer that way.
Step-by-step Process
Okay, let’s break this down. Here’s your clear, numbered guide to mastering that artisan sourdough bread :
Prepare the starter : combine 100g (1/2 cup) of all-purpose flour and 100g (1/2 cup) of water. let this baby sit at room temperature for 8- 12 hours .
That bubbly goodness is your flavor bomb!
Mix the dough : in a big mixing bowl, mix 500g (4 cups) of bread flour with 350g (1.5 cups) of water.
Let it rest for 30 minutes . this is called the autolyse phase, and it’s essential for that beautiful fluffy bread texture .
The Magic Mix : Now, add your active sourdough starter and 10g (2 teaspoons) of sea salt. Mix it all in.
Bulk Fermentation : This is where the dough does its thing! Let it rise for 4 hours , folding it every 30 minutes for the first two hours.
Shape it Up : On a floured surface, shape it into a round ball and let it rest for another 30 minutes .
Final shape : tweak that dough a bit more to create tension by shaping it tightly. place it seam side up in a proofing basket and let it rise for 1- 2 hours .
Heat Things Up : Preheat your oven to 450° F ( 230° C) , with a Dutch oven inside for 30 minutes .
Bake the bread : transfer your dough to the hot dutch oven, cover it, and bake for 30 minutes . remove the lid and let it bake for another 10- 15 minutes for that perfect crust.
Let it Cool : You can’t rush perfection! Transfer to a cooling rack and give it some time (at least 1 hour ) before slicing.
Expert Techniques
Let’s talk about some professional methods that elevate your bread game. always check your dough’s temperature . aim for around 75° f ( 24° c) during the bulk fermentation phase for optimal rise.
Now, during the baking phase, the crust is everything! if you want a nice, chewy crust bread , consider spritzing some water into the oven.
This creates steam, giving your bread that artisan bakery vibe.
Don’t forget about those quality checkpoints . If your loaf sounds hollow when tapped on the bottom, you’ve nailed it!
Success Strategies
Before you feel like a baking pro, here are a few common mistakes to avoid. under proofing is a biggie! you want that dough to double in size, which can take time, so don’t rush it.
For a perfect sourdough , keep a journal of your baking adventures. jot down notes about what worked and what didn’t for future reference.
Believe me, it’ll help you understand that sourdough flavor development process better.
And hey, don’t be afraid to make this a weekly project! with some make-ahead options , you can have your rustic loaf ideas on repeat.
Just make sure to follow the sourdough bread storage tips to keep it fresh for days.
As we dive even deeper into the world of baking, let’s explore some additional information on sourdough and its amazing versatility! what a glorious journey that leads us into endless possibilities with this wonderful ingredient.
Let’s get exploring!
Mastering the Craft of Sourdough Bread: Tips and Tricks
So, you’re diving into the world of sourdough bread , are ya? that's awesome! trust me, it’s a labor of love with delicious rewards.
Let’s chat about some pro tips and secrets that will take your baking game up a notch. i'm not here to be all fancy chef like, just sharing what i’ve learned over the years in my kitchen adventures!
Pro Tips & Secrets
First off, let’s talk about the sourdough starter . keep it bubbly and happy; feed it regularly! you’ll want your starter to be doing its best party dance when you mix it into your dough.
Another life saver? use a digital kitchen scale for your flour and water. i learned this the hard way measuring cups can be inconsistent.
Seriously, a scale will help you nail that famed fluffy bread texture every time.
And here’s a little secret for ya: during the bulk fermentation stage, if you’re short on time, you can increase the heat around your dough for a quicker rise.
A sunny window or a warm oven (turned off, but cozy) can do wonders. it’ll speed up that all-important fermentation process in bread.
Plus, your kitchen will smell like a little slice of heaven.
Perfect Presentation
Okay, now that you’ve got your dough ready, let’s not forget about how pretty it can look. a good loaf of artisan bread isn’t just tasty; it’s also a feast for the eyes.
For plating , try using a simple wooden board or cutting board. it feels rustic and charming very much in line with that homemade vibe, you know? garnish with a sprinkle of flour on top, and maybe some fresh herbs around it for color.
Your friends will think you’re a pro (even if this is your beginner sourdough bread project).
And don’t forget about color combinations! a golden brown crust is fab, but imagine a dash of green from basil or rosemary on the side.
It makes the plate pop. seriously, food is meant to be looked at as much as it is to be eaten!
Storage & make-ahead
Now, let’s chat storage. once your loaf is baked to perfection , let it cool completely on a rack before slicing.
This is super crucial for keeping that crusty exterior you worked so hard for.
If you have extras (which, let’s be real, you may not because it’ll probably get scarfed down quickly), wrap that bad boy tightly in parchment paper and then a plastic bag.
It’ll stay fresh for about 3-5 days. but if you need it to last longer, toss it in the freezer! just make sure it’s well wrapped so no frostbite happens.
When it’s time to enjoy that frozen slice, pop it right in the toaster or wrap it in foil and heat in the oven. Freshly baked bread aroma? Yes, please!
Creative Variations
Want to mix things up? there are so many variations for your sourdough bread. you can add in seeds, herbs, or even cheese for some serious flavor enhancements.
Feeling seasonal? how about throwing in some pumpkin or cranberries for a fall twist?
And for those who are health conscious, you can modify it to suit your dietary needs. whole wheat flour or gluten-free flour can give you a totally different loaf too.
Just make sure you adjust the water content as some flours absorb differently.
Complete Nutrition Guide
Now, i totally get it. you might be wondering about the nutritional value of sourdough . a slice typically has around 130 calories, 4g of protein, and almost no fat.
Plus, it’s full of beneficial bacteria from the fermentation process, which is great for digestion! and hey, bread can actually be a part of a balanced meal.
When you serve your sourdough with some creamy butter or a healthy avocado spread, it makes for a perfect breakfast or snack. Honestly, what could be better?
Wrapping It All Up
So there you have it, folks! you’re totally equipped to tackle that sourdough bread recipe like a champ. remember, baking is all about having fun and experimenting.
Don’t be afraid to mess up a loaf or two it’s part of the journey!
Next time you take a whiff of that beautiful freshly baked bread aroma filling your kitchen, you’ll know you’ve mastered a skill that’s been around for generations.
Happy baking, and go make that crusty artisan bread!
Frequently Asked Questions
What are the key tips for a successful sourdough bread recipe?
To ensure success with your sourdough bread recipe, start with an active and bubbly starter. Pay attention to the fermentation times, as they can vary based on temperature and humidity. Lastly, don’t rush the cooling process after baking; it’s crucial for the crumb texture!
Can I use all-purpose flour instead of bread flour for this sourdough bread recipe?
Absolutely! While bread flour yields a chewier texture and better gluten development, all-purpose flour can also work well. Just keep in mind that your loaf might be slightly less airy and crusty, but it’ll still taste fantastic like a classic British scone with a bit of a twist!
How should I store my sourdough bread after baking?
Store your sourdough bread at room temperature in a cotton or linen bag to keep the crust crispy. Avoid plastic, as it can make the bread go soggy. If you want to keep it longer, slice and freeze the bread, but be sure to wrap it well to prevent freezer burn just like saving the last biscuit for a rainy day!
What are the health benefits of homemade sourdough bread?
Sourdough bread may be easier to digest than regular bread, thanks to the fermentation process which breaks down gluten. It also has a lower glycemic index, meaning it can help keep blood sugar levels stable.
Plus, it’s made with simple ingredients that you can feel good about, rather like a hearty bowl of porridge!
Can I add flavors or textures to my sourdough bread?
Definitely! You can incorporate herbs, spices, or even seeds during the mixing stage. Think of rosemary for an aromatic touch or chia seeds for a bit of crunch. Just like a great English stew, the more you play with flavors, the more delightful your bread will be!
How do I know when my sourdough bread is fully baked?
To check if your sourdough bread is fully baked, tap the bottom of the loaf: it should sound hollow. Also, look for a deep brown crust and a temperature of about 200-210°F (93-99°C) inside. Just think of it as a golden Yorkshire pudding you want it perfectly risen and deliciously crusty!
This FAQ section addresses common concerns while remaining friendly and informative, perfect for both novice and seasoned bakers diving into the world of sourdough. Happy baking!
Artisan Sourdough Bread A Rustic Delight At Home